User Guide
Software Installation
For installation instructions, see "Quick Start".
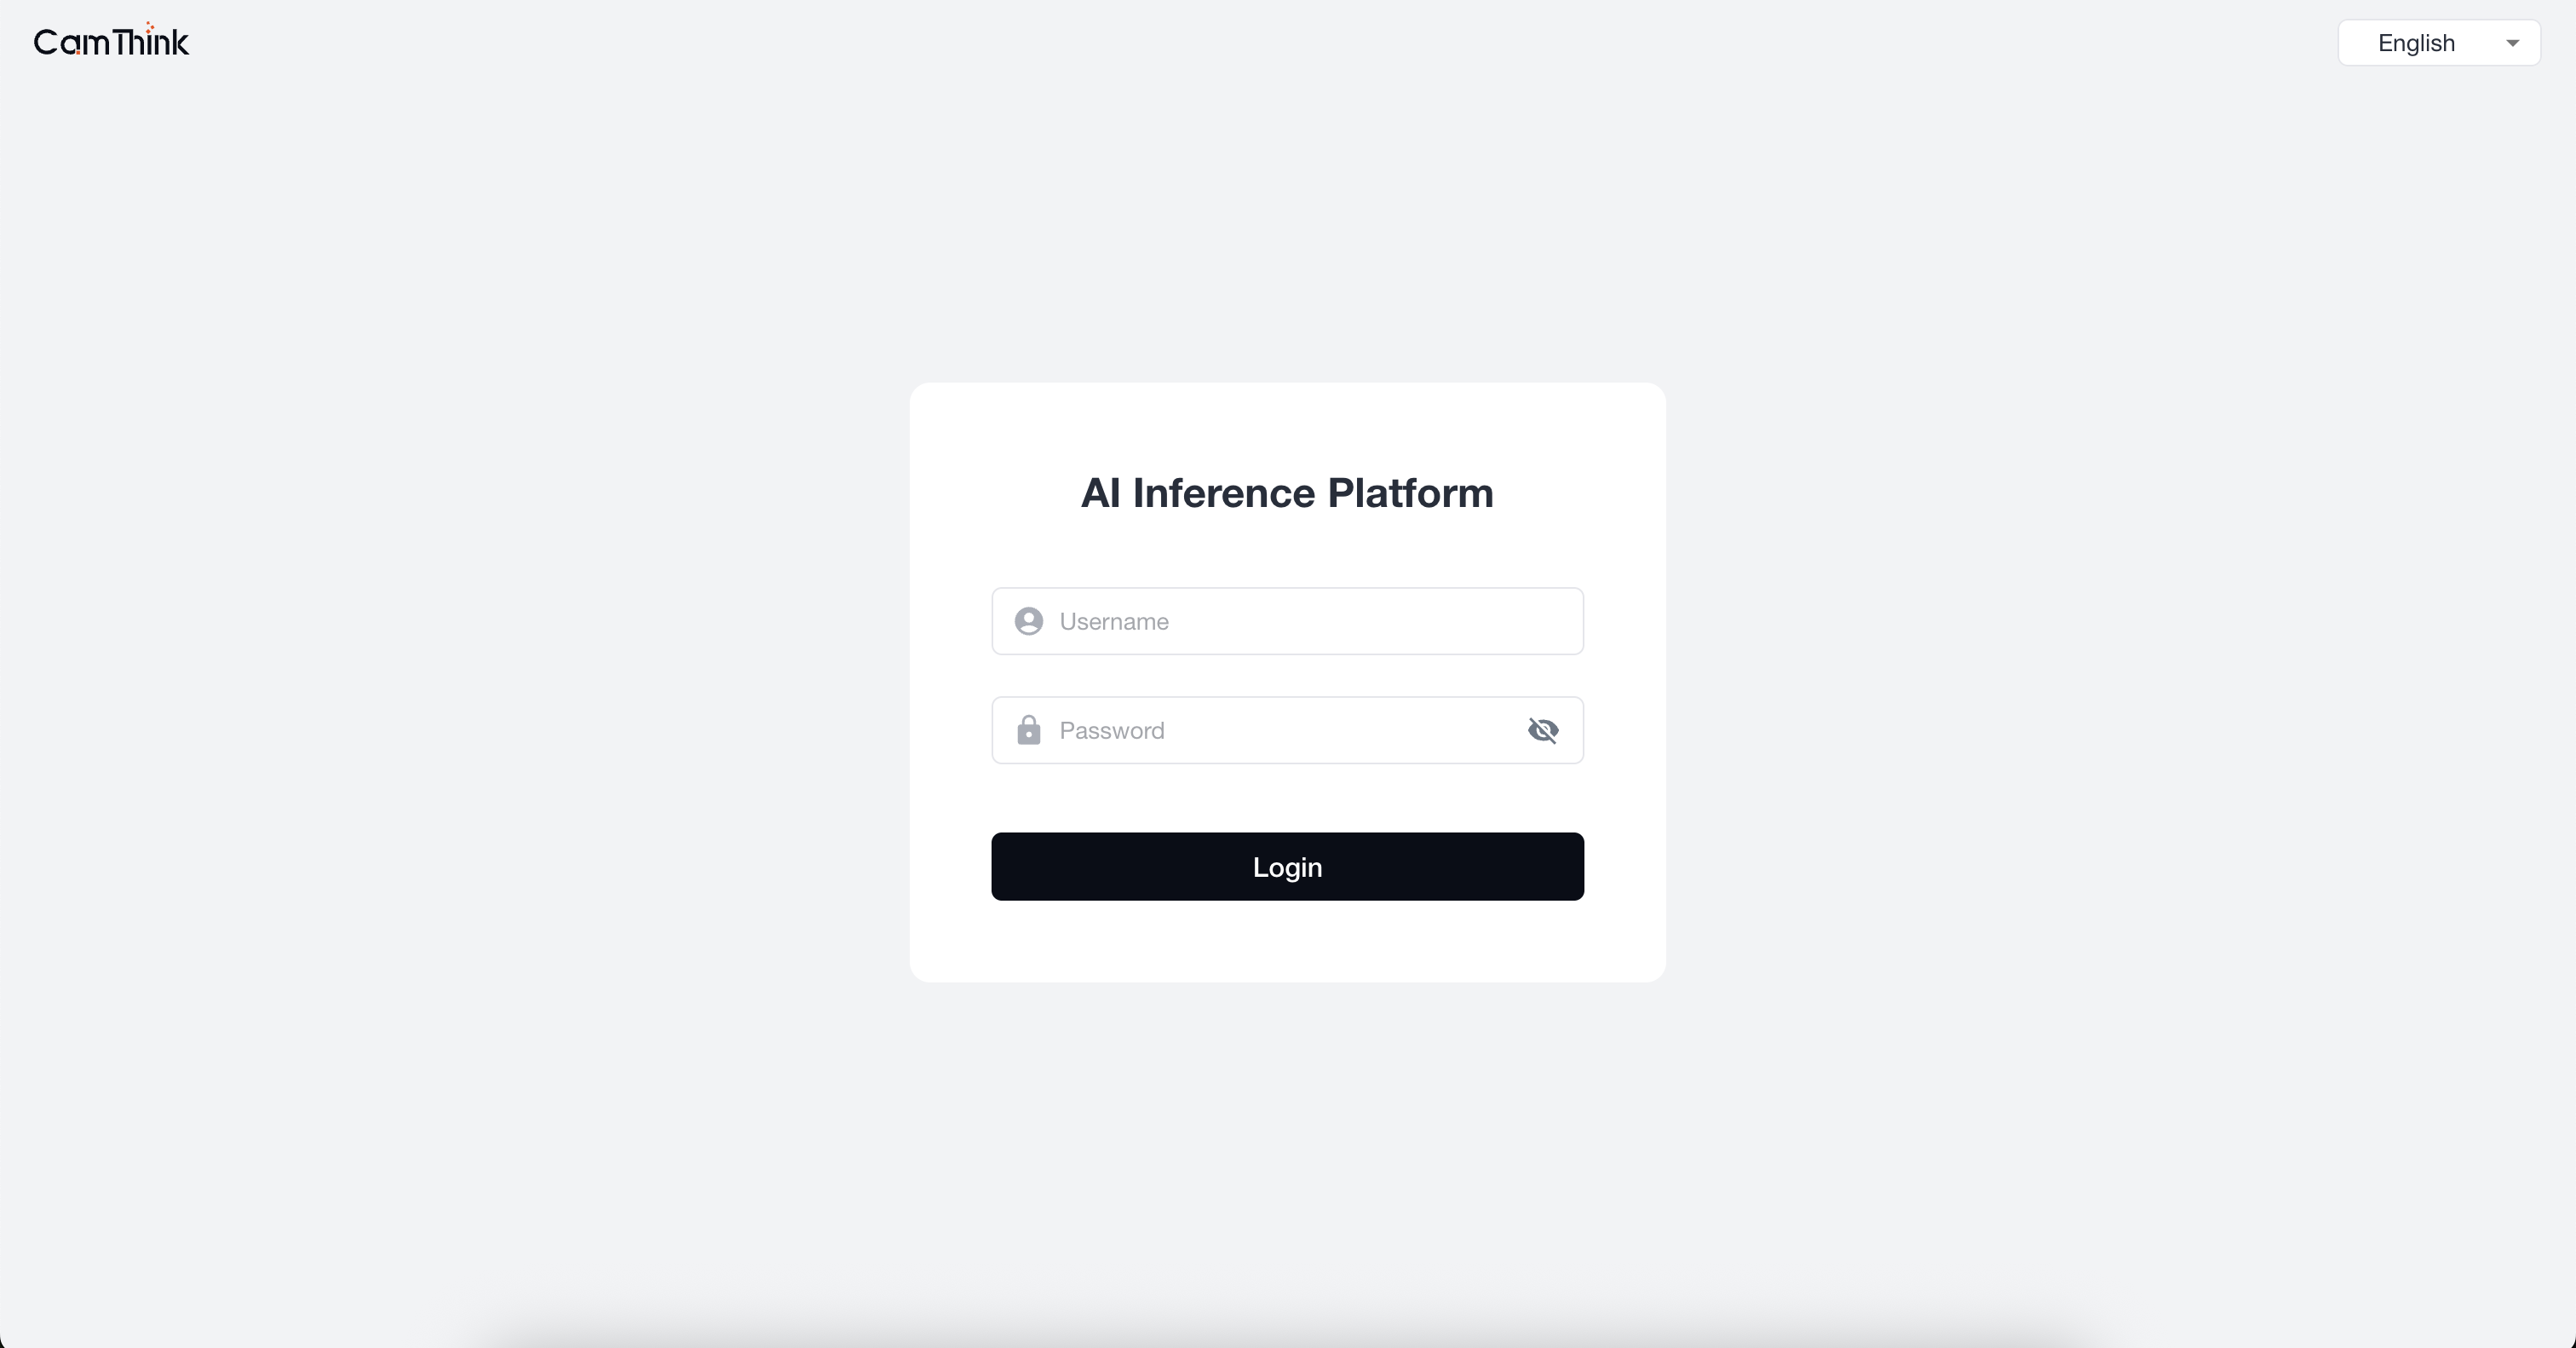
Login
Enter the configured administrator username and password, then click the "Login" button to sign in. You can switch the interface language from the dropdown at the top-right of the login page. After login, you will land on the Dashboard by default.
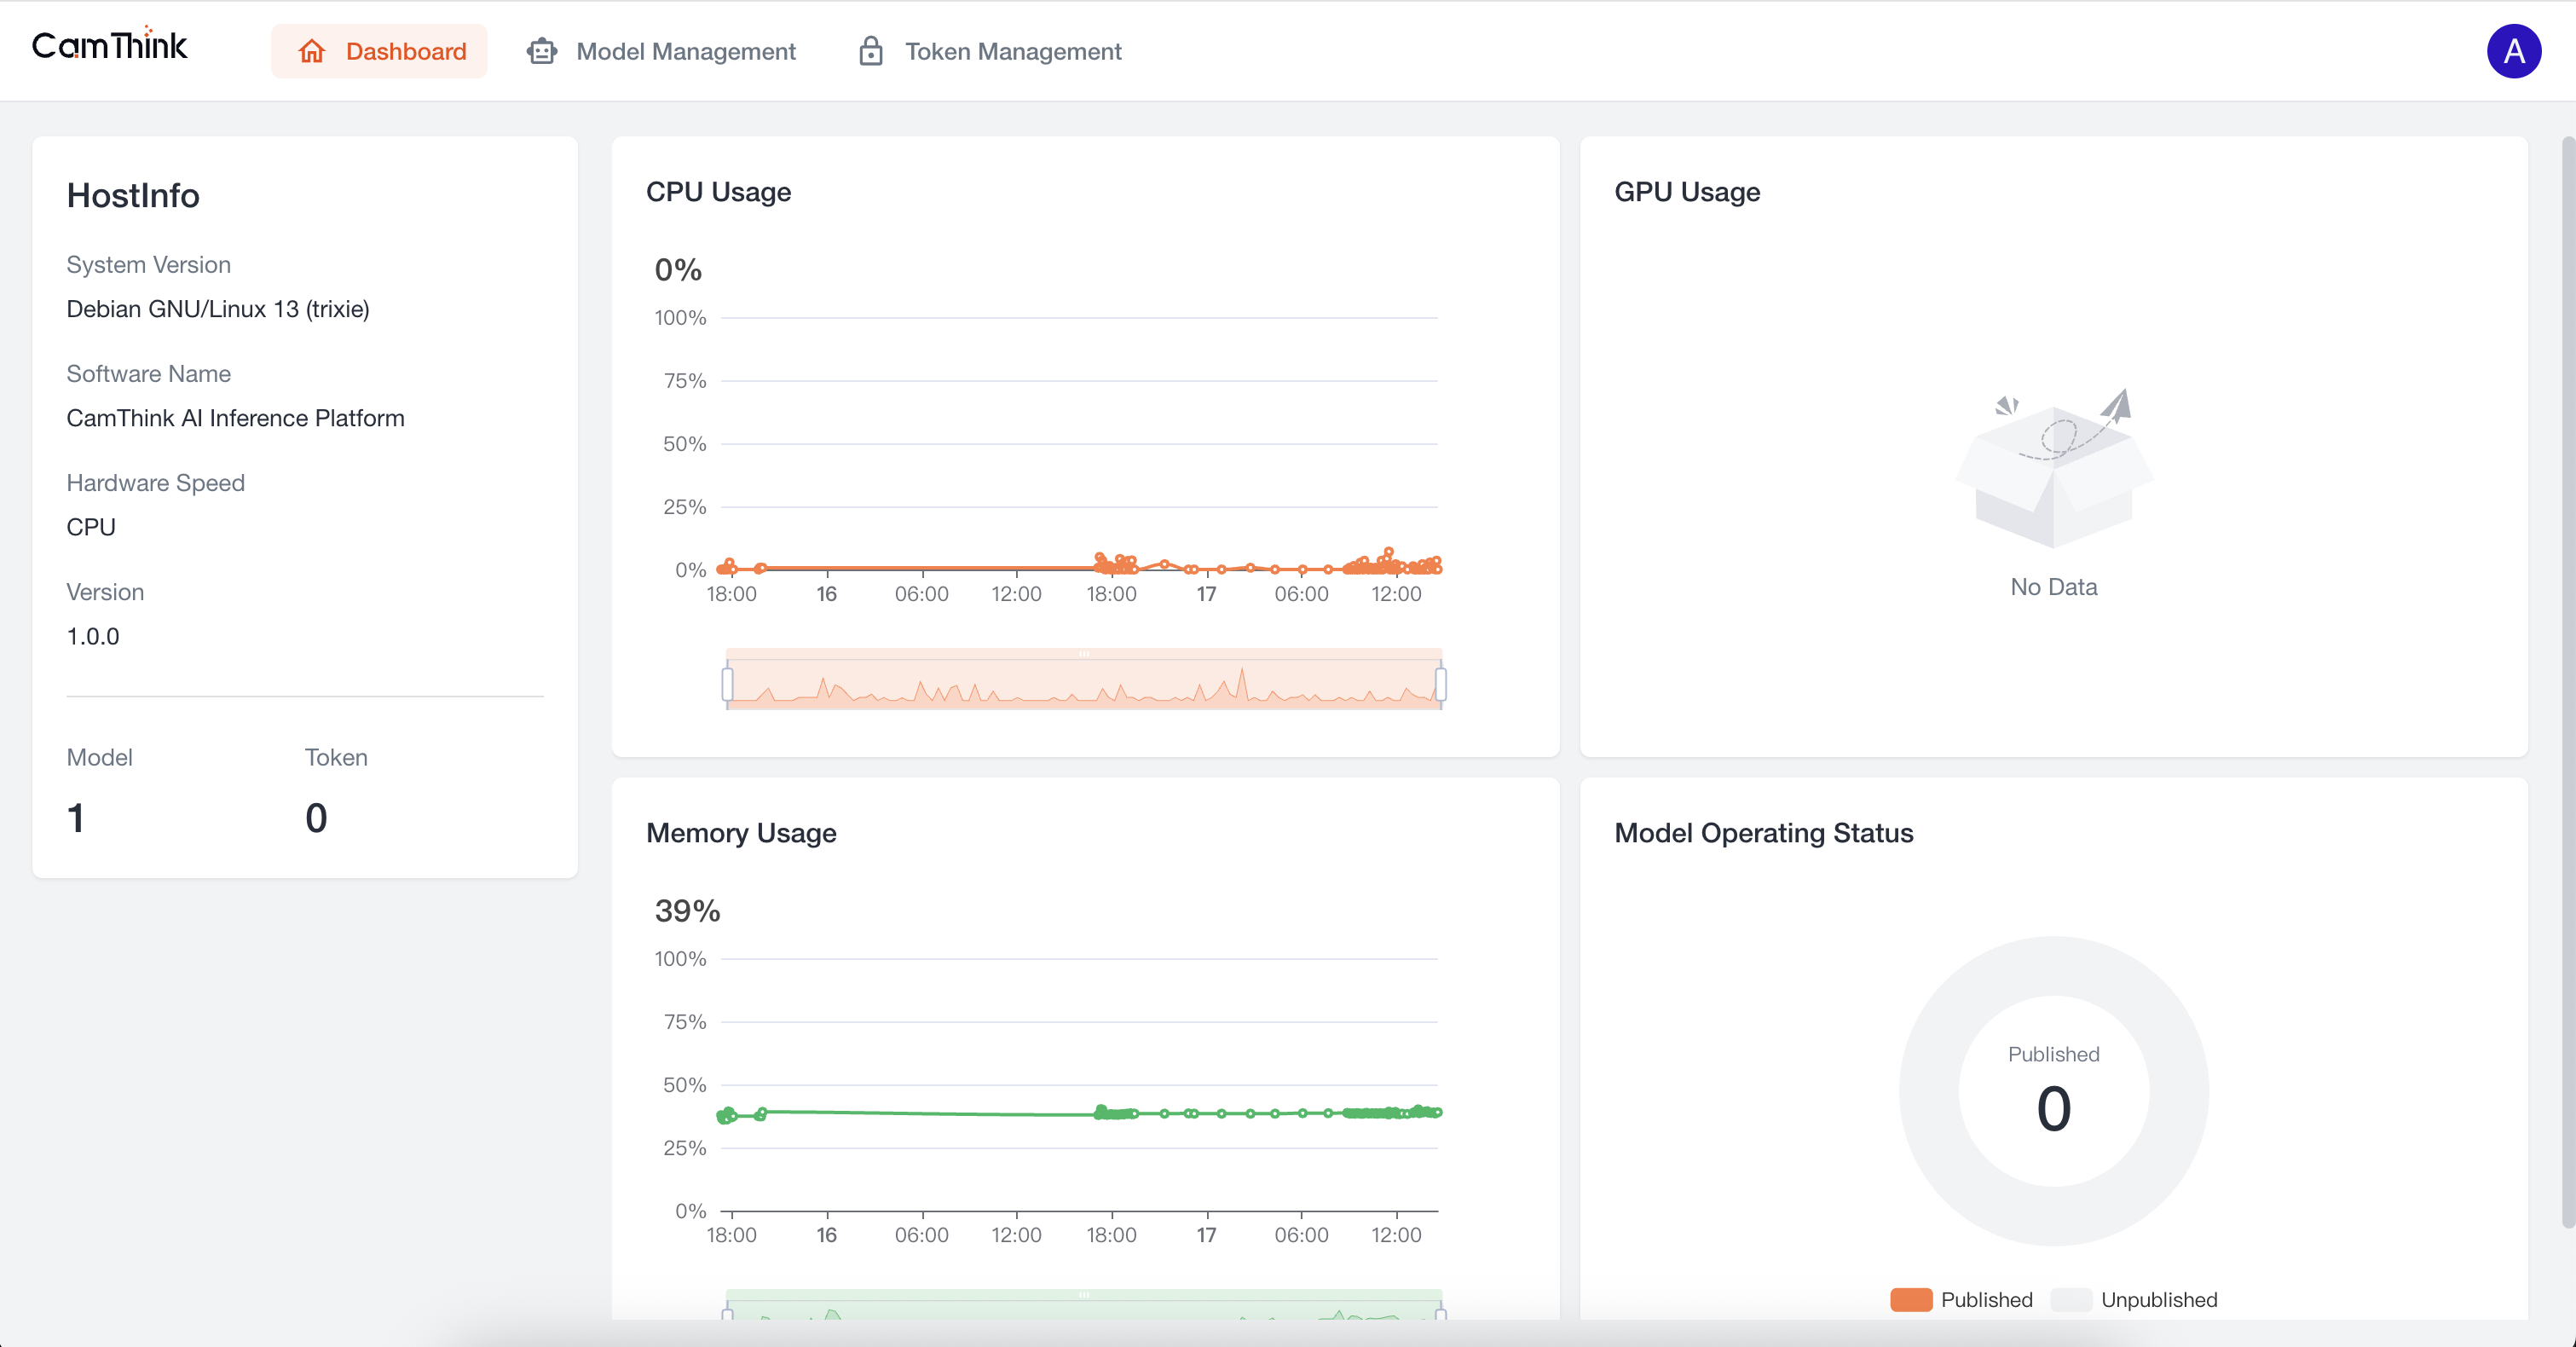
Dashboard
The Dashboard displays the environment information, resource usage, and model-related stats for the current service. It primarily includes:
- Device Info: Basic information about the deployment device or server, including OS version, software name, inference resources (CPU/GPU, etc.), version number, as well as counts of current models and assigned models.
- CPU Usage: CPU utilization of the service, showing the past 24 hours.
- GPU Usage: GPU utilization of the service, showing the past 24 hours.
- Memory Usage: Memory usage of the service, showing the past 24 hours.
- Model Operating Status: Counts of published and unpublished models in Model Management.
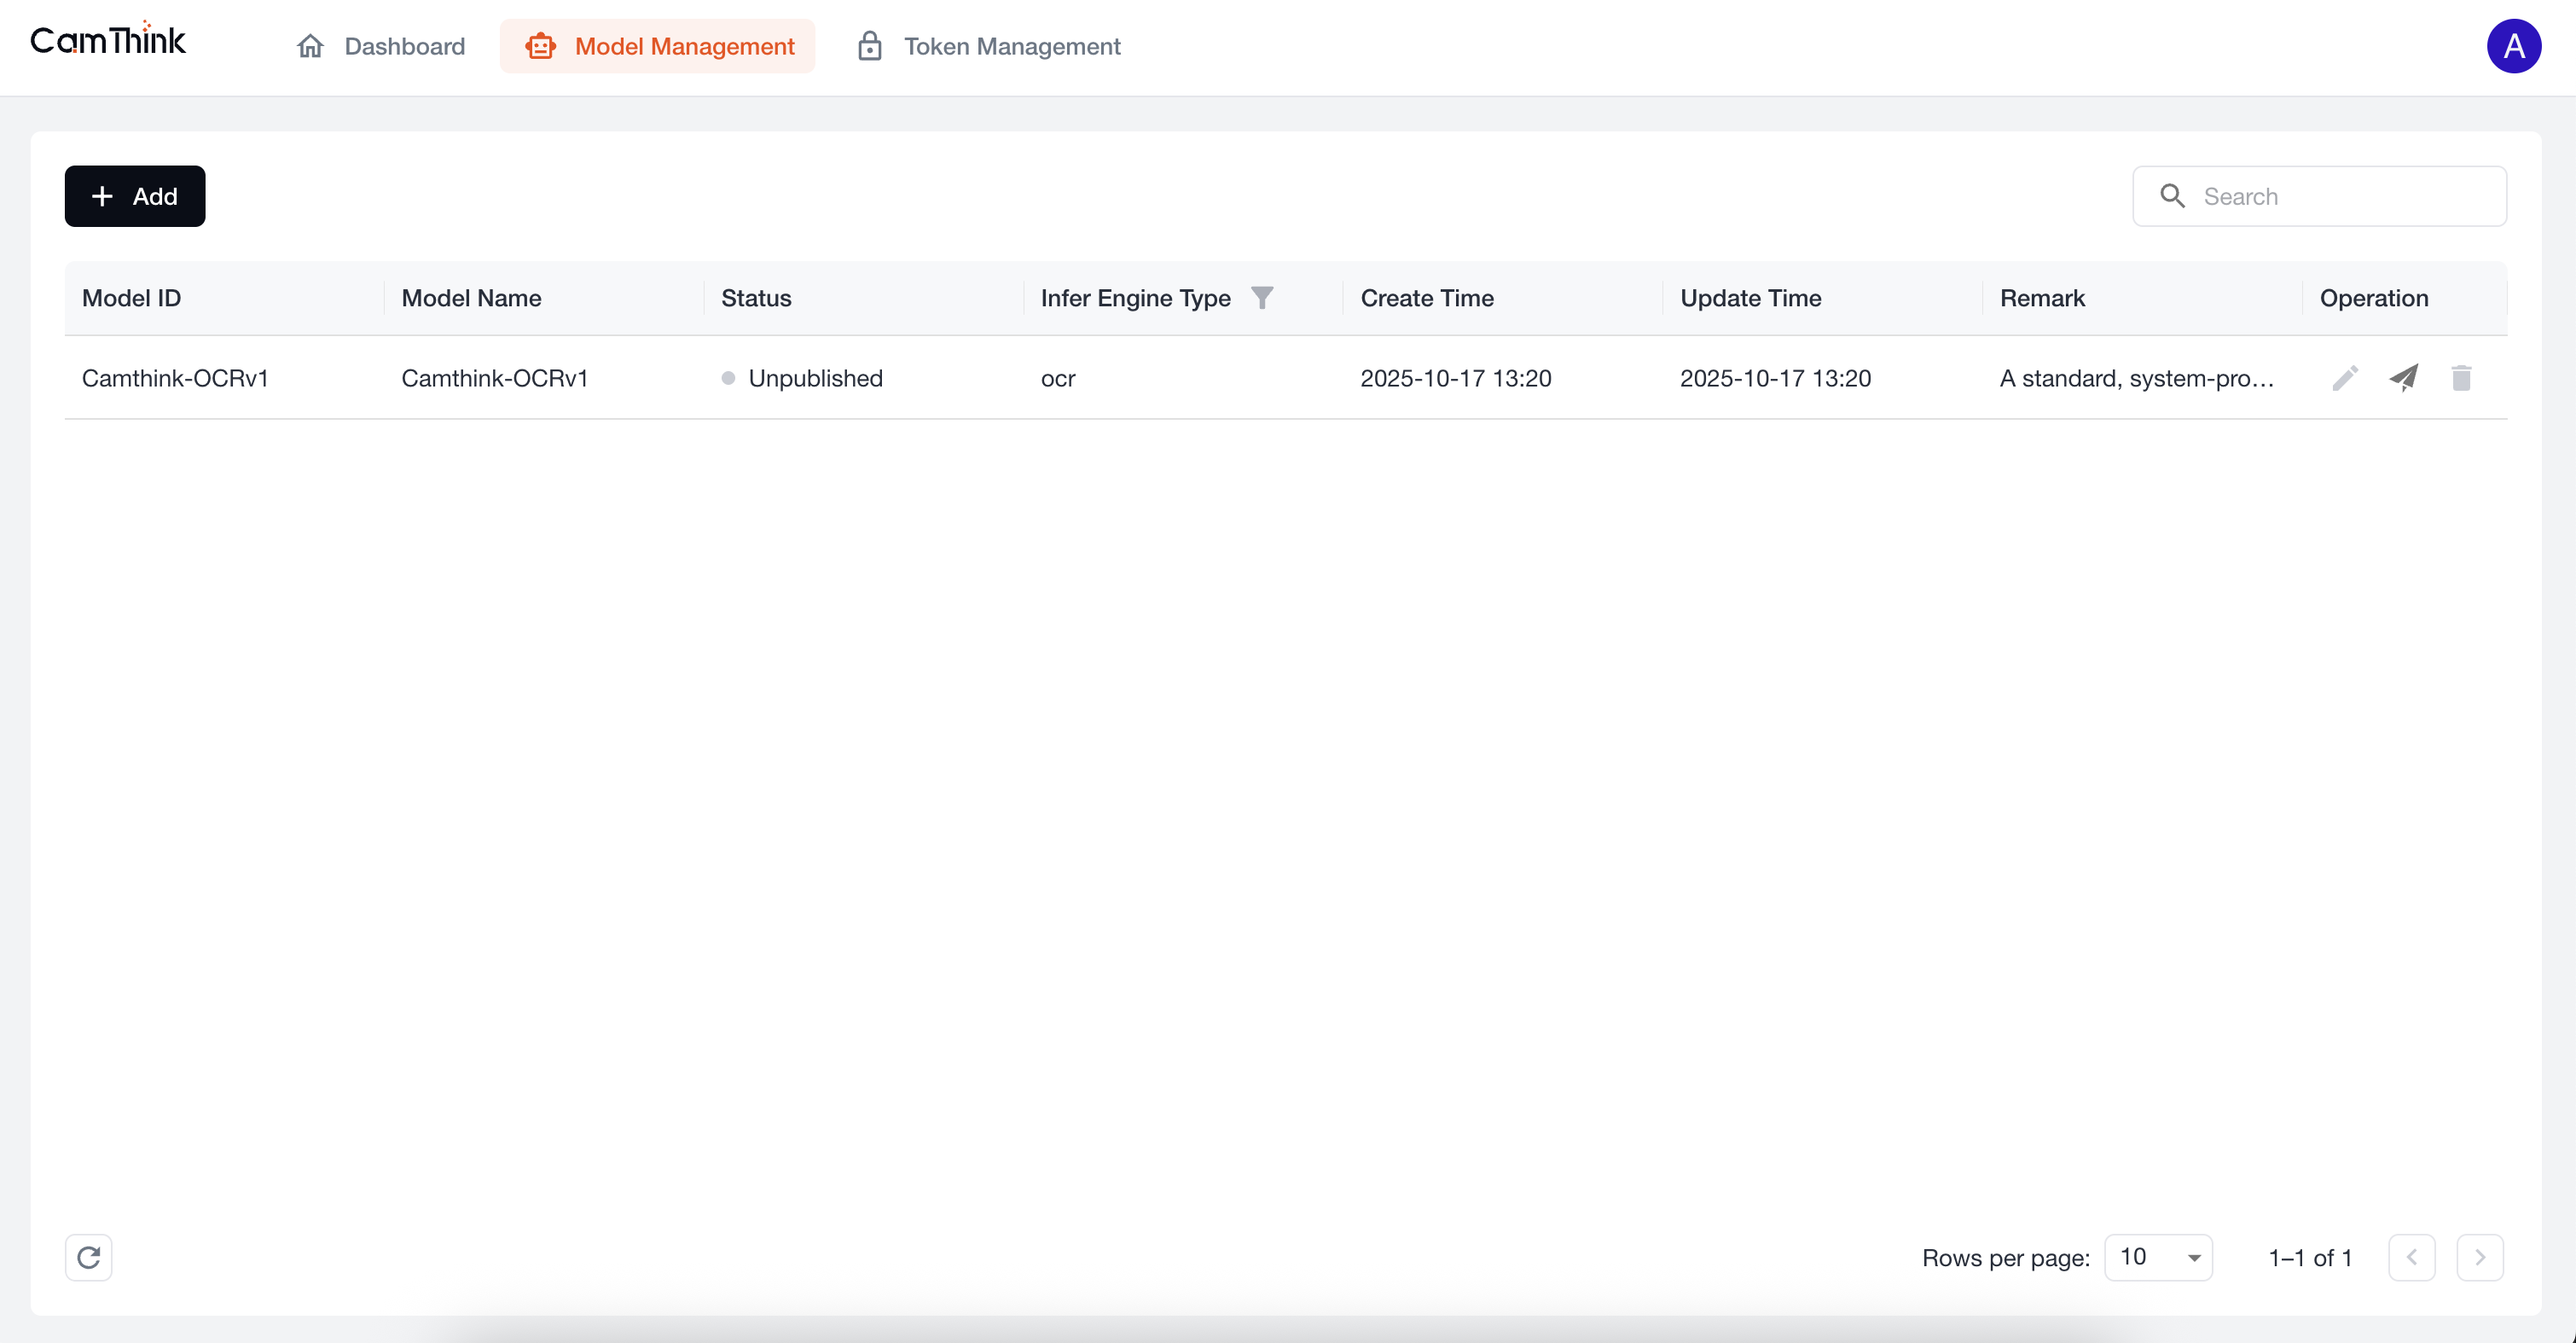
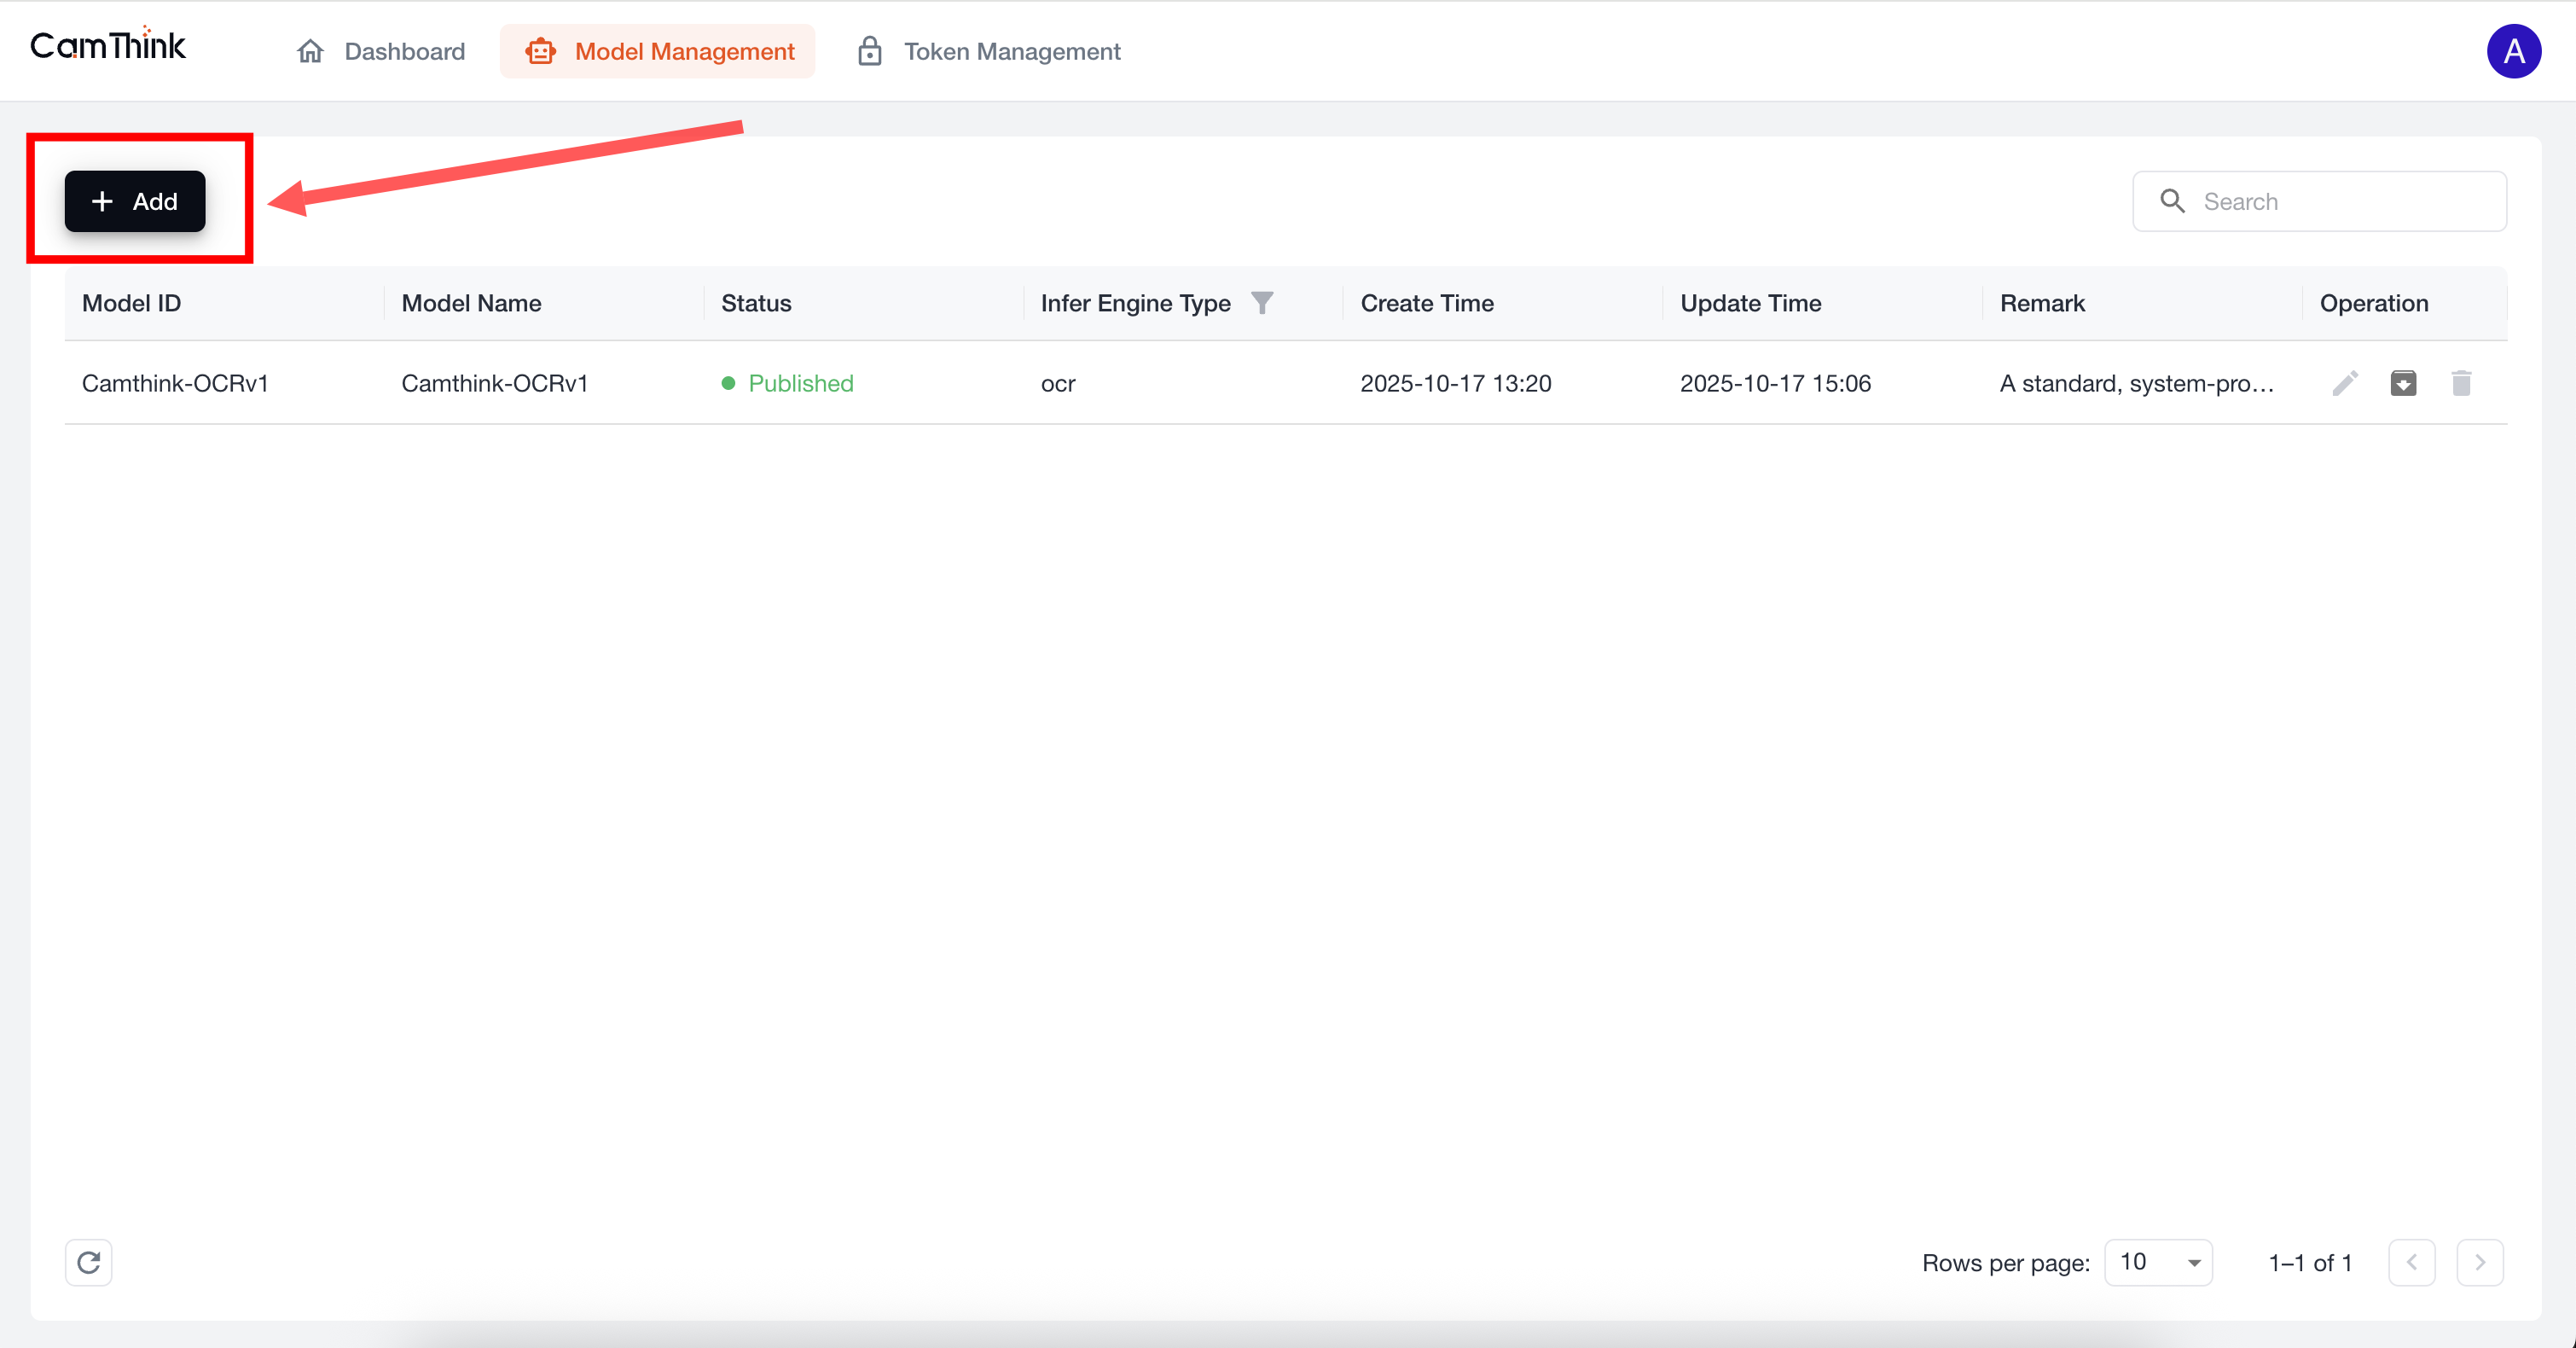
Model Management
In Model Management, you can upload, publish, and unpublish various AI models, and configure input/output parameters. Published models expose a unified OpenAPI for external applications to perform standardized AI inference calls.
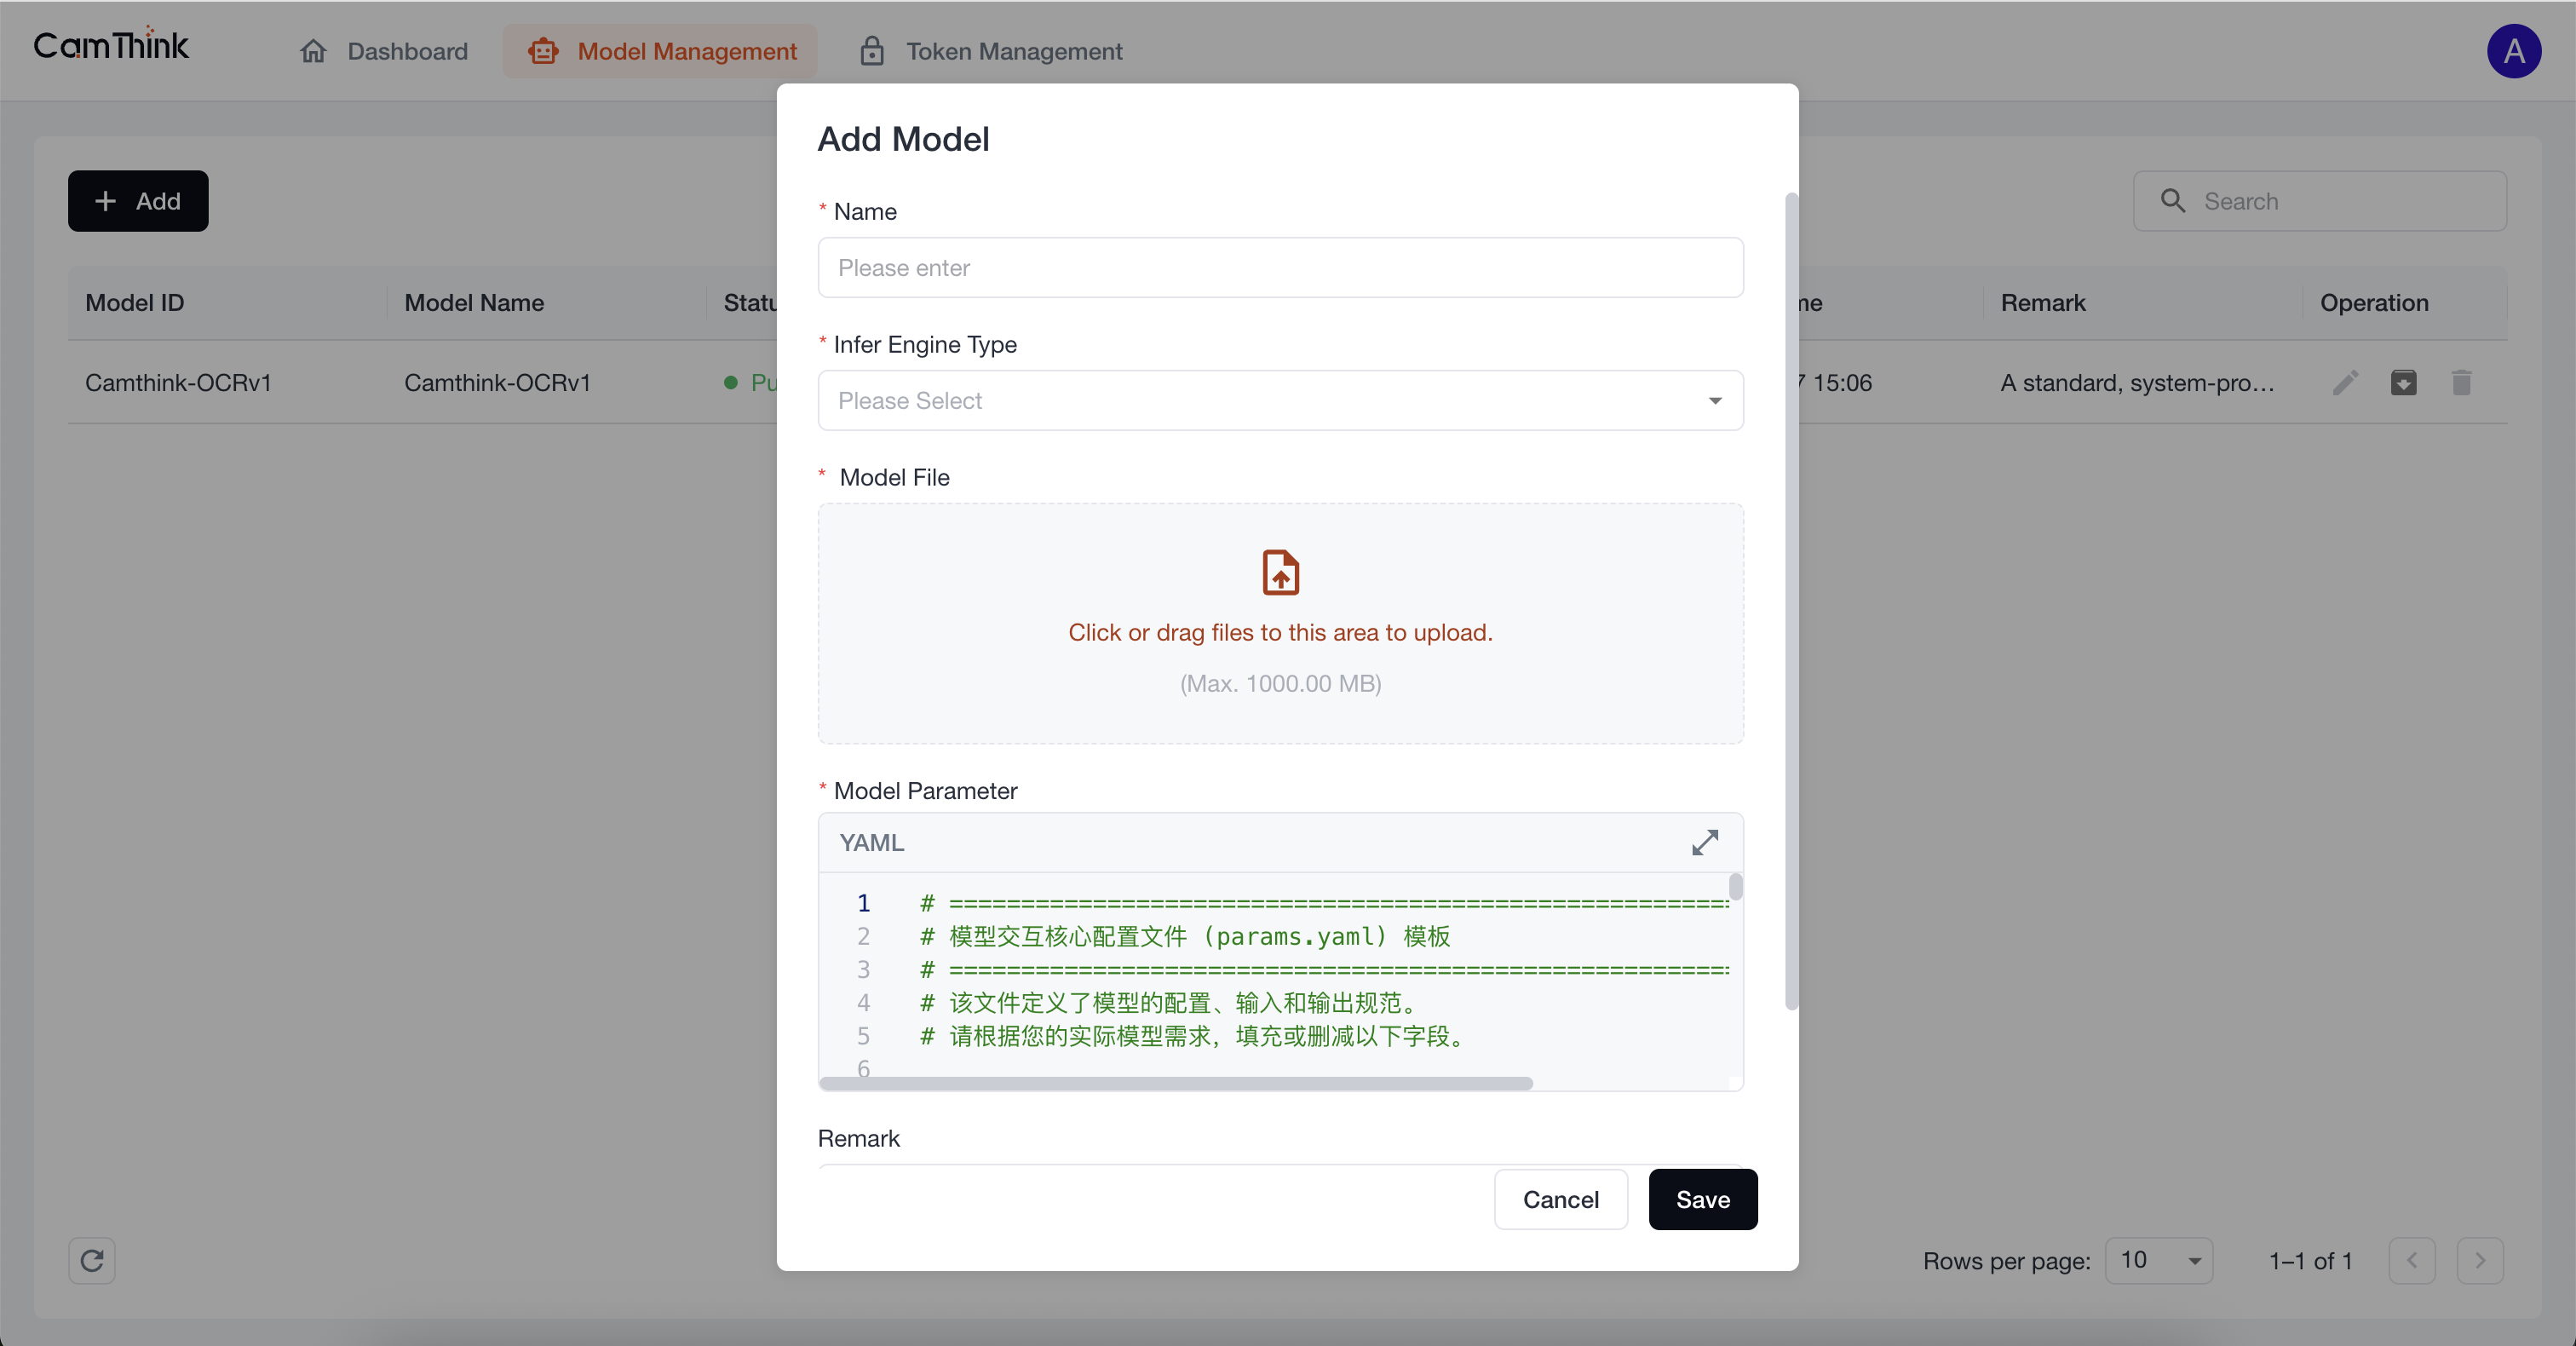
Add Model
Cinfer allows users to upload their own trained ONNX models and manage them. Click the "Add" button on the page to open the form and upload a model. Parameter descriptions:
- Name: Model name
- Infer Engine Type: Model type; currently only ONNX is supported
- Model File: Model source file; it must match the selected model type
- Model Parameter: Model parameters used to define model inputs/outputs; can be customized for application integration and requires adaptation in the inference layer. For details on filling Model Parameter, see "Dev Guide".
- Remark: Notes
Manage Models
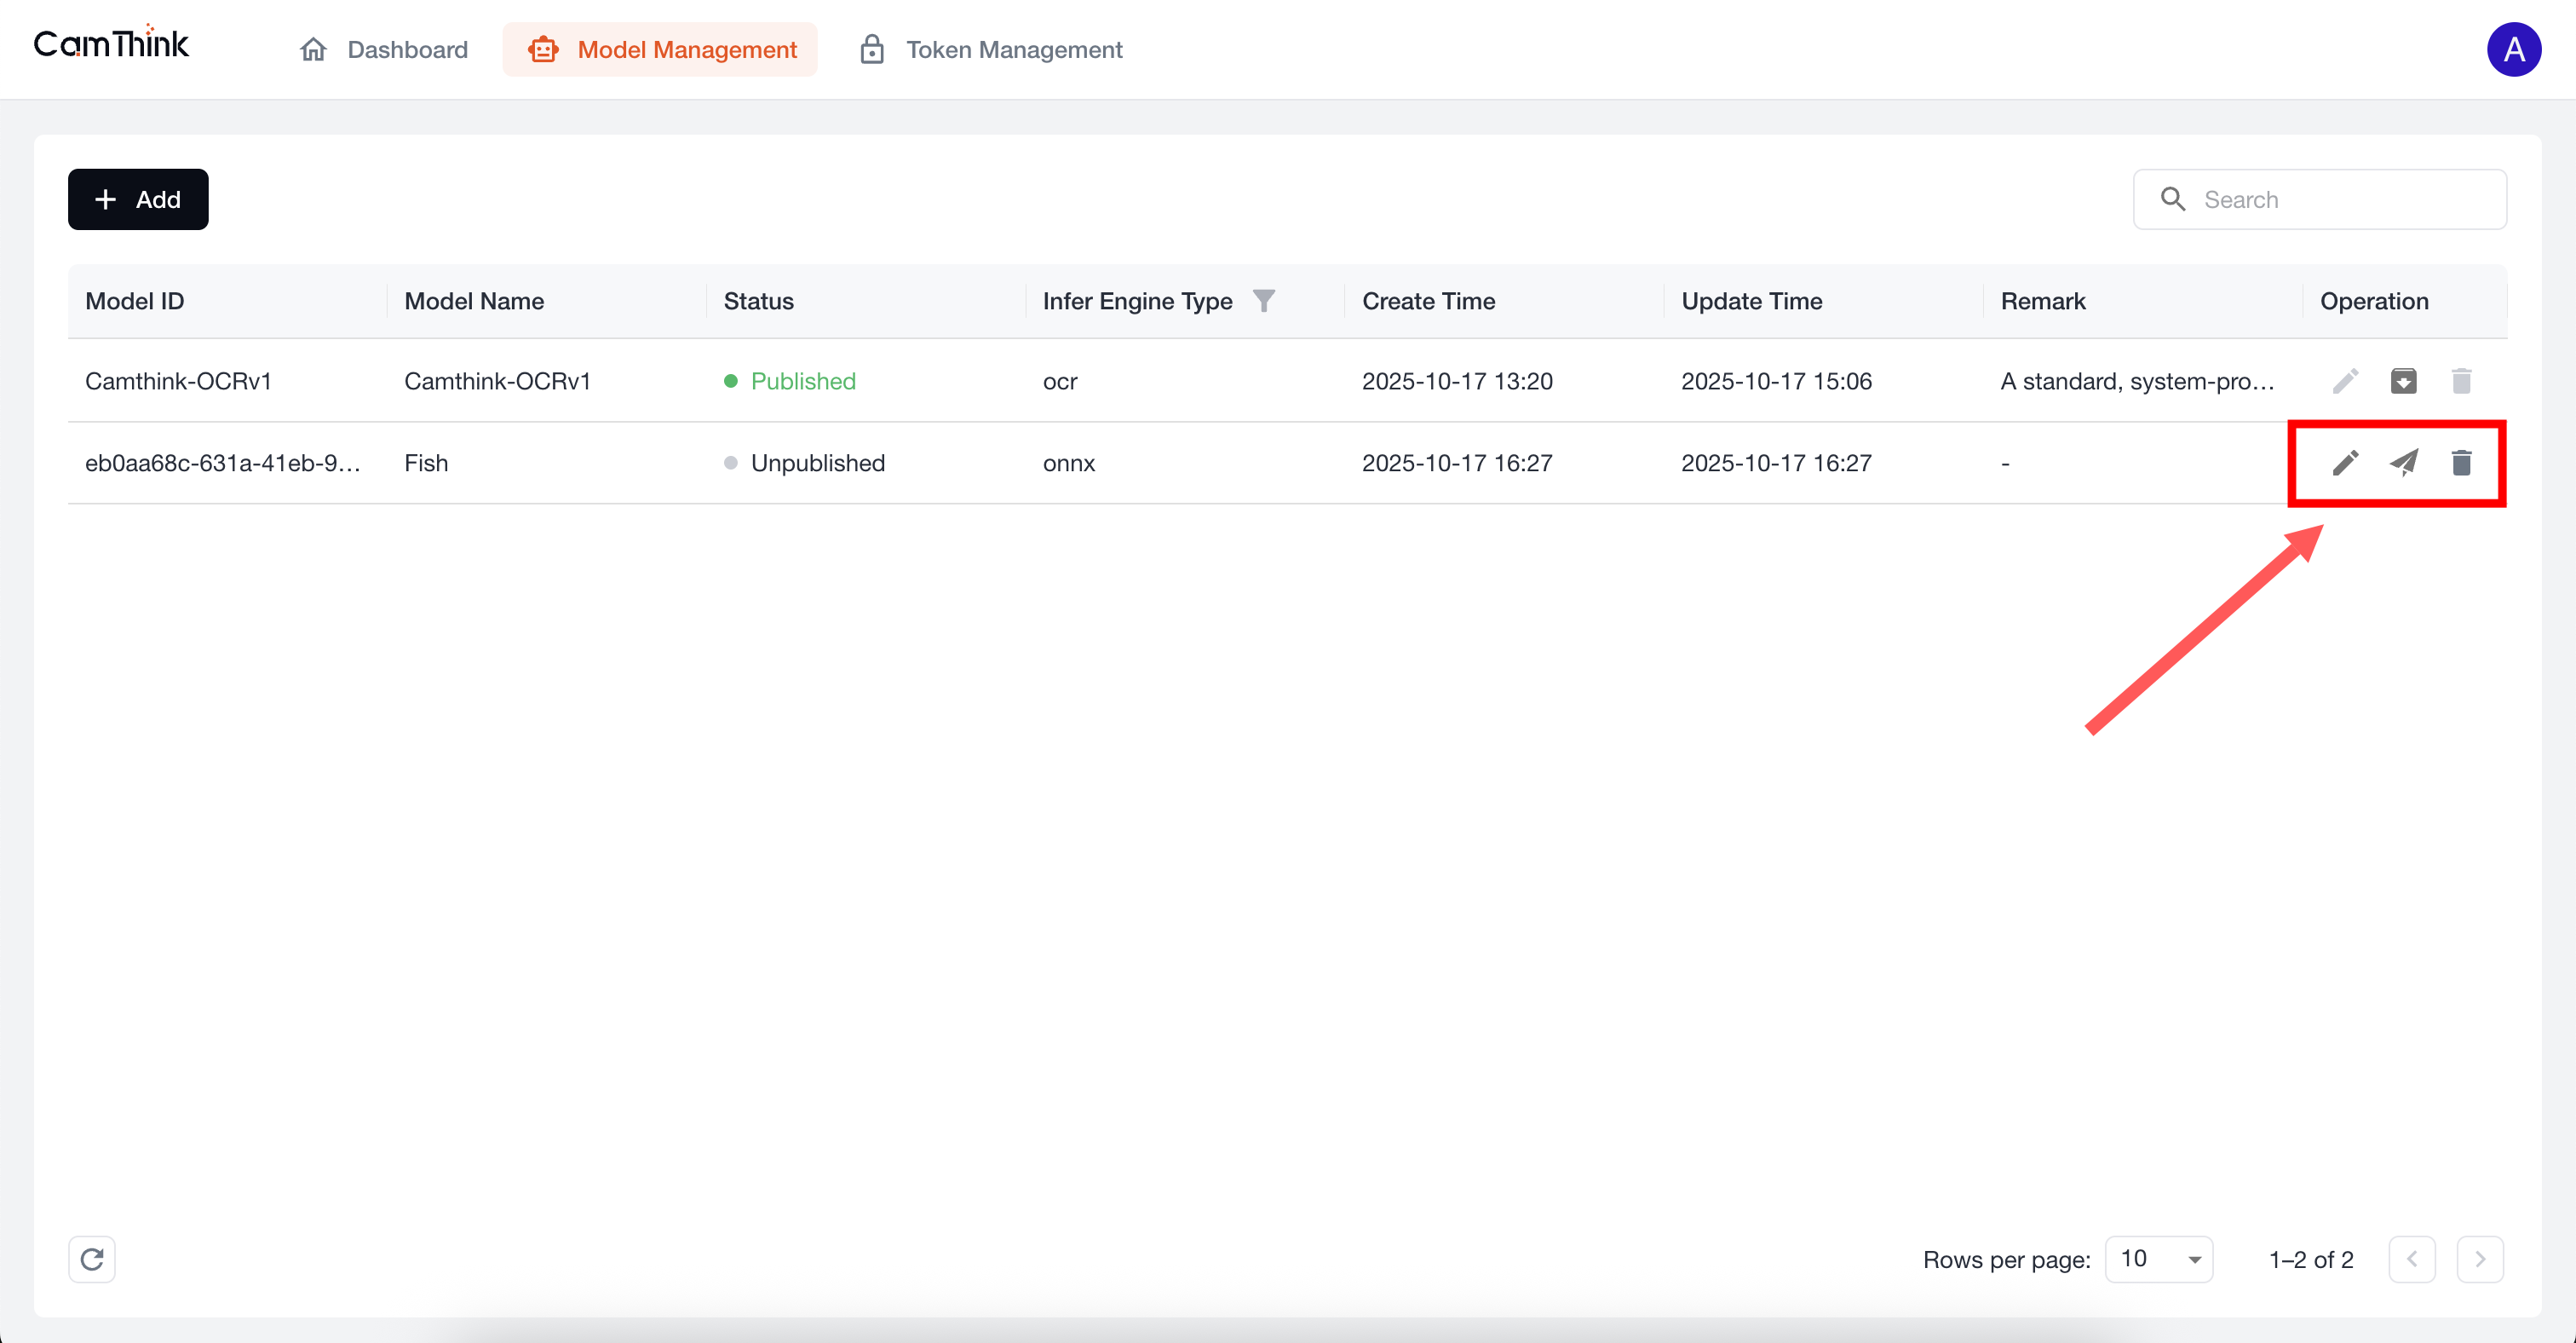
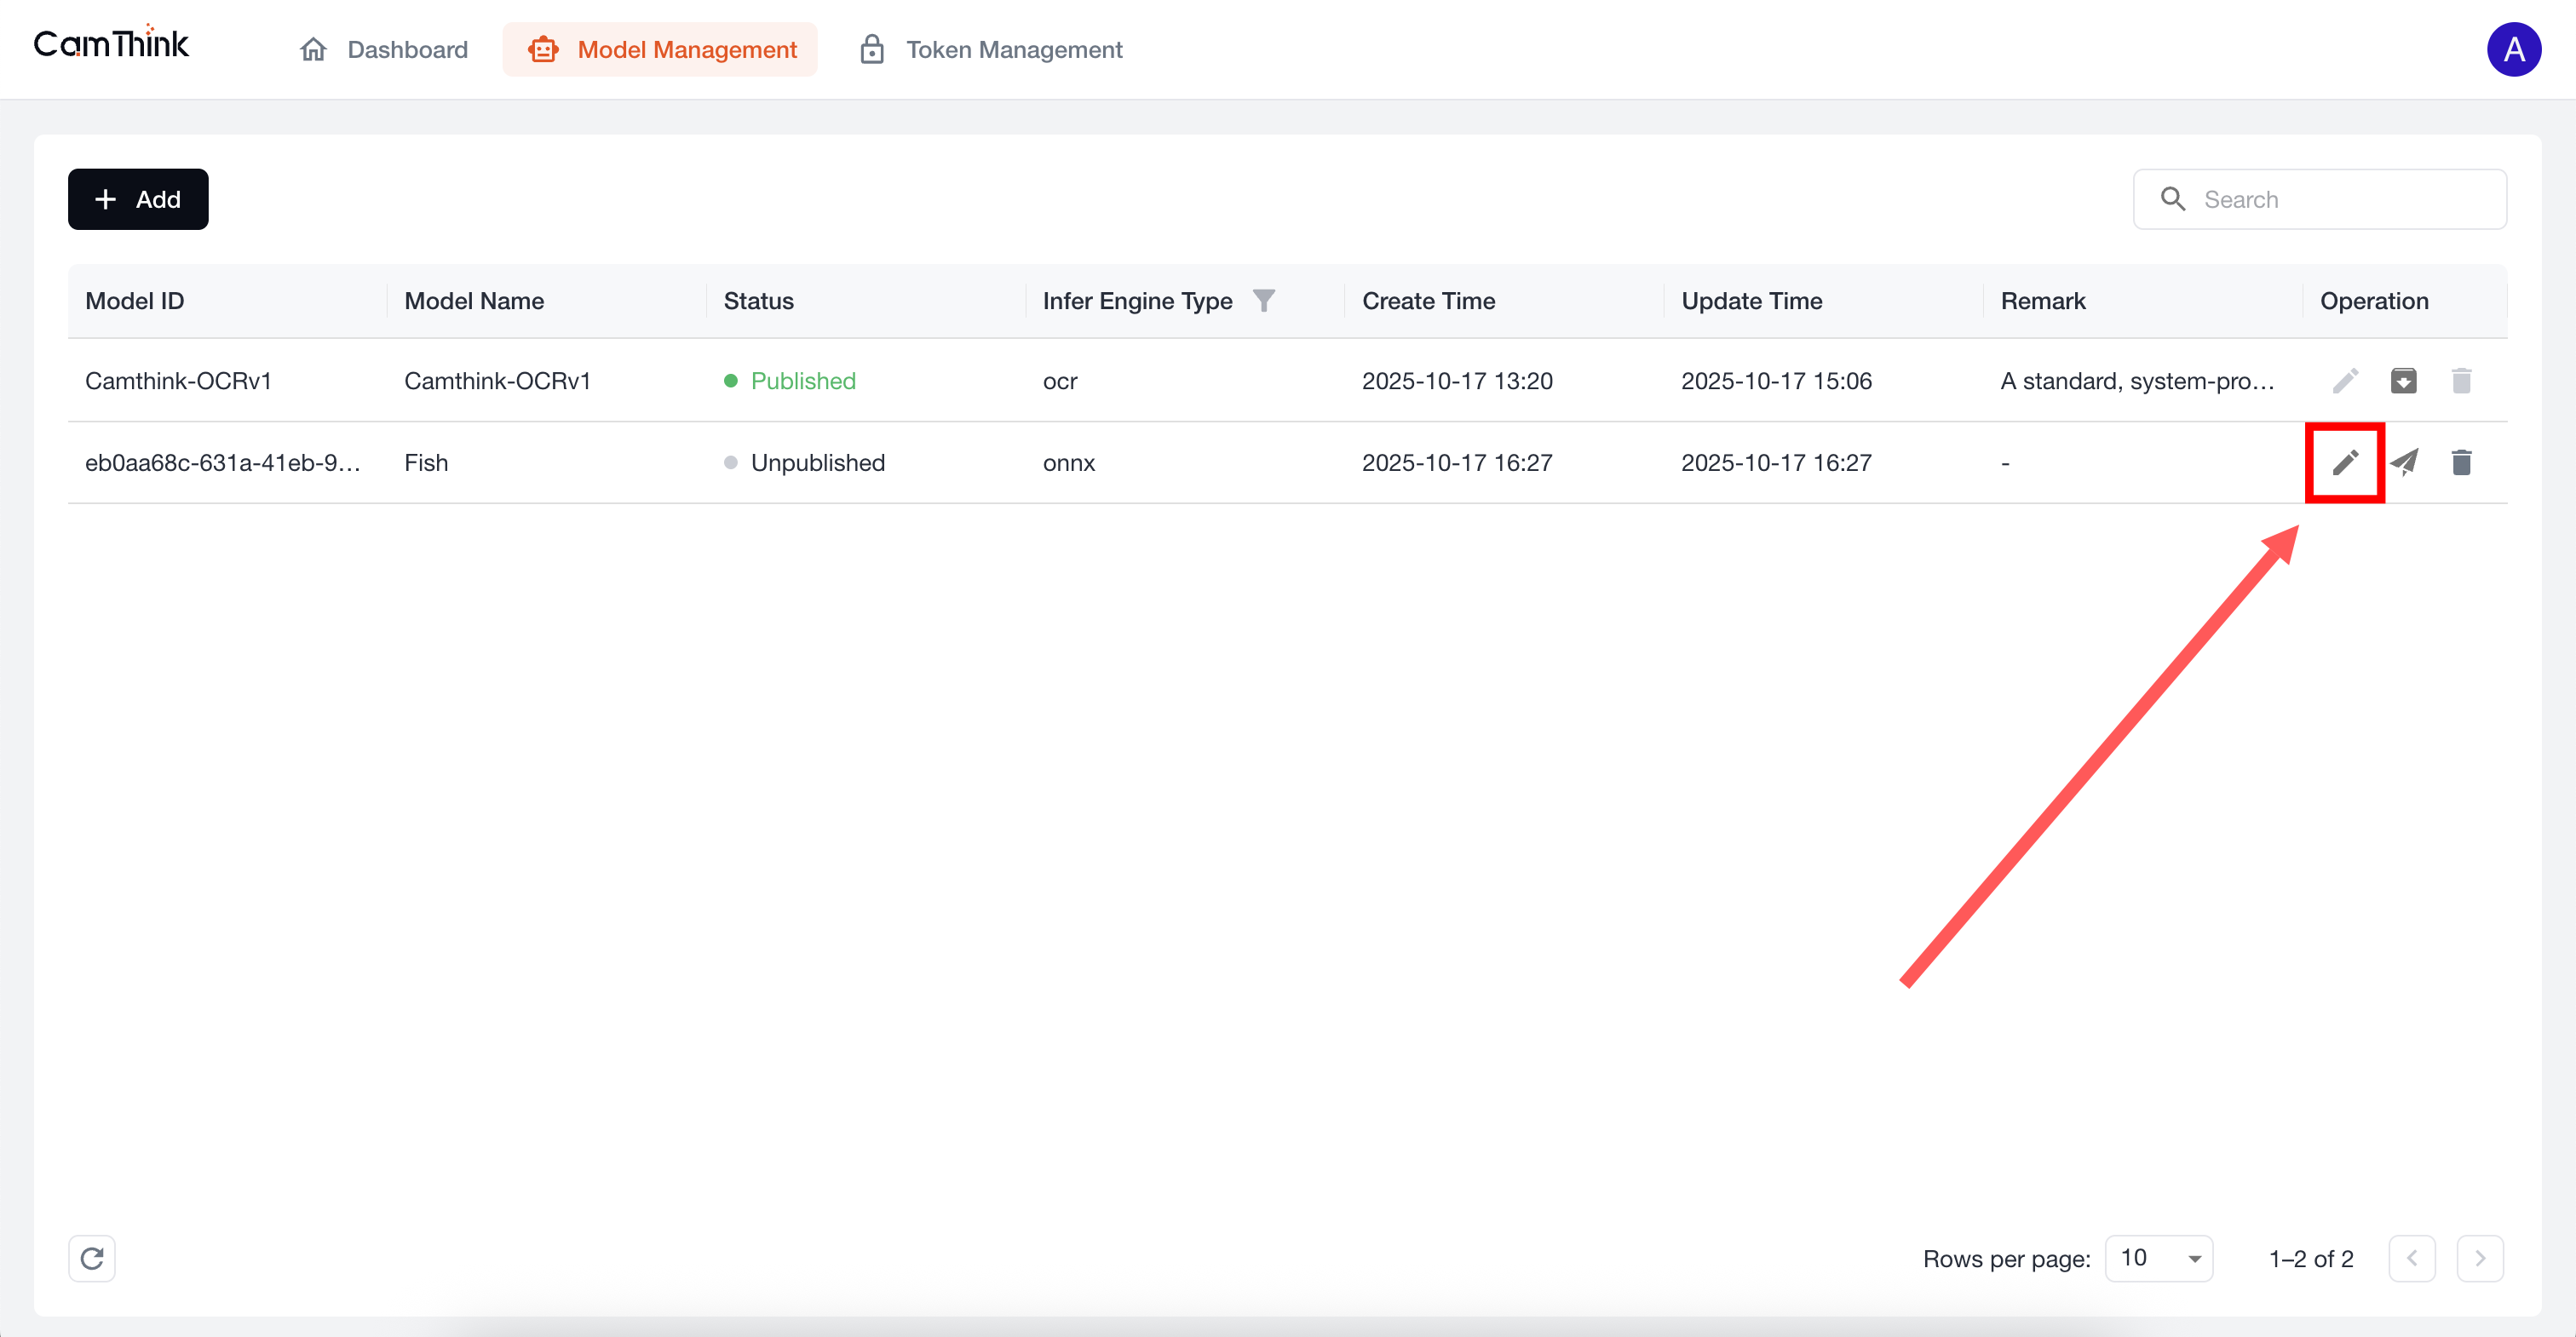
Edit Model
While a model is unpublished, click the "Edit" button to reopen the form and modify model information.
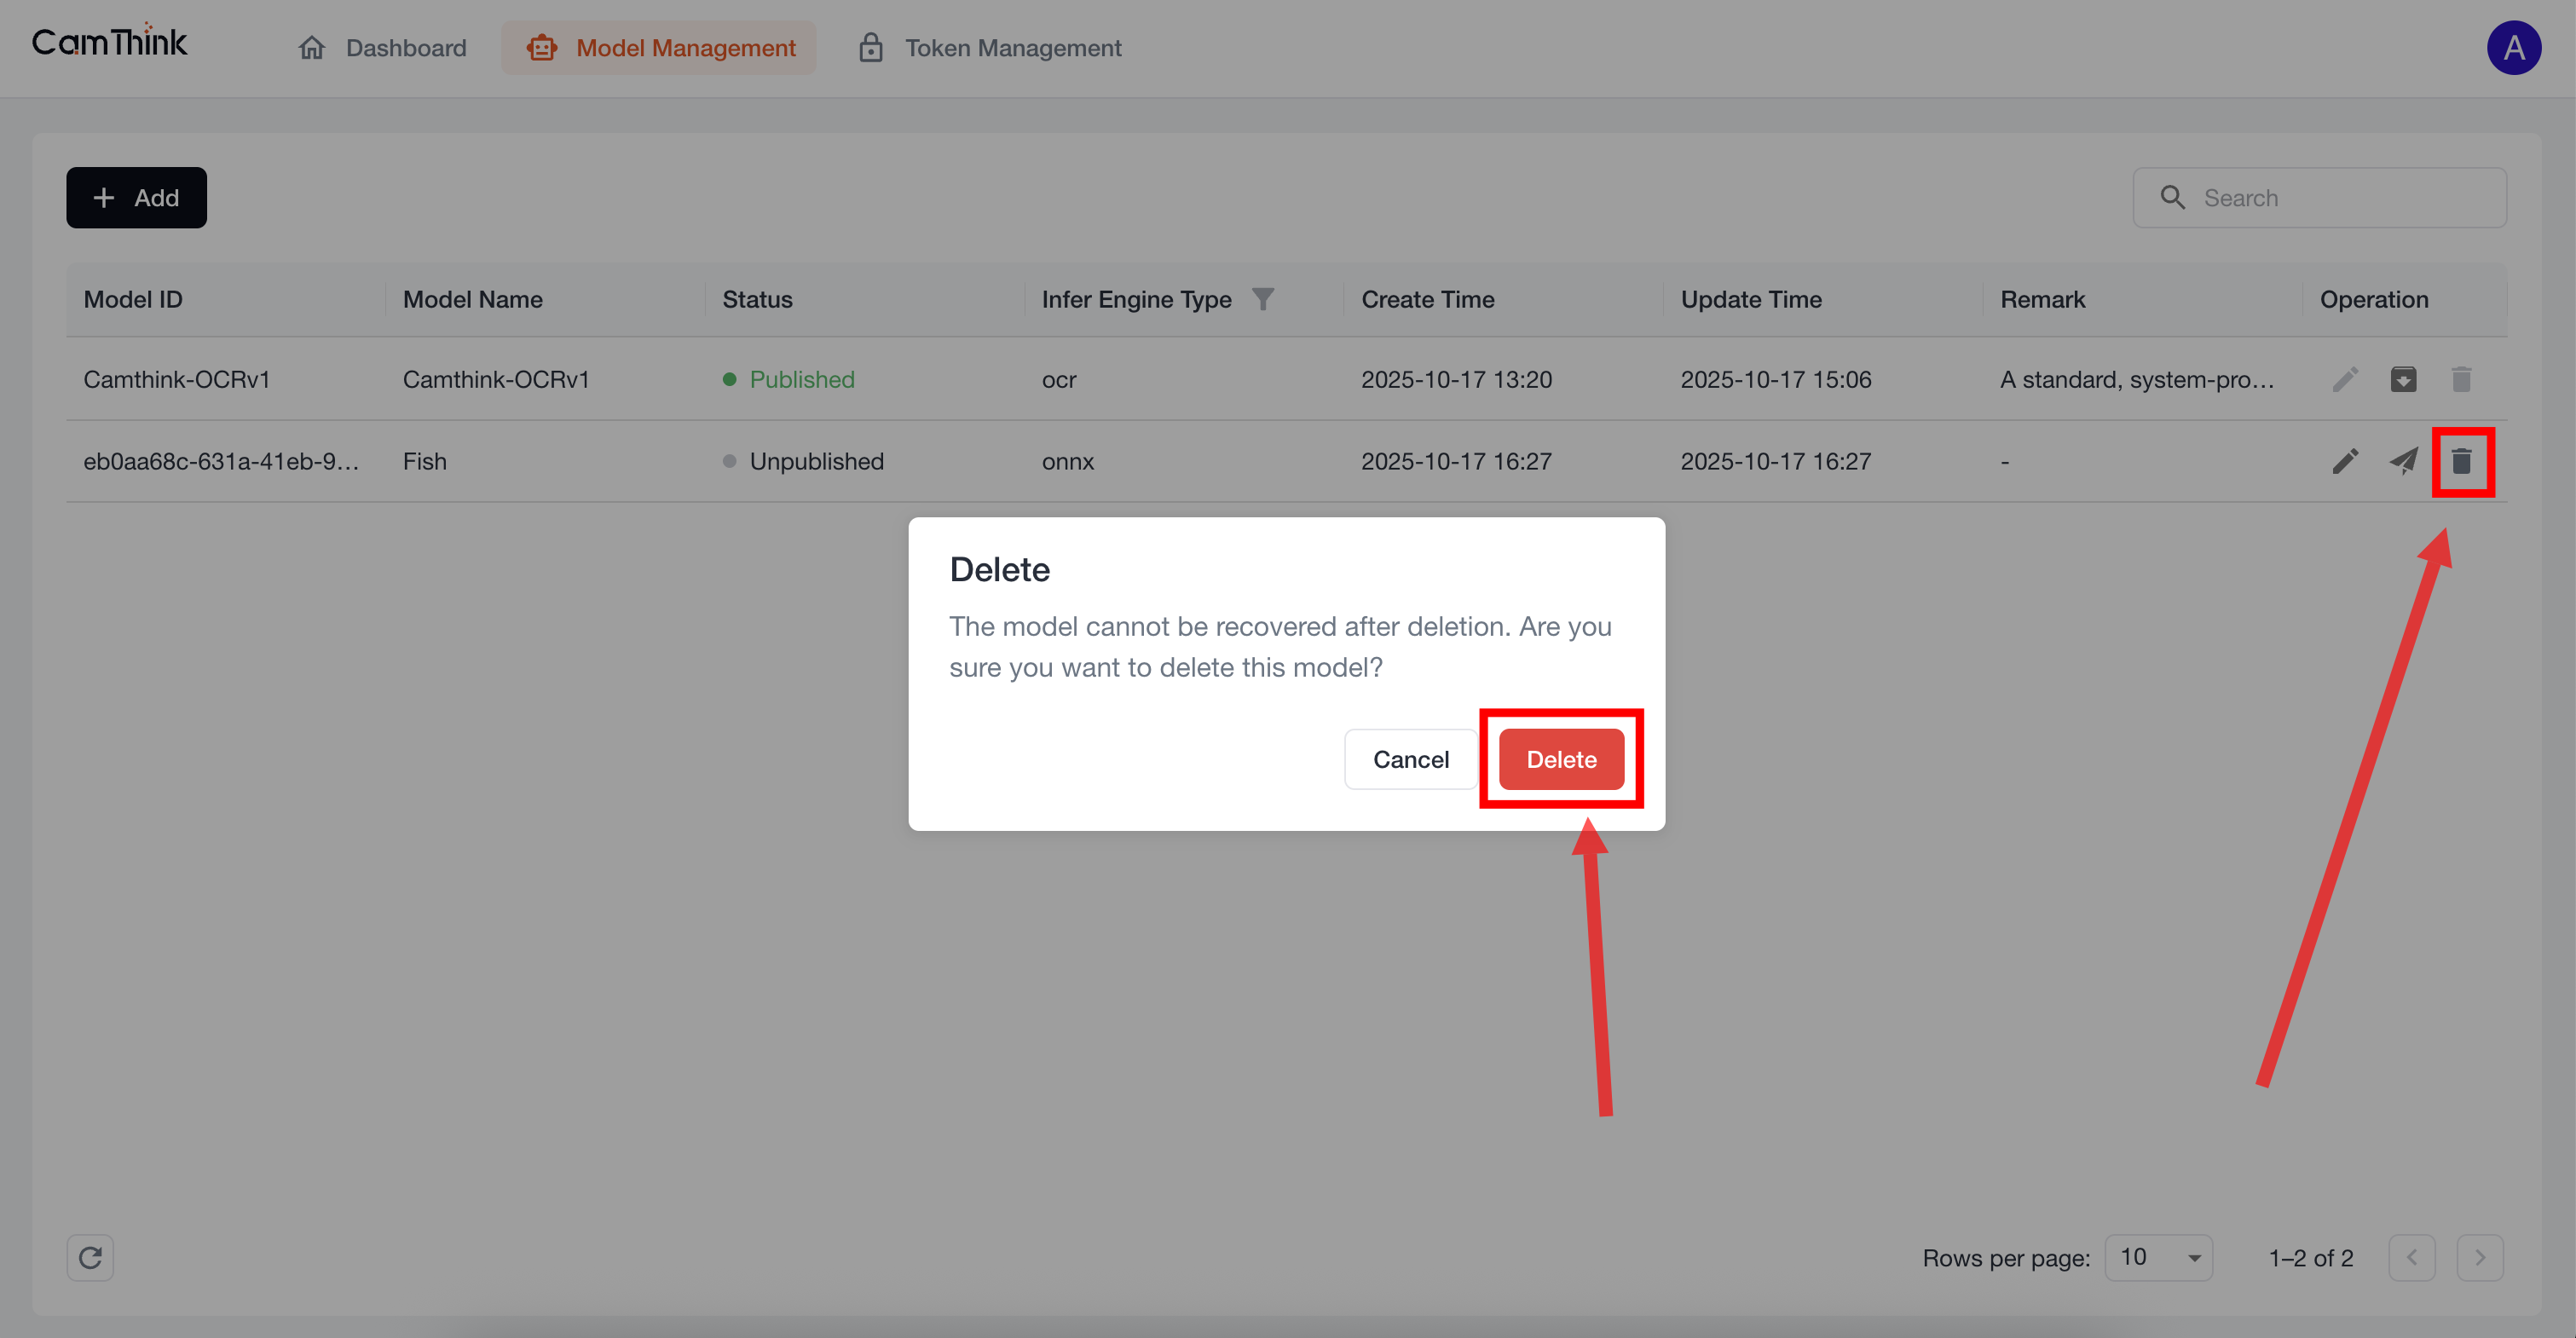
Delete Model
While a model is unpublished, click the "Delete" button and then "Delete" in the confirmation dialog to remove the model.
Publish Model
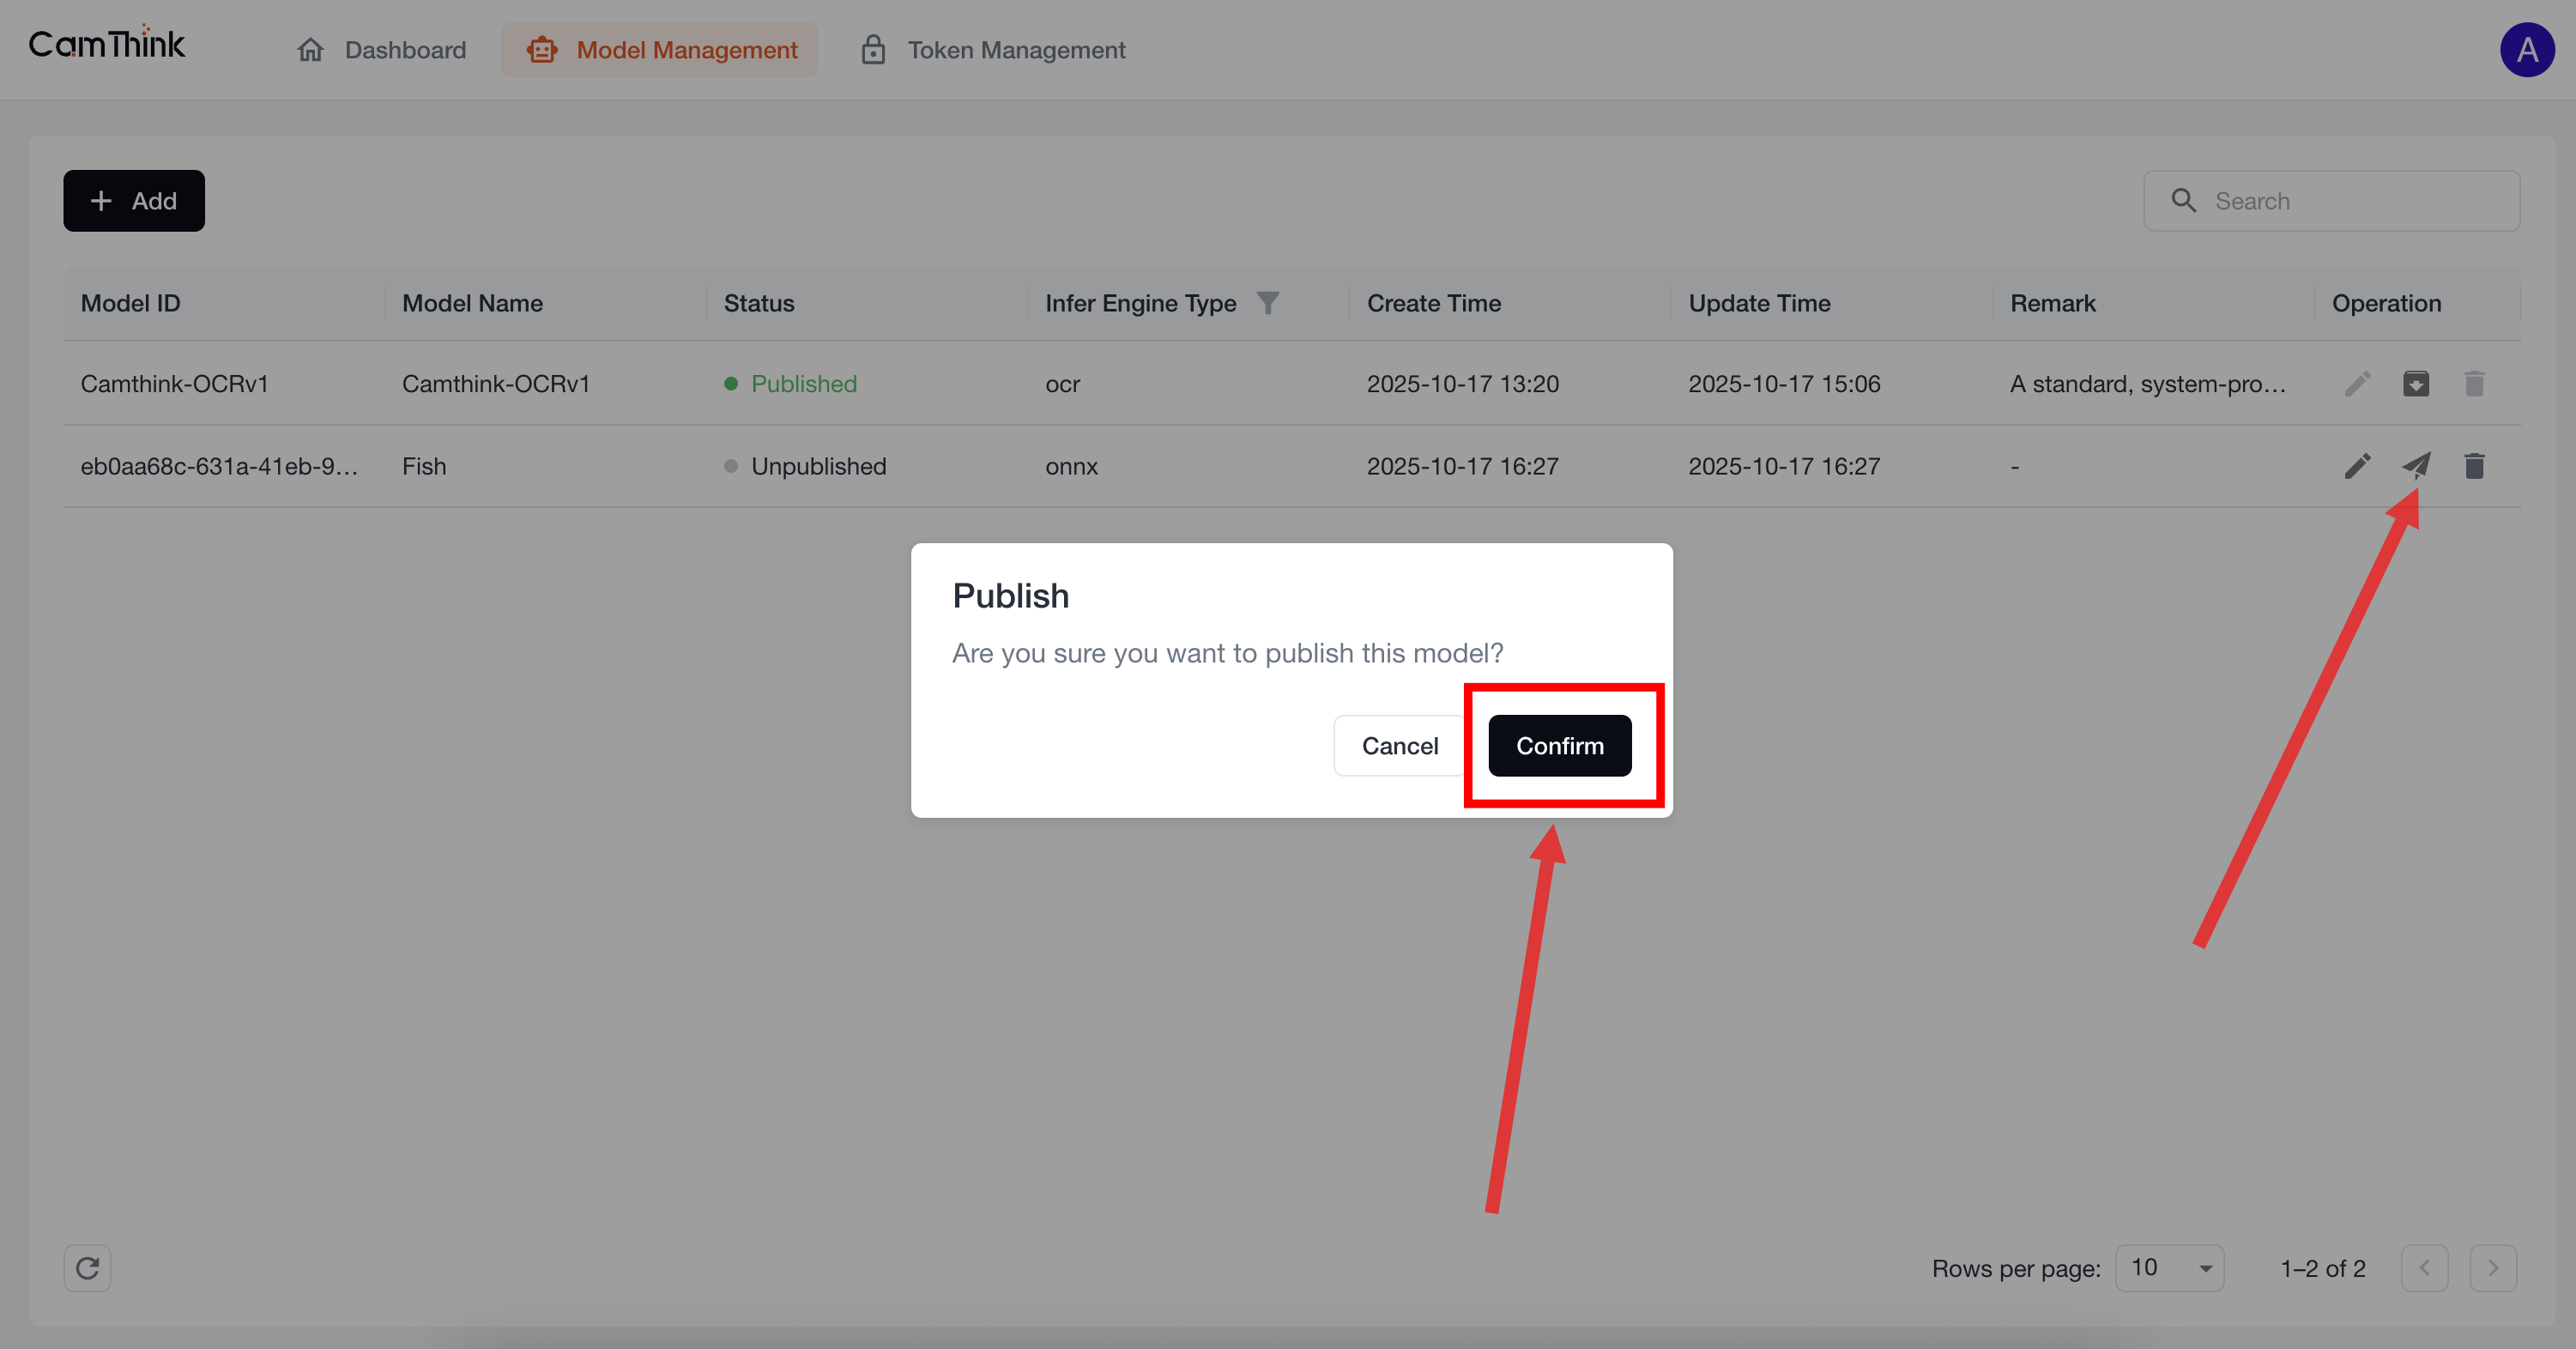
After completing the add-model form and clicking "Save", a unique Model ID is generated and appears in the list. You can then edit, publish, or delete it. Click the middle button to publish the model; in the confirmation dialog, click "Confirm" to finalize publishing. After publishing, you can authorize clients to use this model in Token Management. If a token is configured with permissions for all models, the published model will be granted automatically.
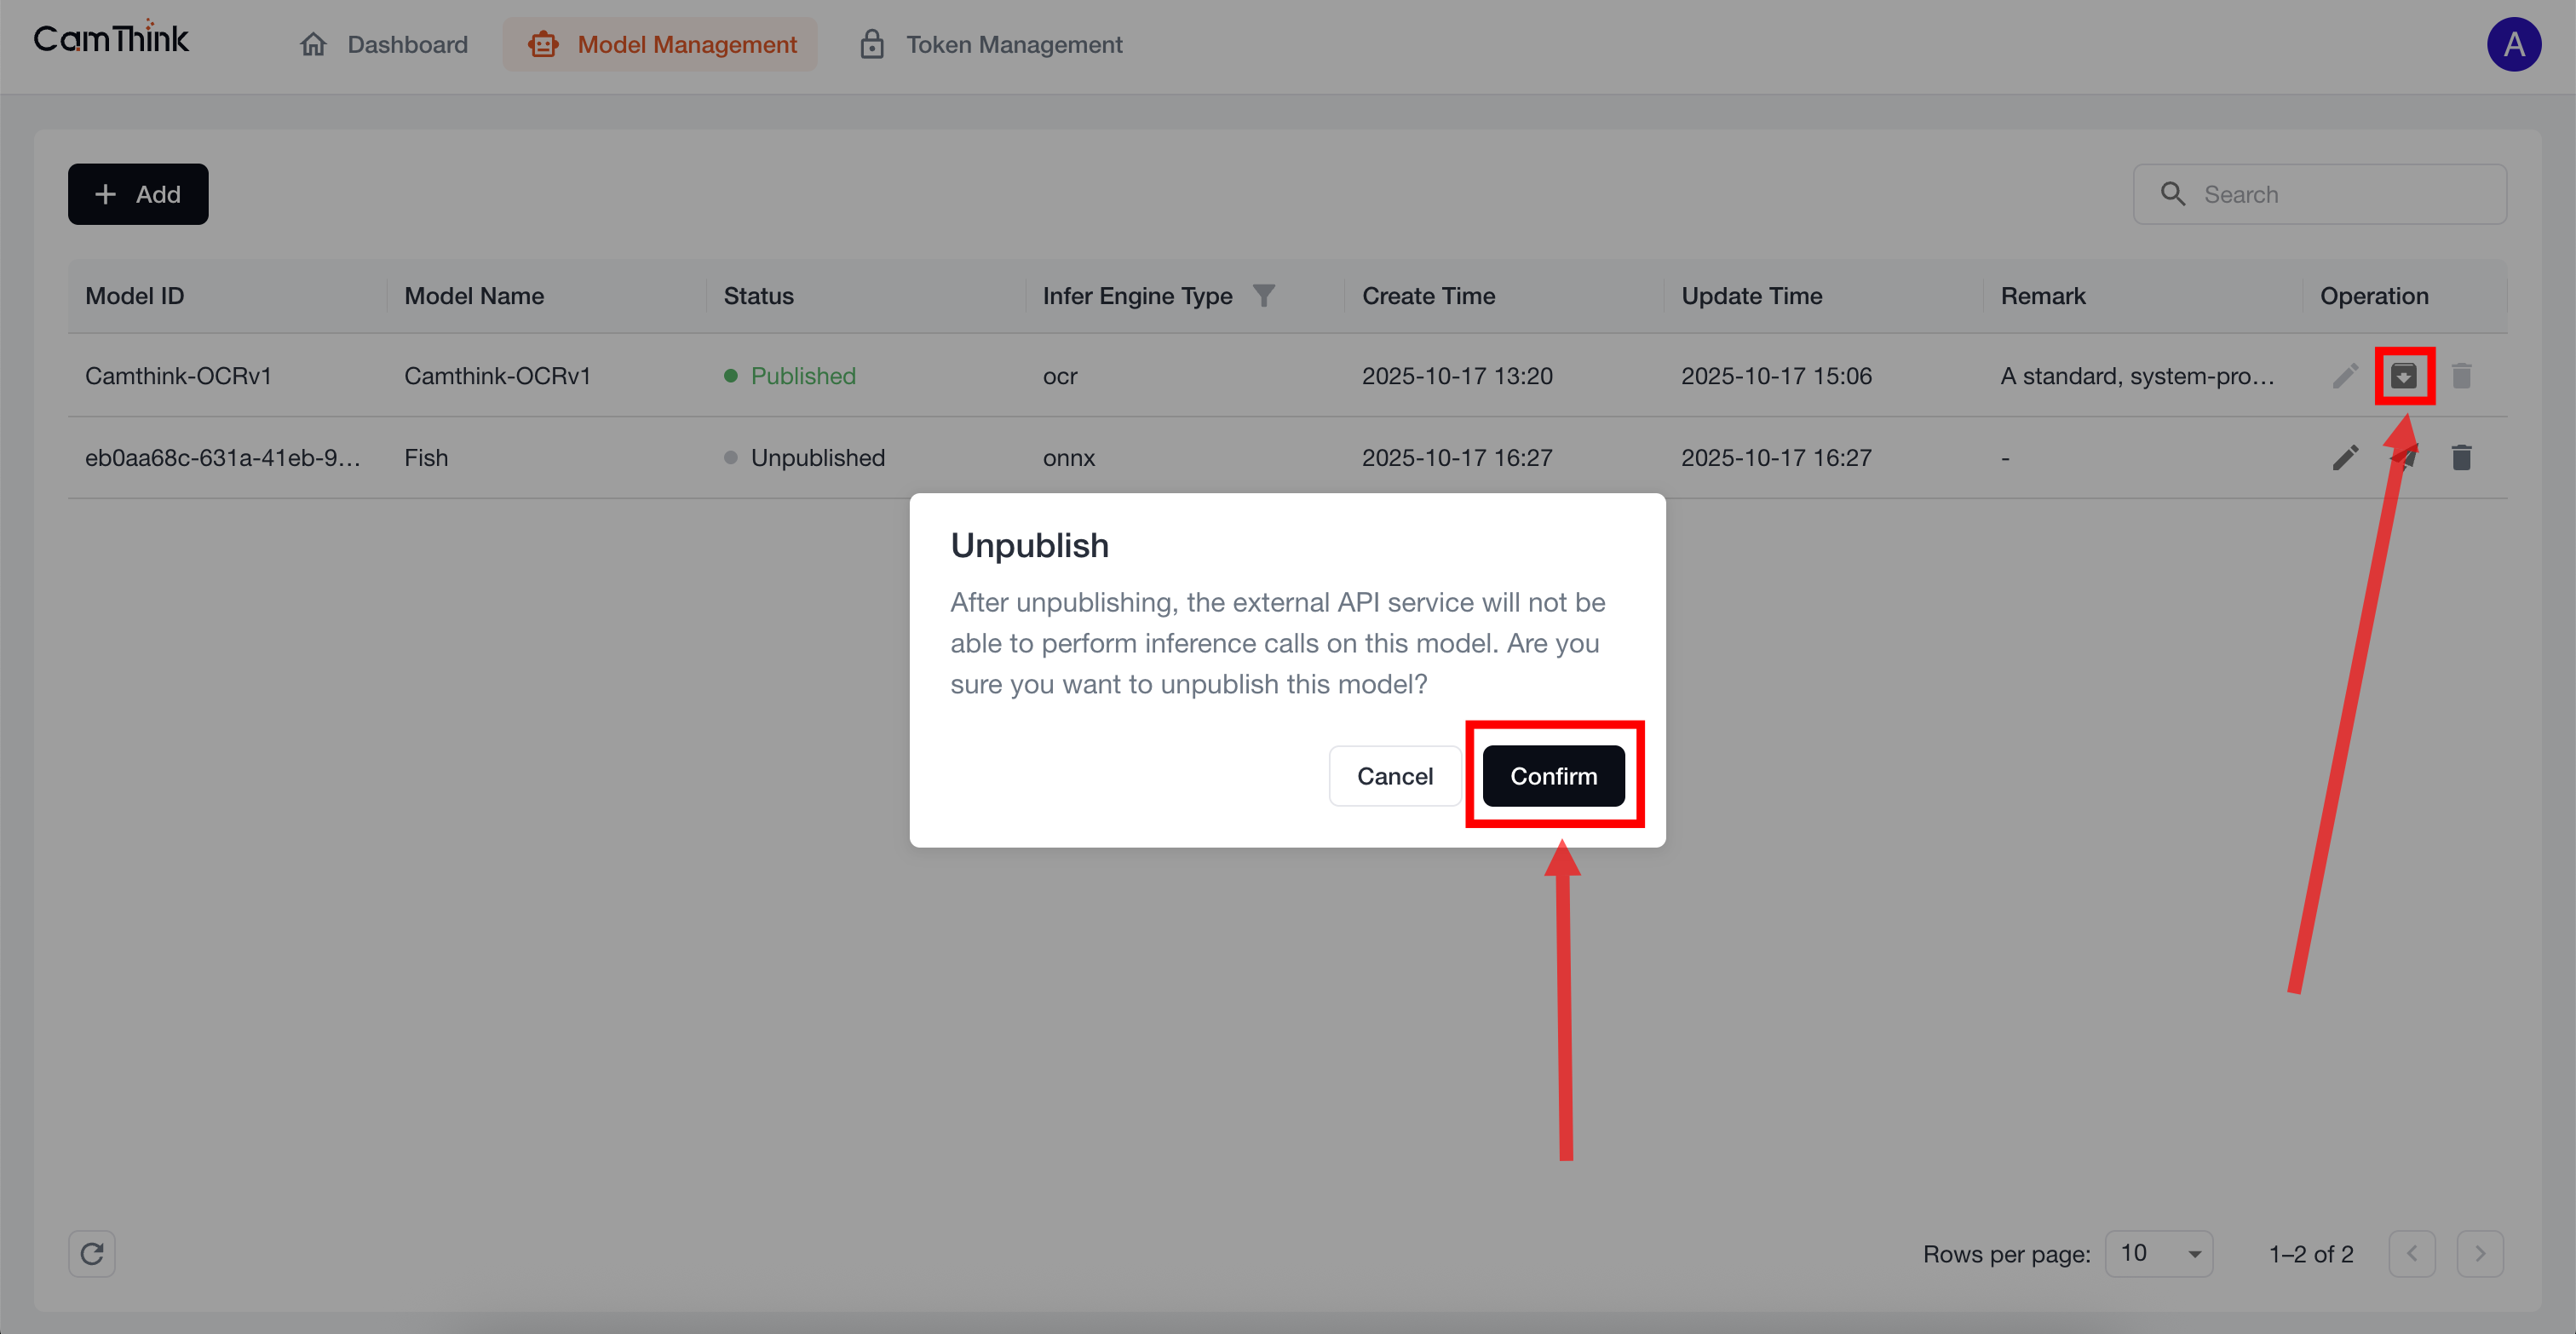
Unpublish Model
After publishing, you can unpublish a model. Note: This operation can impact existing applications or clients using the model service, potentially causing failures. Proceed with caution.
Token Management
This module defines clients allowed to access the Cinfer service by assigning tokens. Token Management provides token creation and management, request IP whitelists, and API request limits.
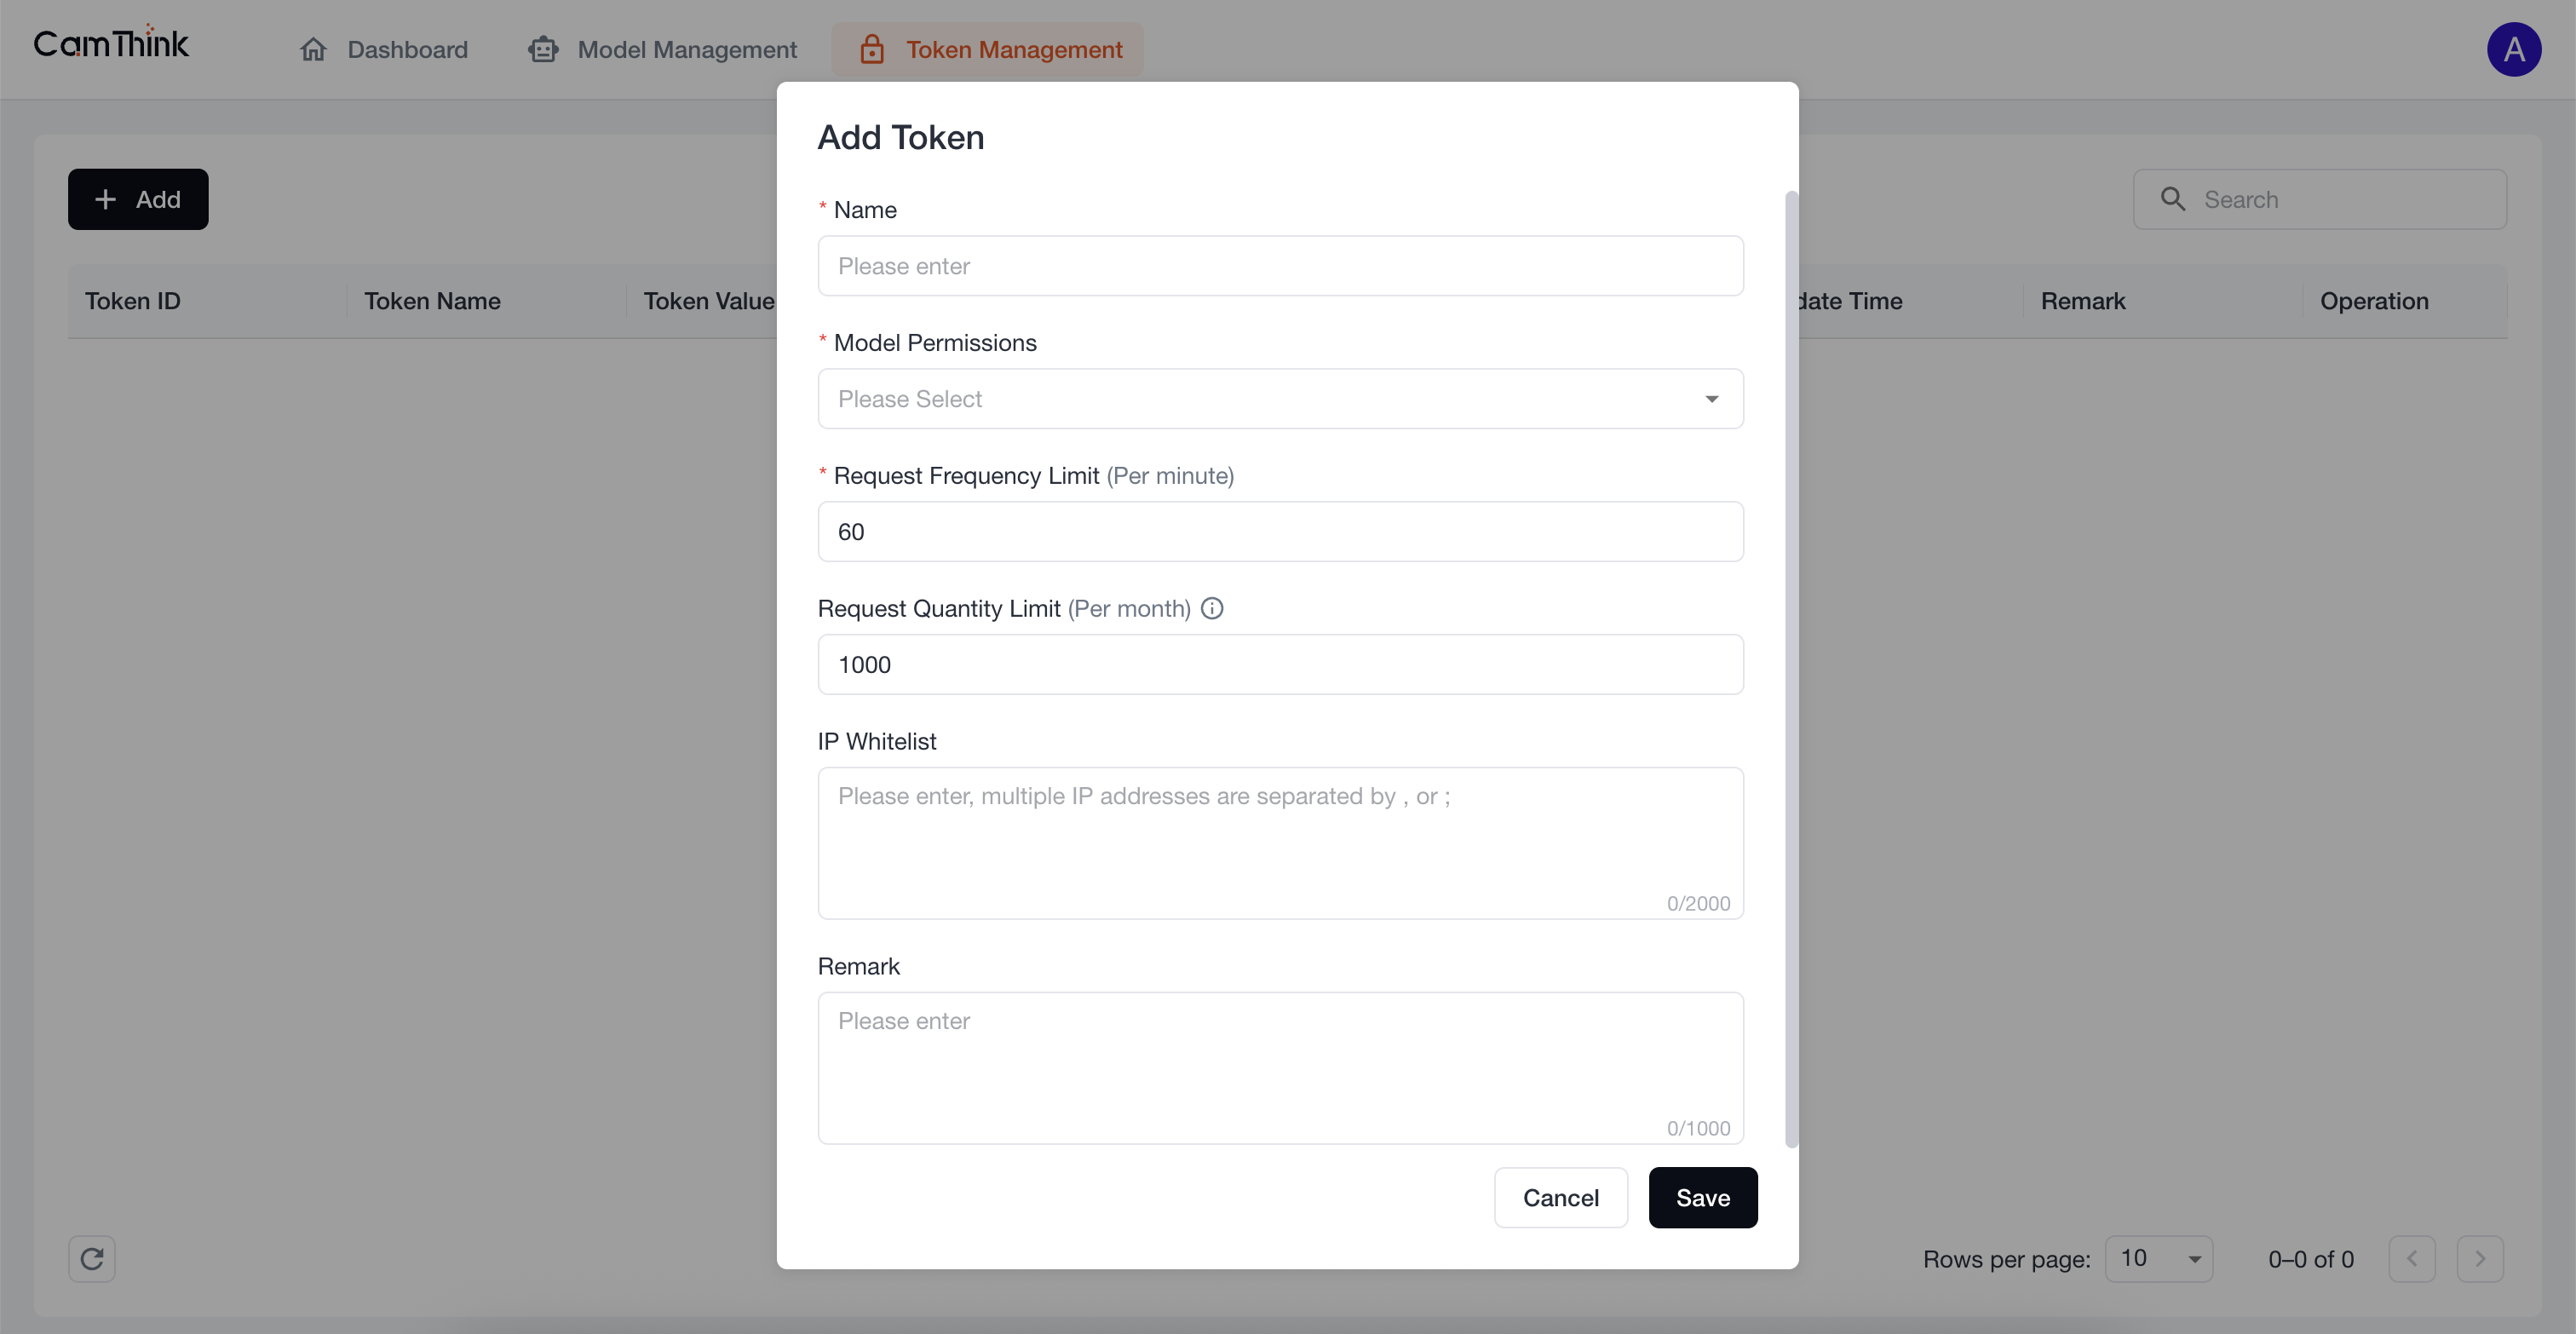
Add Token
Click the "Add" button in the menu to create a token. Form fields include:
- Name: Token name; customizable
- Model Permissions: The models this token may call. Currently supports all models or selecting specific published models. If "all models" is selected, newly published models will automatically be granted to tokens with this option.
- Request Frequency Limit: Per-minute API request limit for anti-abuse. Requests beyond the limit are blocked. Applies to the total of all API requests.
- Request Quantity Limit: Monthly API request limit to control usage. Requests beyond the limit are blocked. Applies to the total of all API requests.
- IP Whitelist: IP allowlist; supports multiple entries separated by "," or ";". Only listed IPs may access services with the token.
- Remark: Notes
After completing the form, click "Save" to create the token.
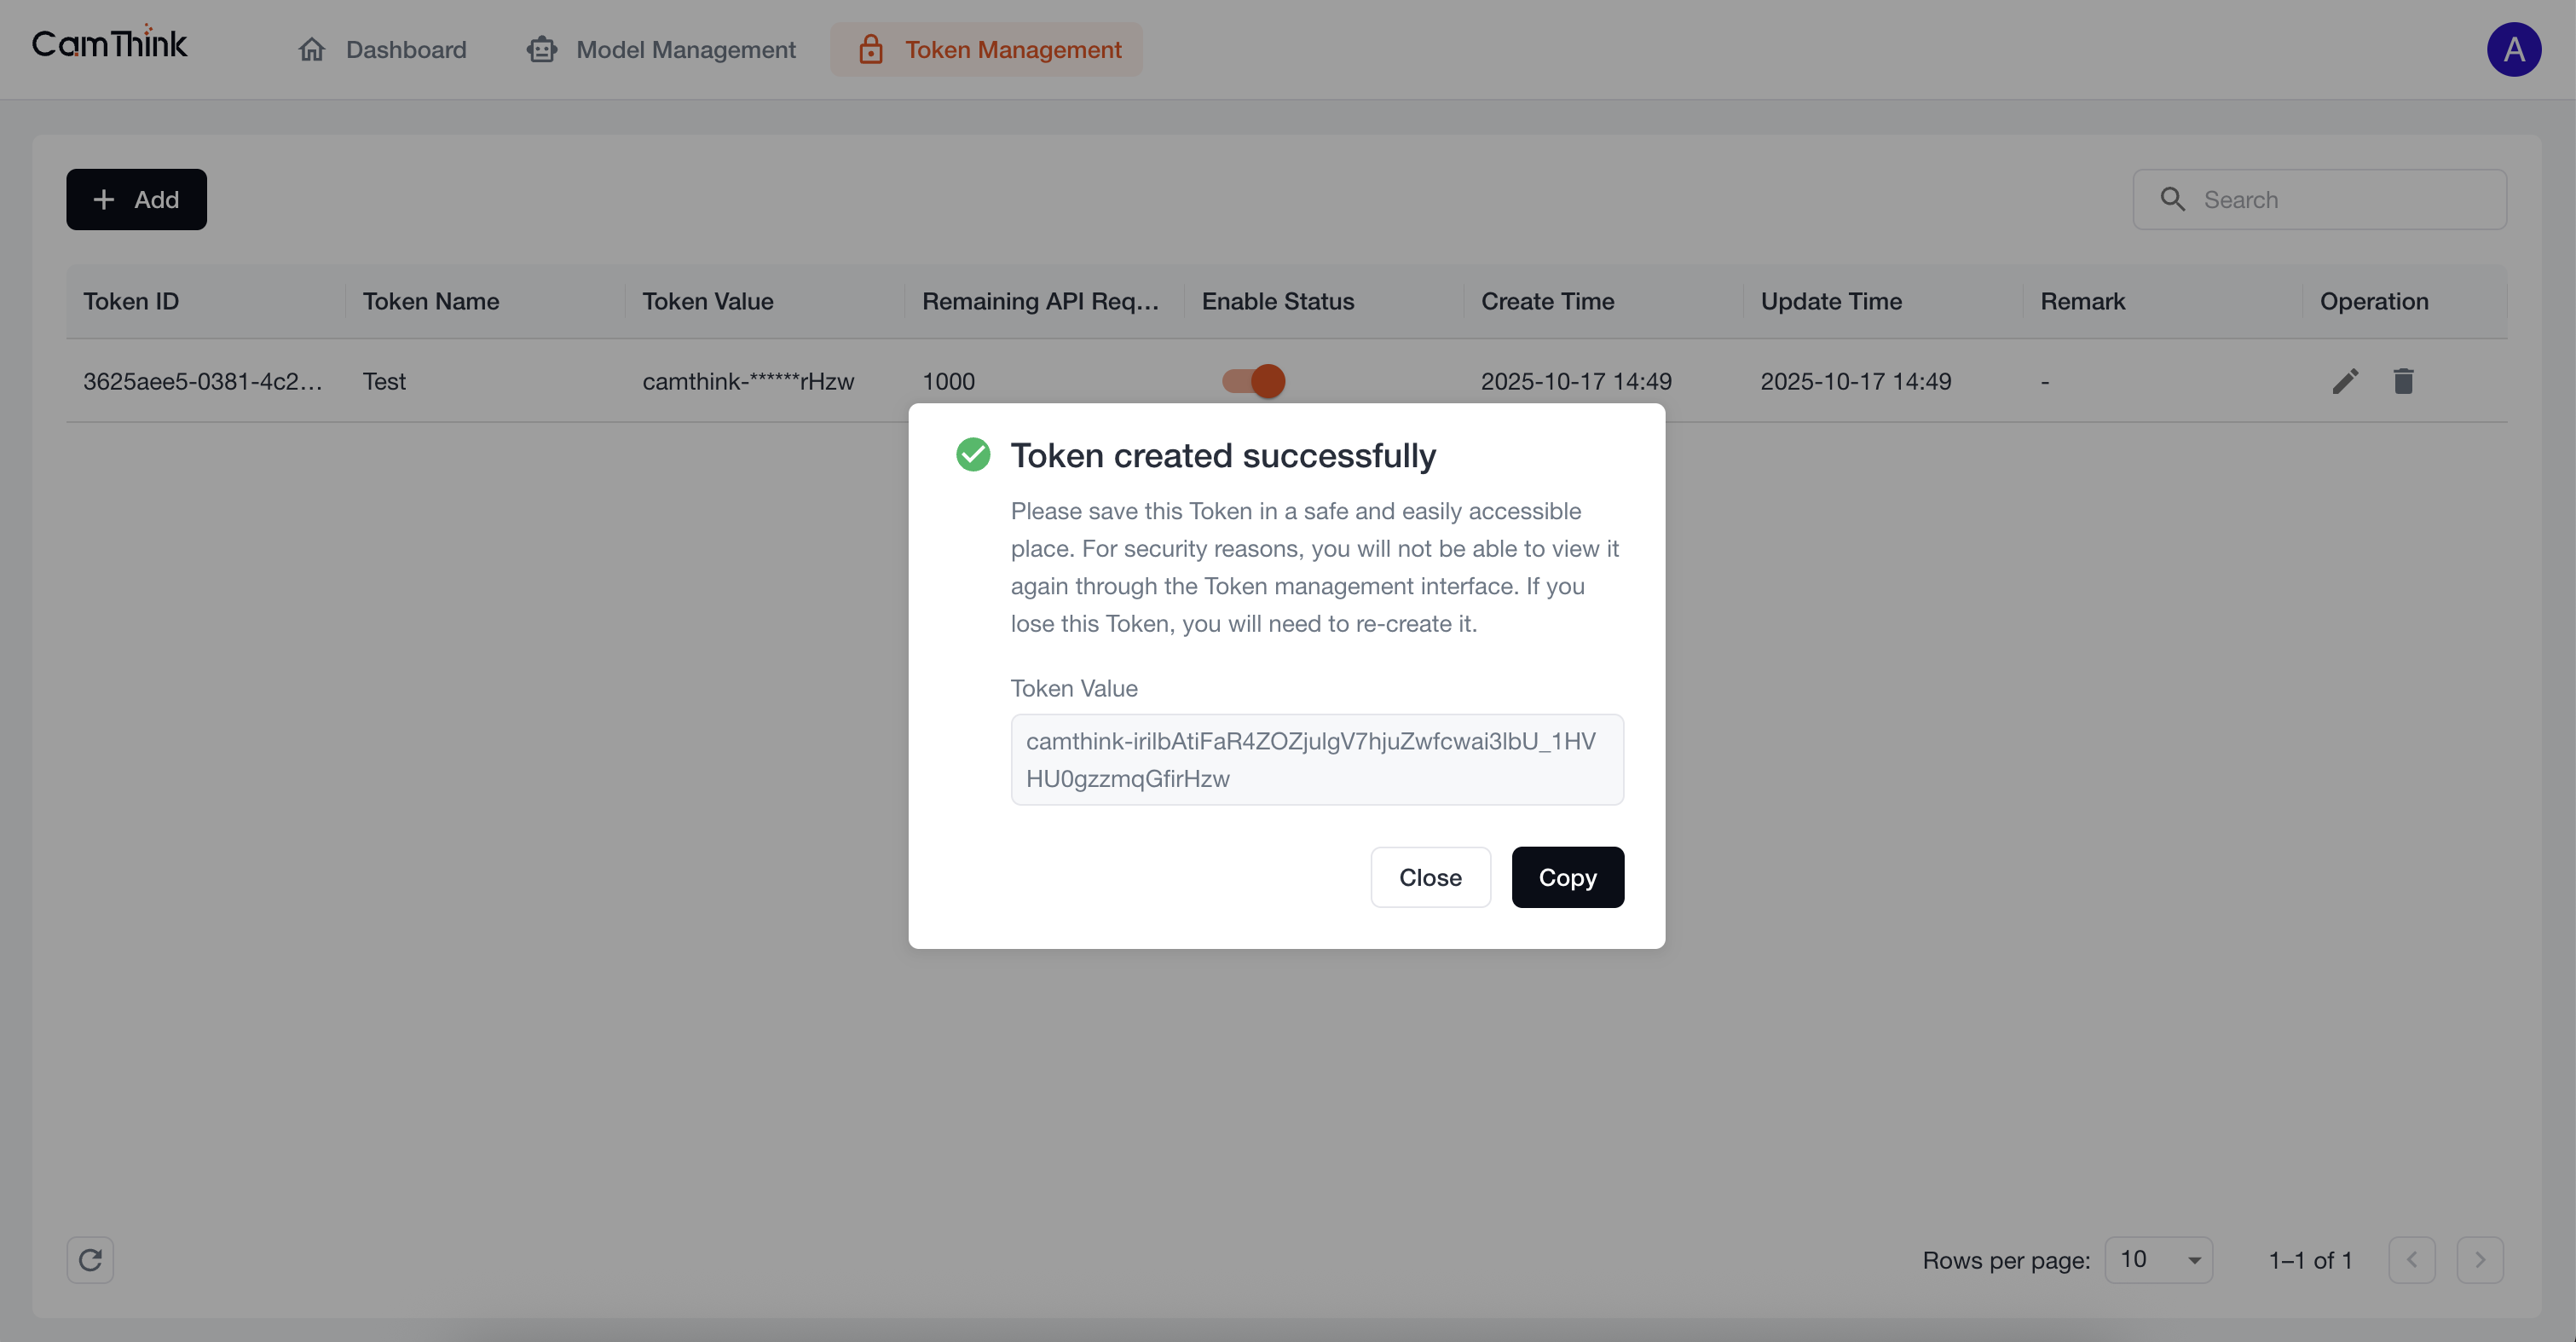
 After saving, a dialog shows the token. Click "Copy" to copy it. Keep it secure. You can later use this token to call AI services within its permission scope.
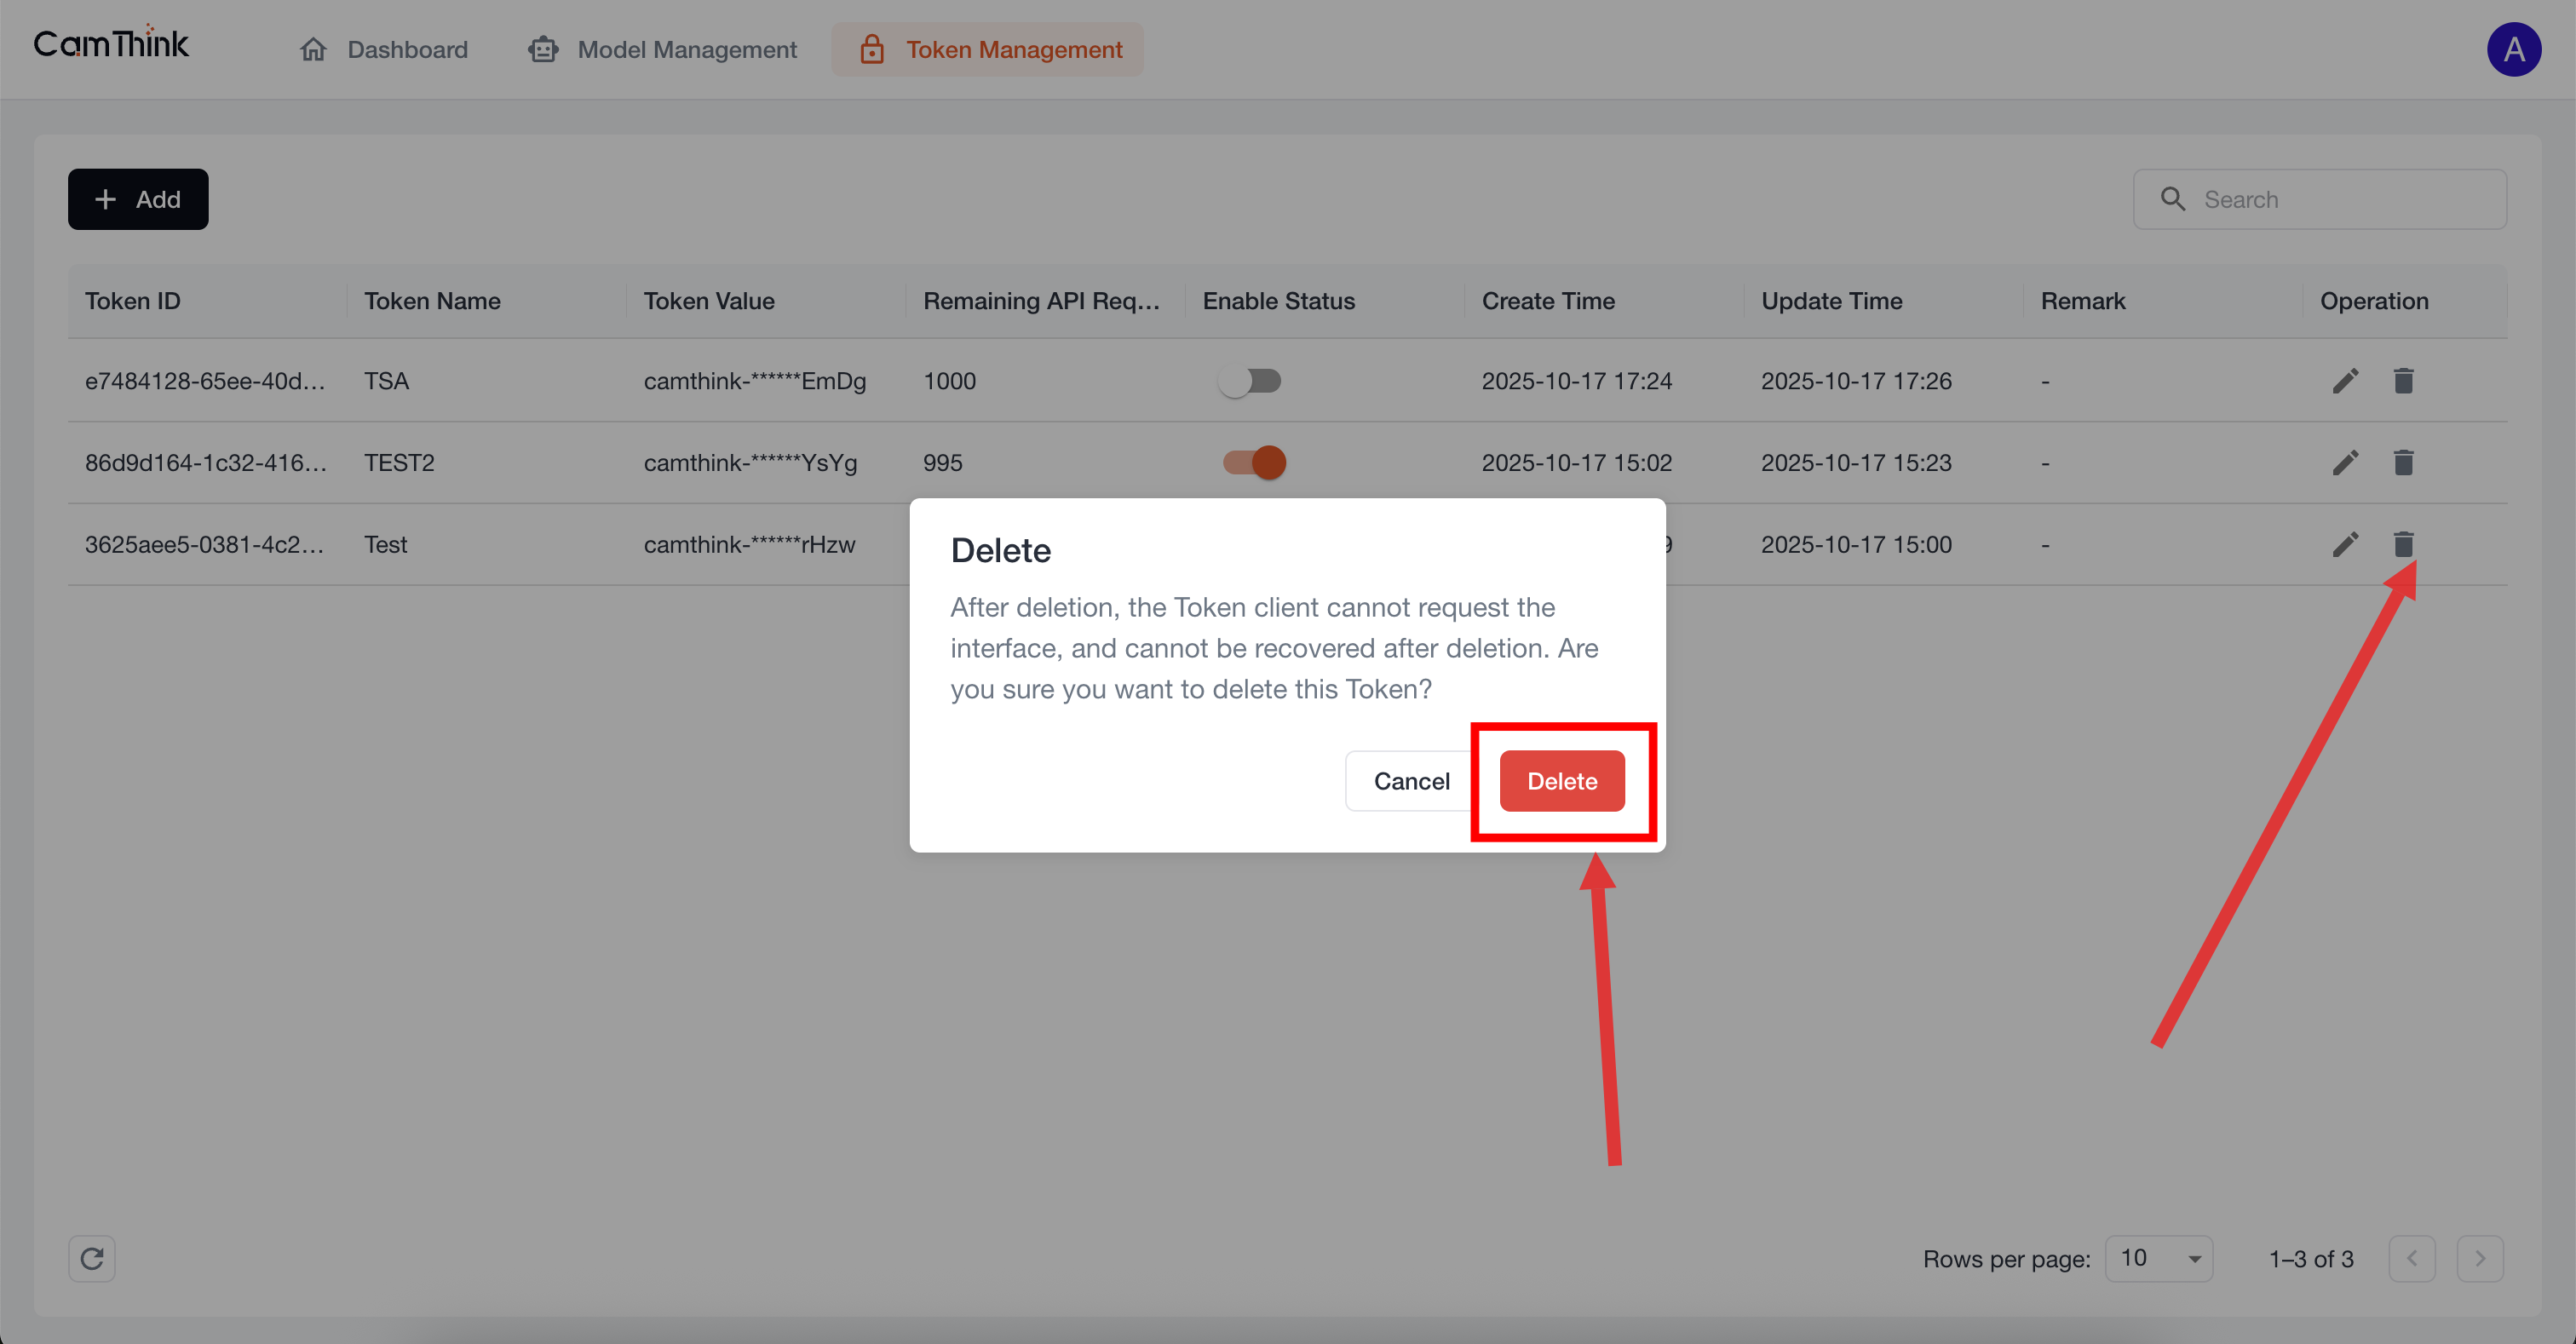
Manage Tokens
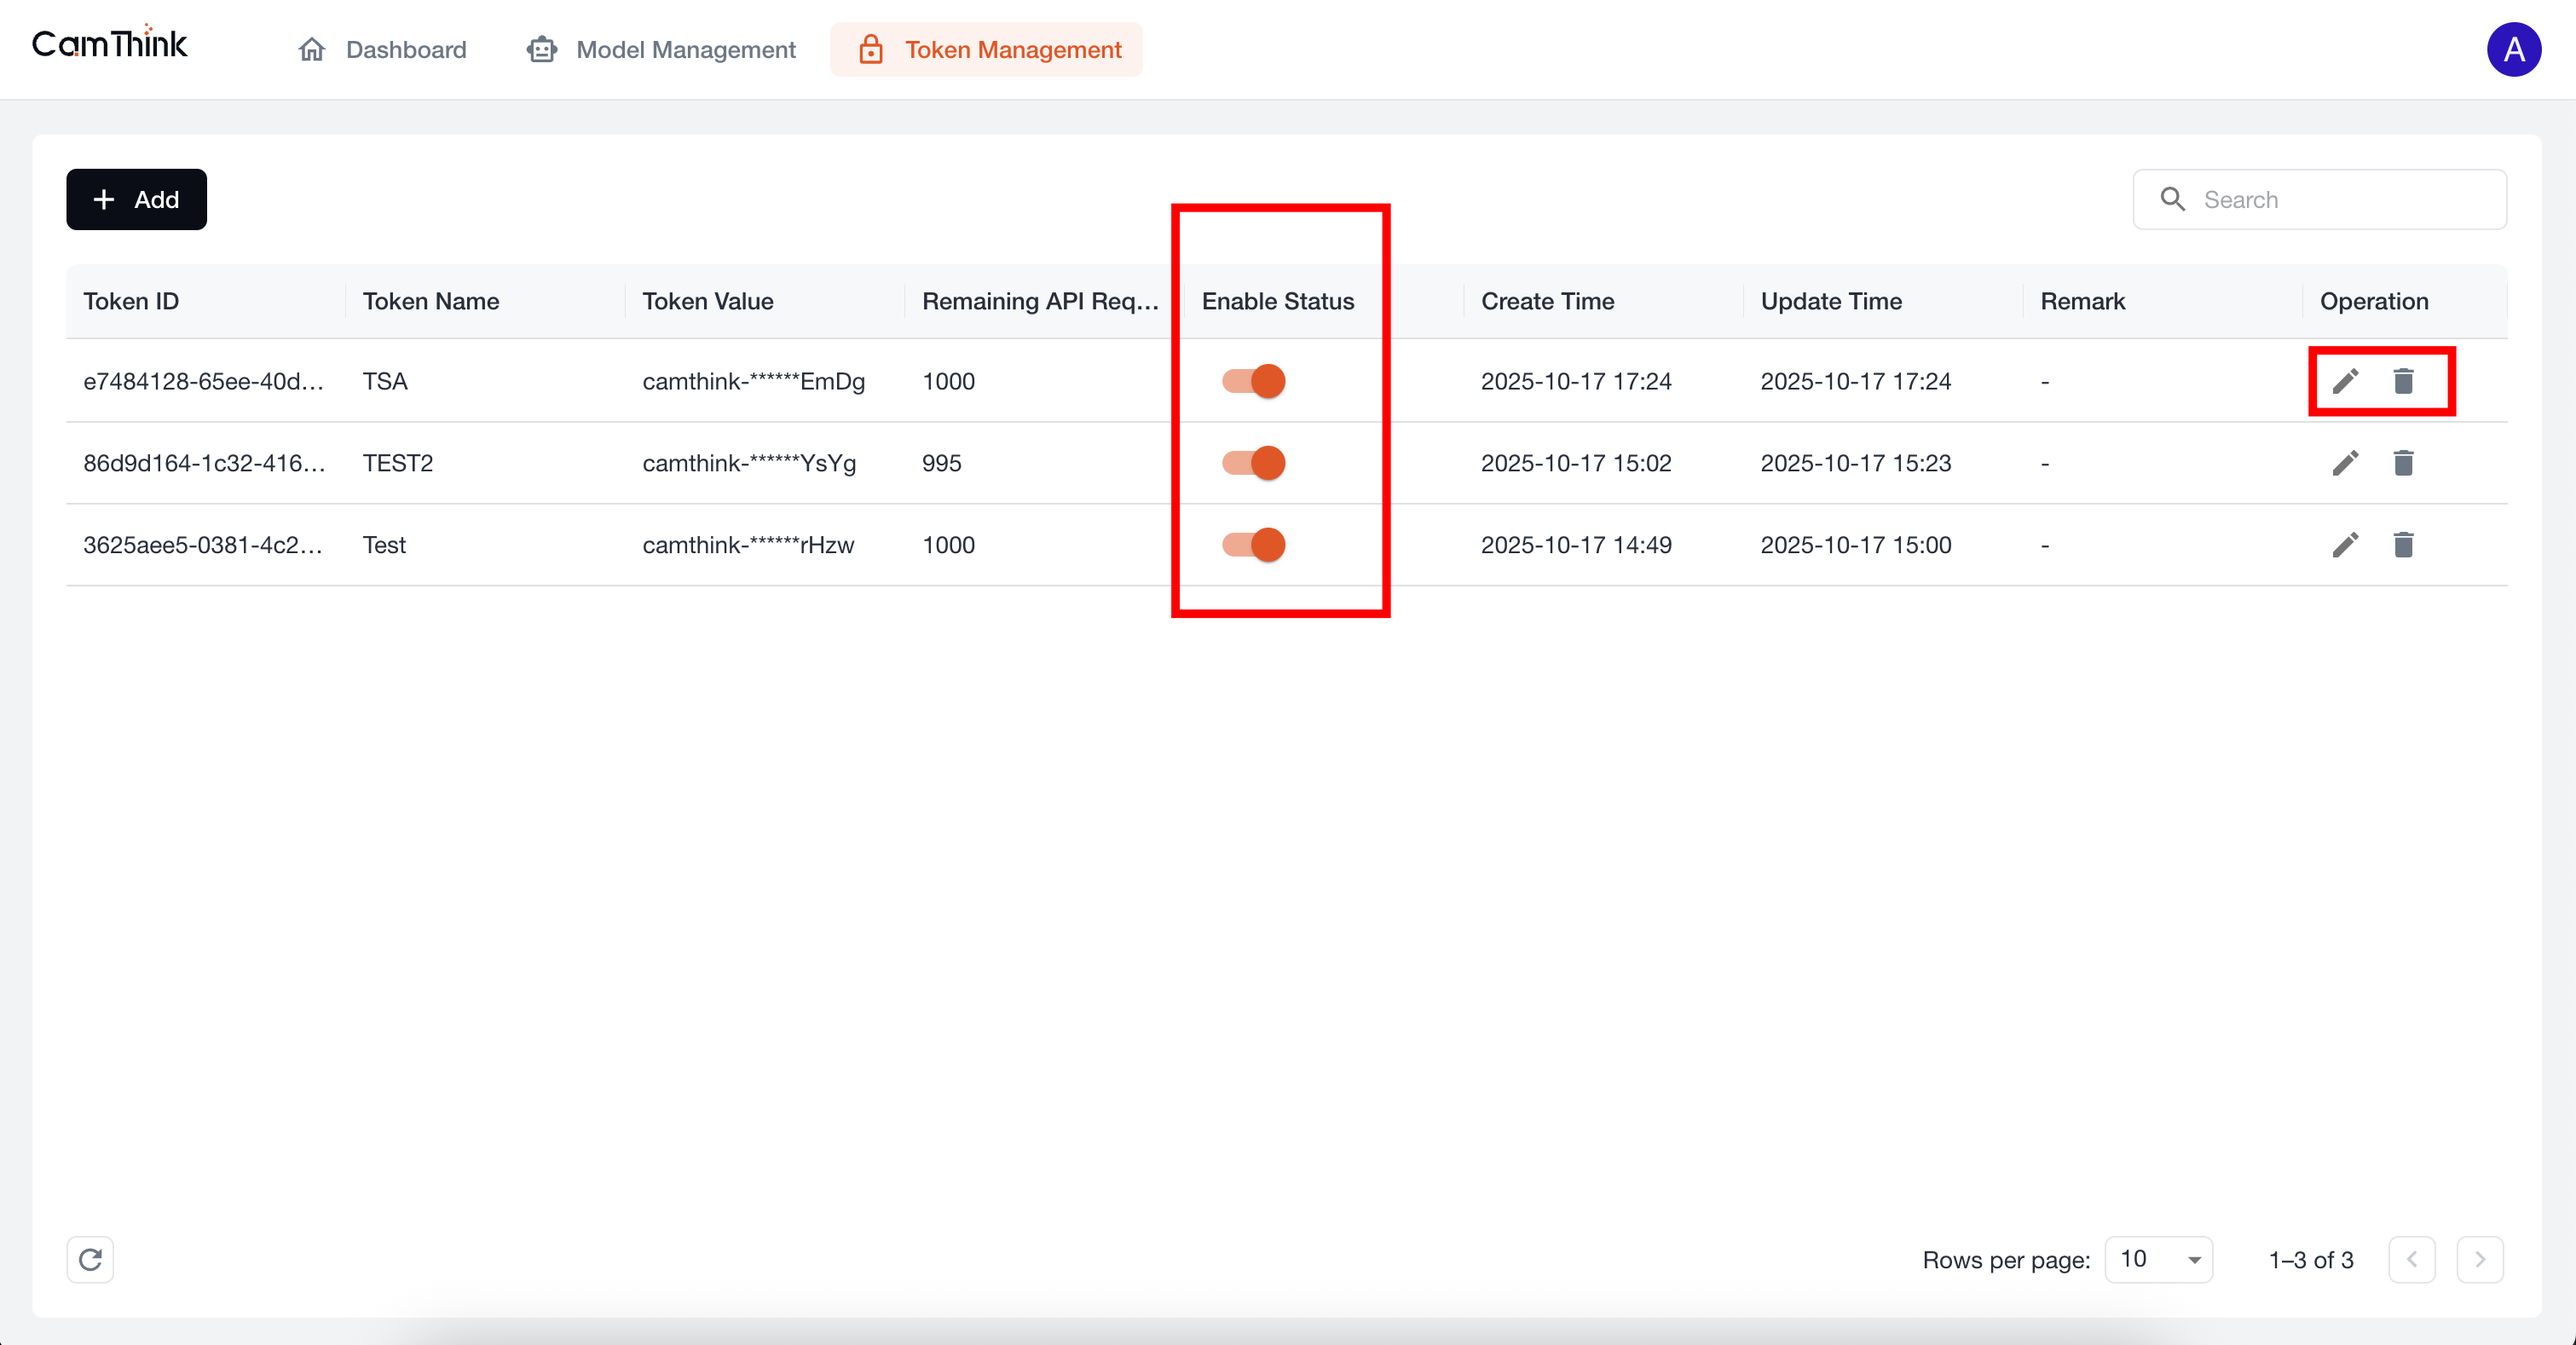 Tokens support delete, edit, and disable operations with the following controls:
- Disable: Toggle the status switch in the list to enable/disable a token. Disabled tokens are denied access. Operate with caution.
- Edit: Click the "Edit" button to modify model permissions, request limits, and the IP allowlist. This does not affect currently integrated clients.
- Delete: Click the "Delete" button to remove a token. This operation is highly risky and will affect clients using the token. Avoid unless necessary. If confirmed, click "Delete" in the dialog.