Quick Start
Introduction
Cinfer is a general-purpose Vision AI inference software by CamThink, open to the developer community. It supports deploying Vision AI inference services, provides model management, and exposes standard OpenAPI services. It is suitable for integrating as an image recognition AI component in vision application development, allowing you to call various models for image recognition. It is lightweight and simple, making it ideal for quickly adding models for deployment and project integration.
Tech Stack
- Backend: Python, FastAPI, SQLAlchemy, ONNX Runtime
- Frontend: React, TypeScript
- Containerization: Docker, Docker Compose
- Web Server: Nginx
Model Support
Currently only ONNX model management and deployment are supported, for the following ONNX model tasks. If you need model training, see "YOLO Model Training". For software operation, see "User Guide".
| Model Type | Notes |
|---|---|
| Classification | Supports common image/video classification models (animals/objects/scenes) |
| Detection | Supports object detection models (e.g., YOLO, SSD) for localization and classification |
| Segmentation | Supports image segmentation models (semantic/instance; for regions, lane lines, etc.) |
| OCR | Supports text detection and recognition for extracting text from images |
| Other Custom ONNX Models | Supports custom AI models that comply with ONNX (e.g., domain-specific algorithms) |
Installation and Usage
Environment Preparation
Please confirm the following are installed:
- Docker Engine (recommended version 20.10.0 or later). See "Install Docker Engine"
- Docker Compose (recommended version v2.0.0 or later). See "Install Docker Compose"
- If you need GPU inference, ensure NVIDIA drivers and NVIDIA Docker are correctly installed. See "Install NVIDIA Docker"
Download Project Code
Clone the project locally
git clone https://github.com/camthink-ai/cinfer.git
 After successful installation, enter the project folder
cd cinfer
Install Using the Deployment Script
The project provides a flexible deployment script located in the root directory named deploy.sh, supporting multiple deployment methods and configuration options. Installation and management commands are as follows.
# View script commands
./deploy.sh

# Deploy with GPU
./deploy.sh --gpu yes

# Custom ports
./deploy.sh --backend-port 8000 --frontend-port 3000

# Specify backend host
./deploy.sh --host 192.168.100.2
Use the deploy.sh script to install. Run the following command to install project Docker. For other configurations, run deploy.sh directly to view commands.
Before executing, check whether your local ports 3000 and 8000 are in conflict
./deploy.sh --backend-port 8000 --frontend-port 3000
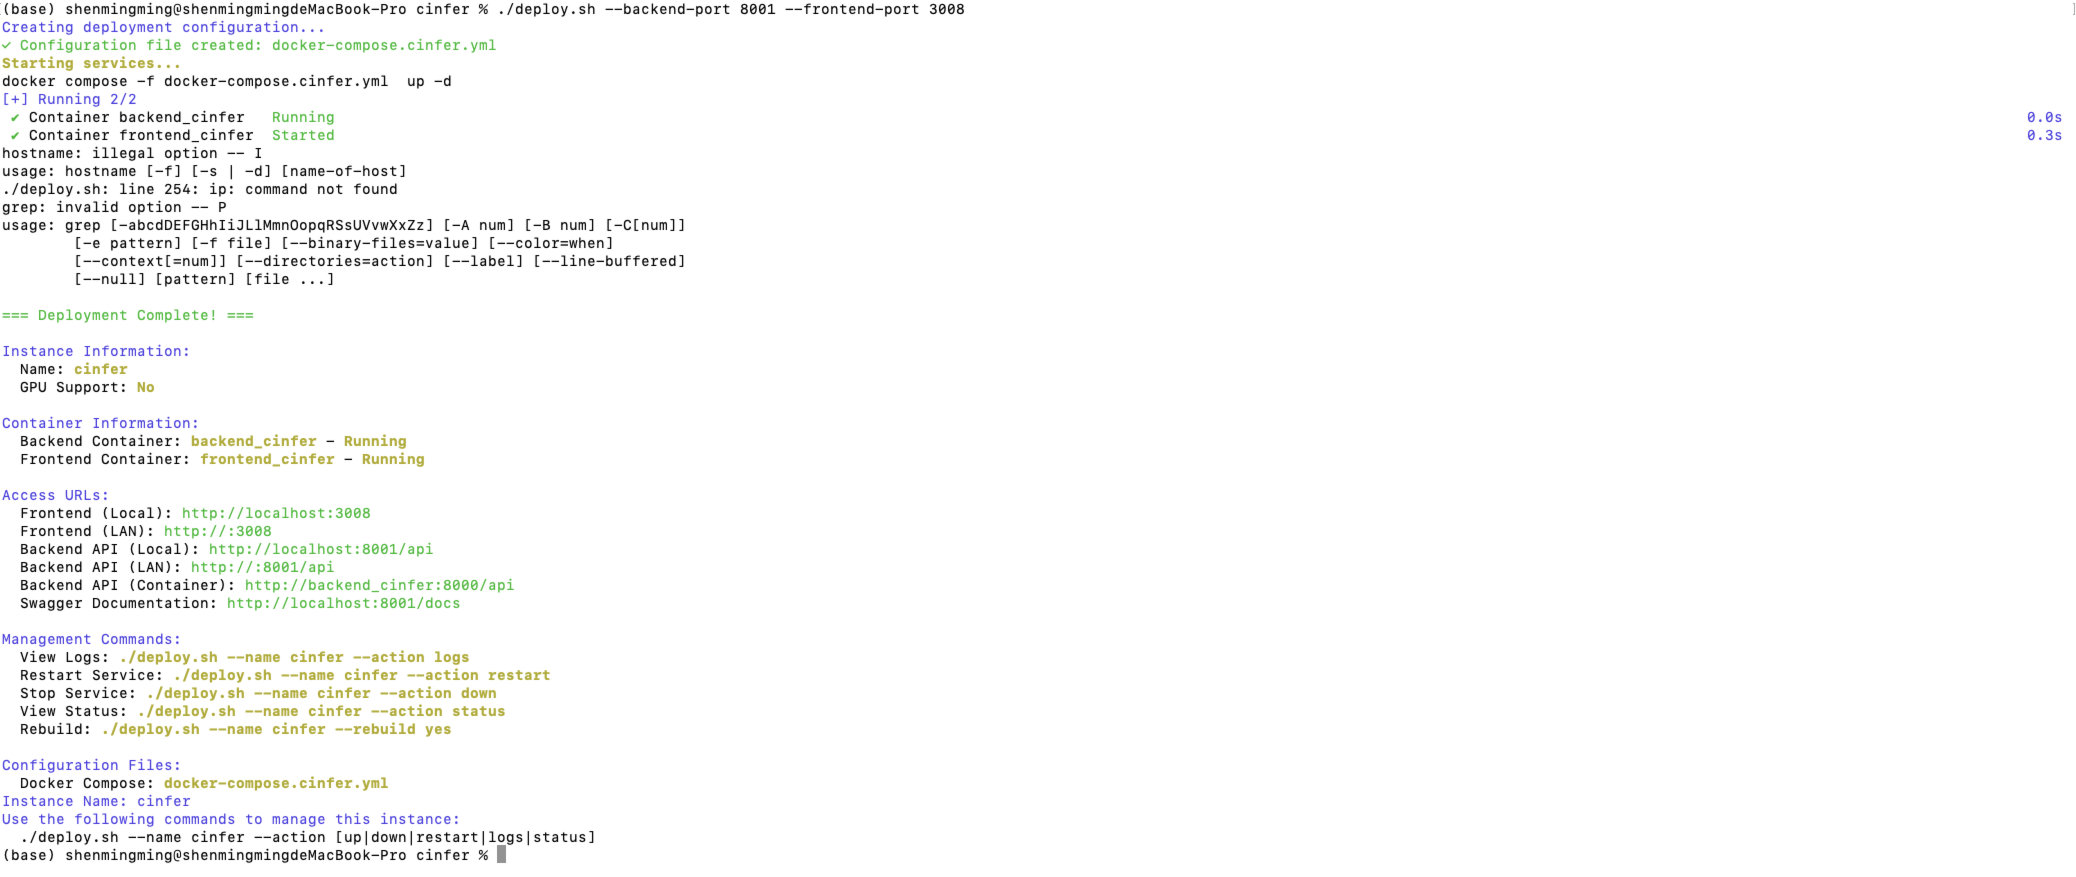
After installation, you can access the service via:
- Frontend (Local): http://localhost:3000
- Backend API (Local): http://localhost:8000/api
- Backend API (LAN): http://:8000/api
- Backend API (Container): http://backend_cinfer:8000/api
- Swagger Documentation: http://localhost:8000/docs
Quick Use
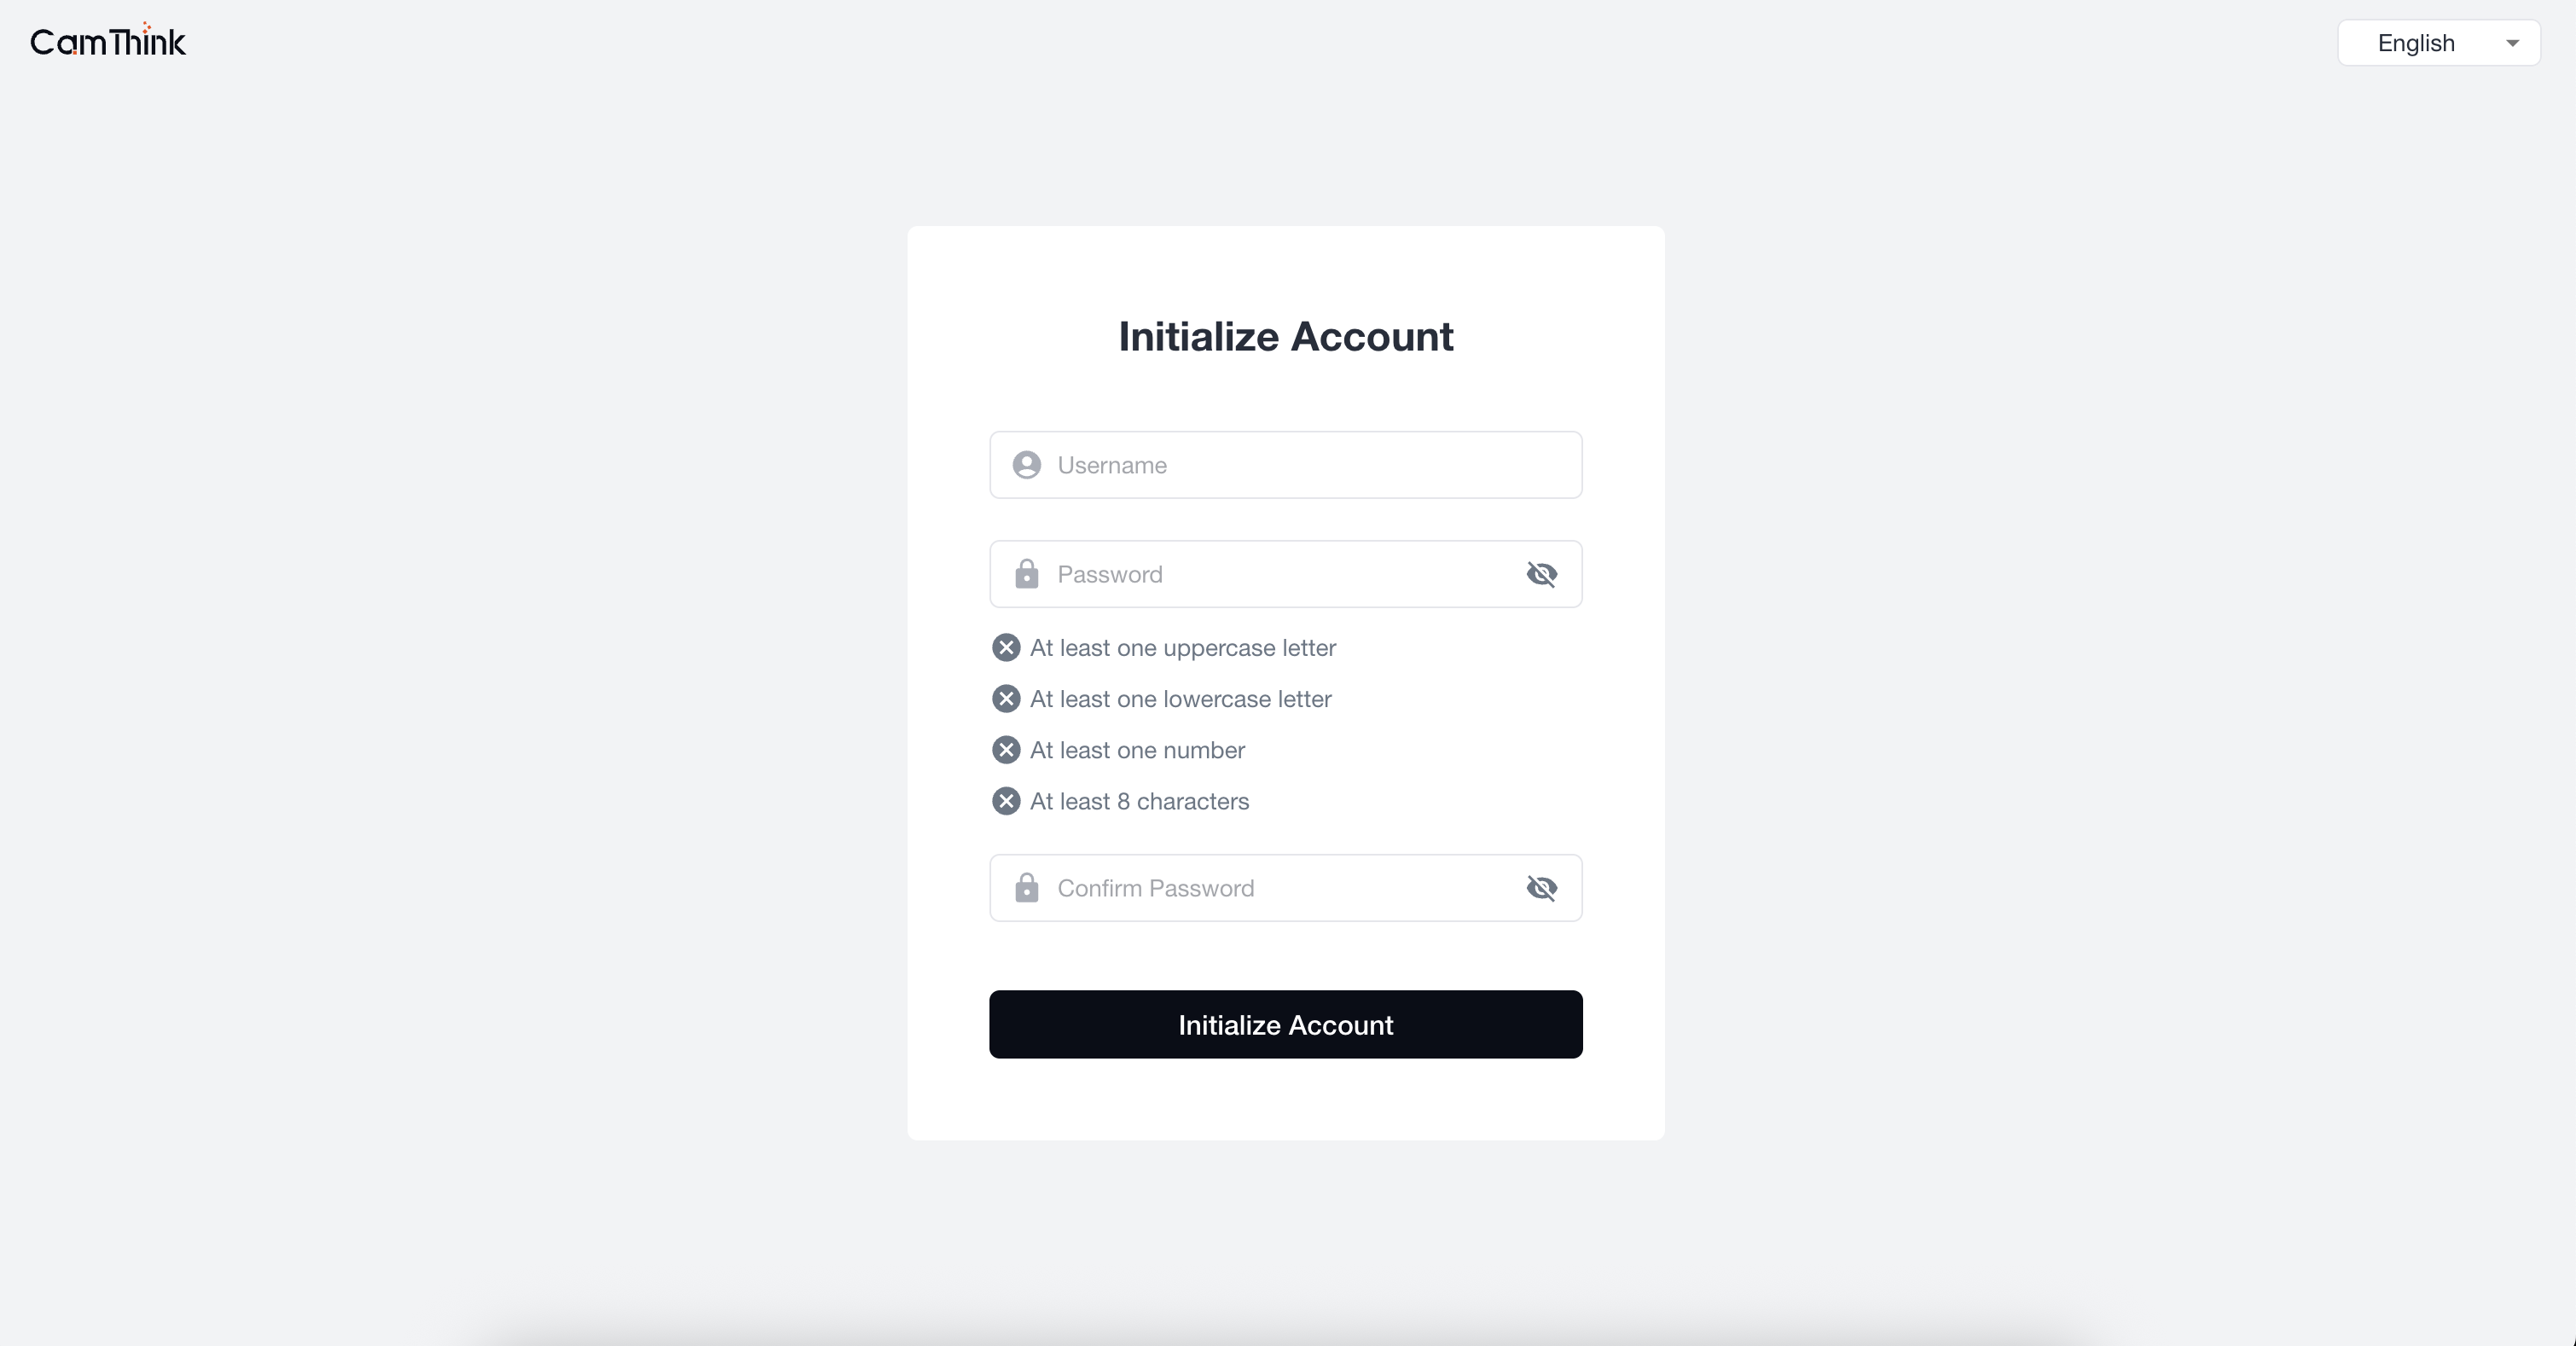
1. Register Super Administrator
Open a browser and visit "http://localhost:3000" to access the frontend project. Enter the initial administrator setup page, set the administrator account and password, then log in to enter the management page.
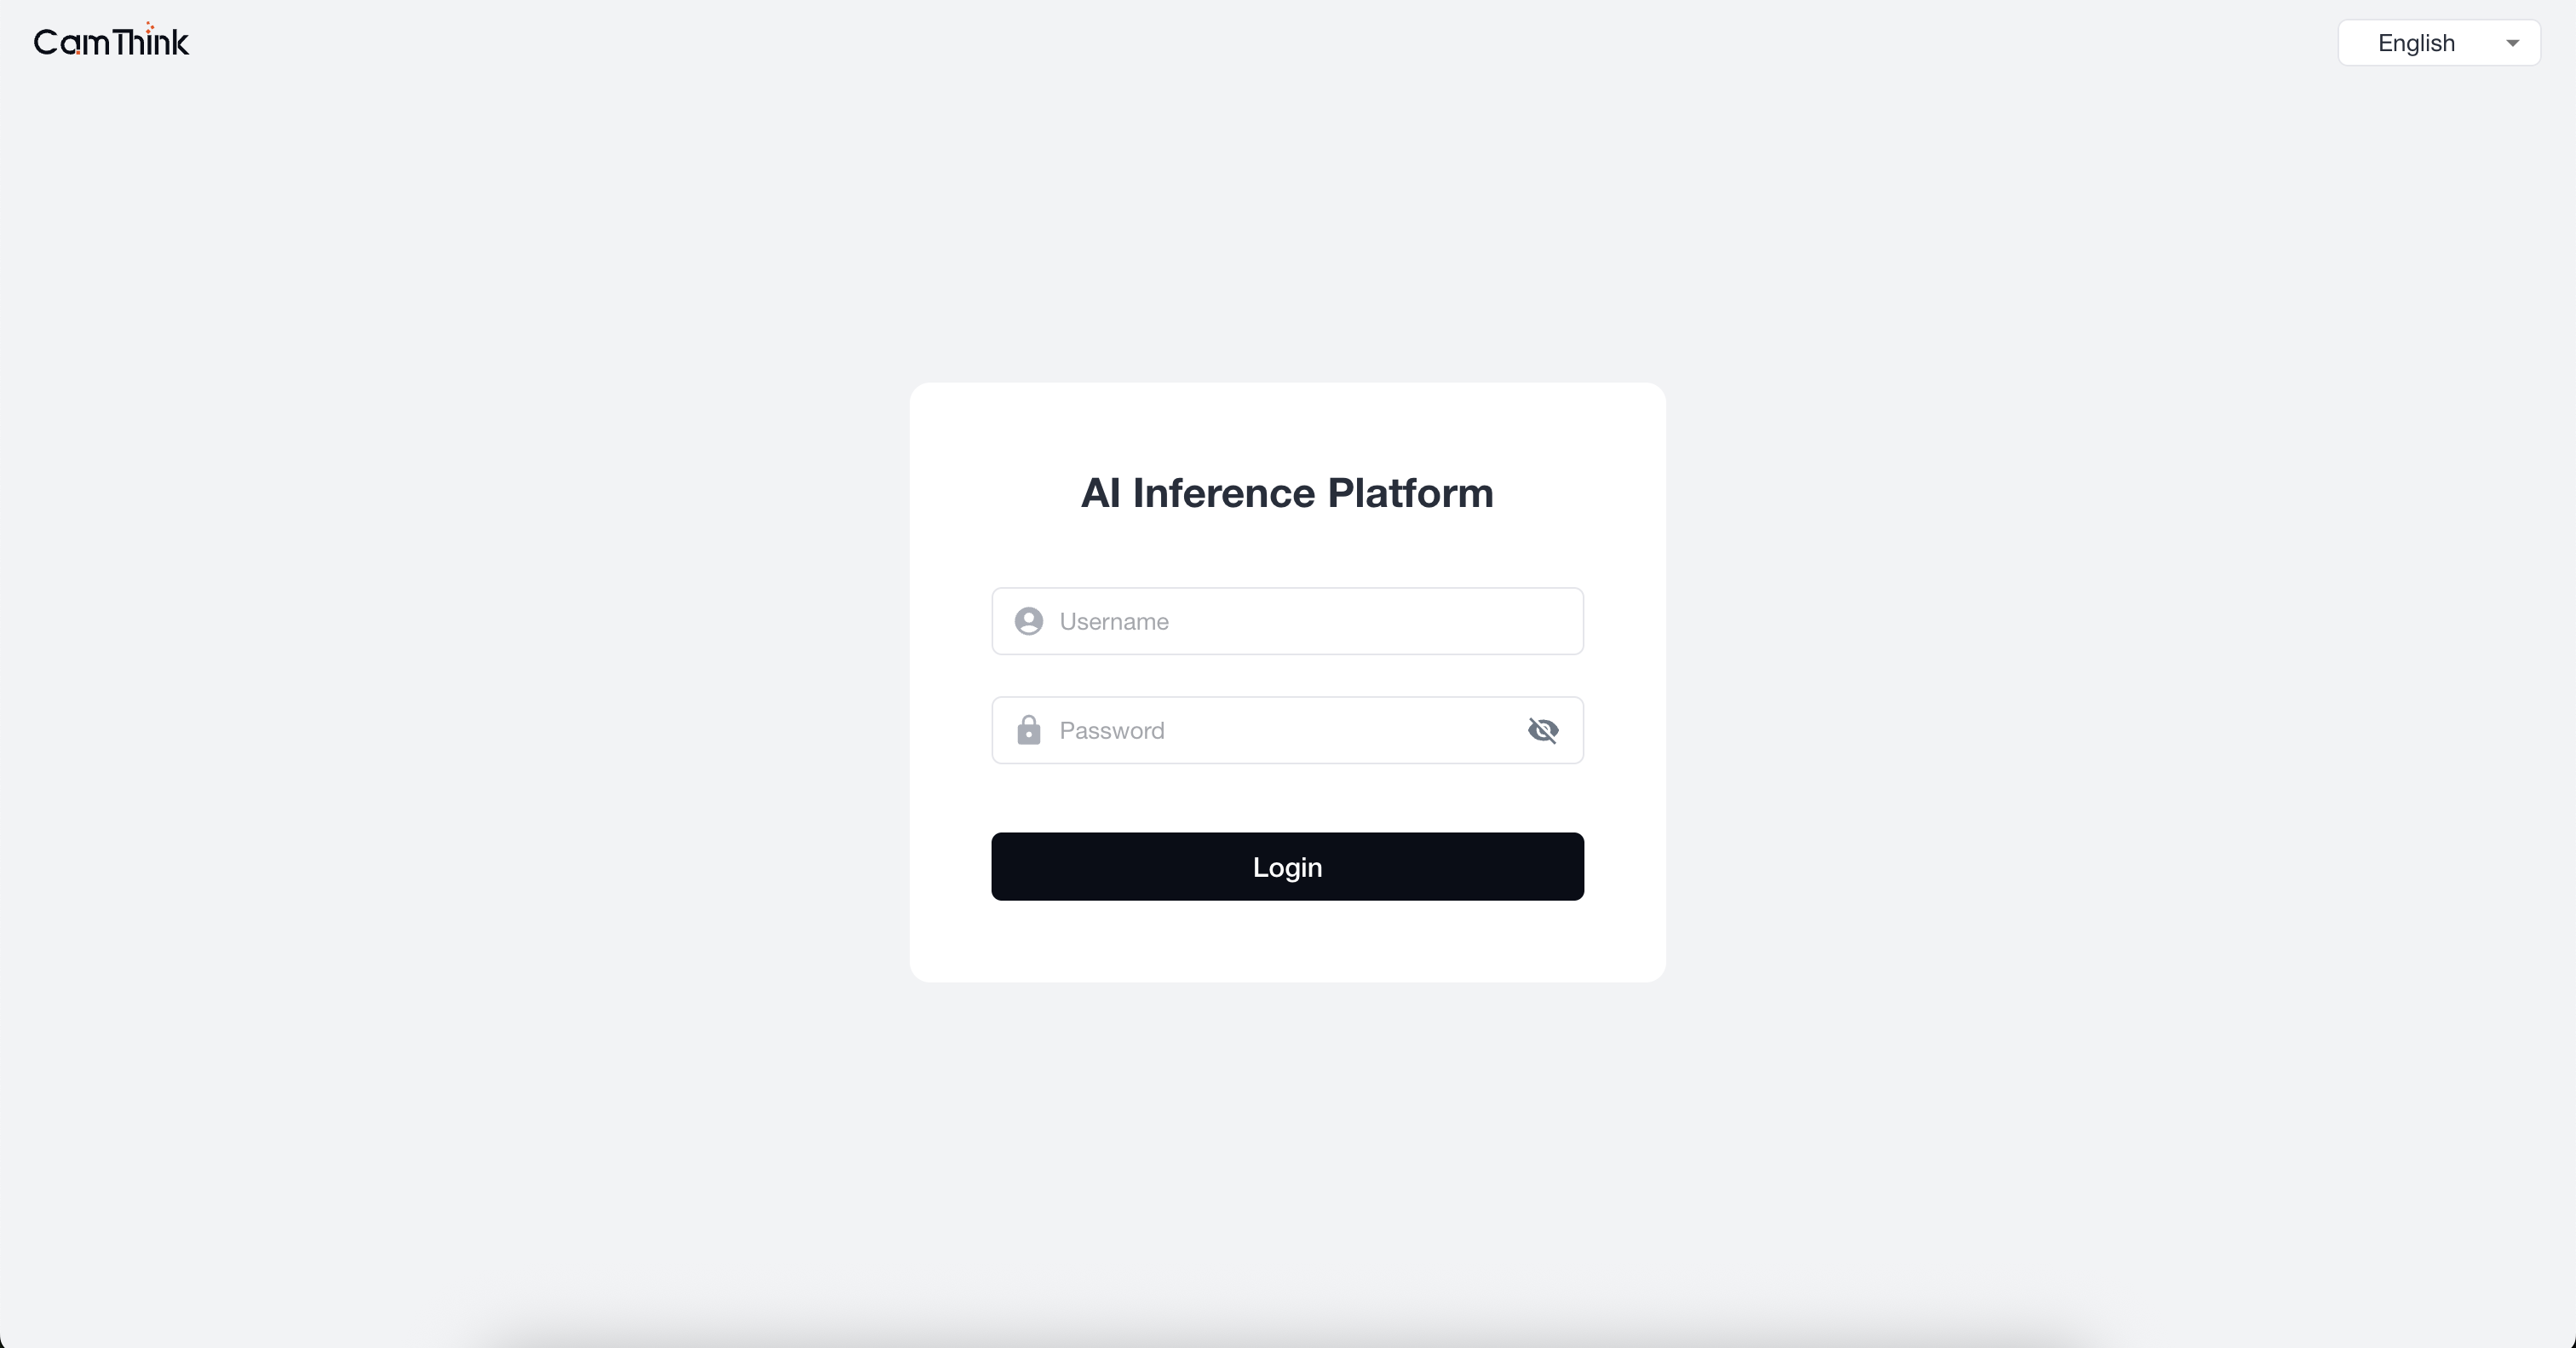
2. User Login
Enter the configured administrator account and password, then click login to enter the system page.
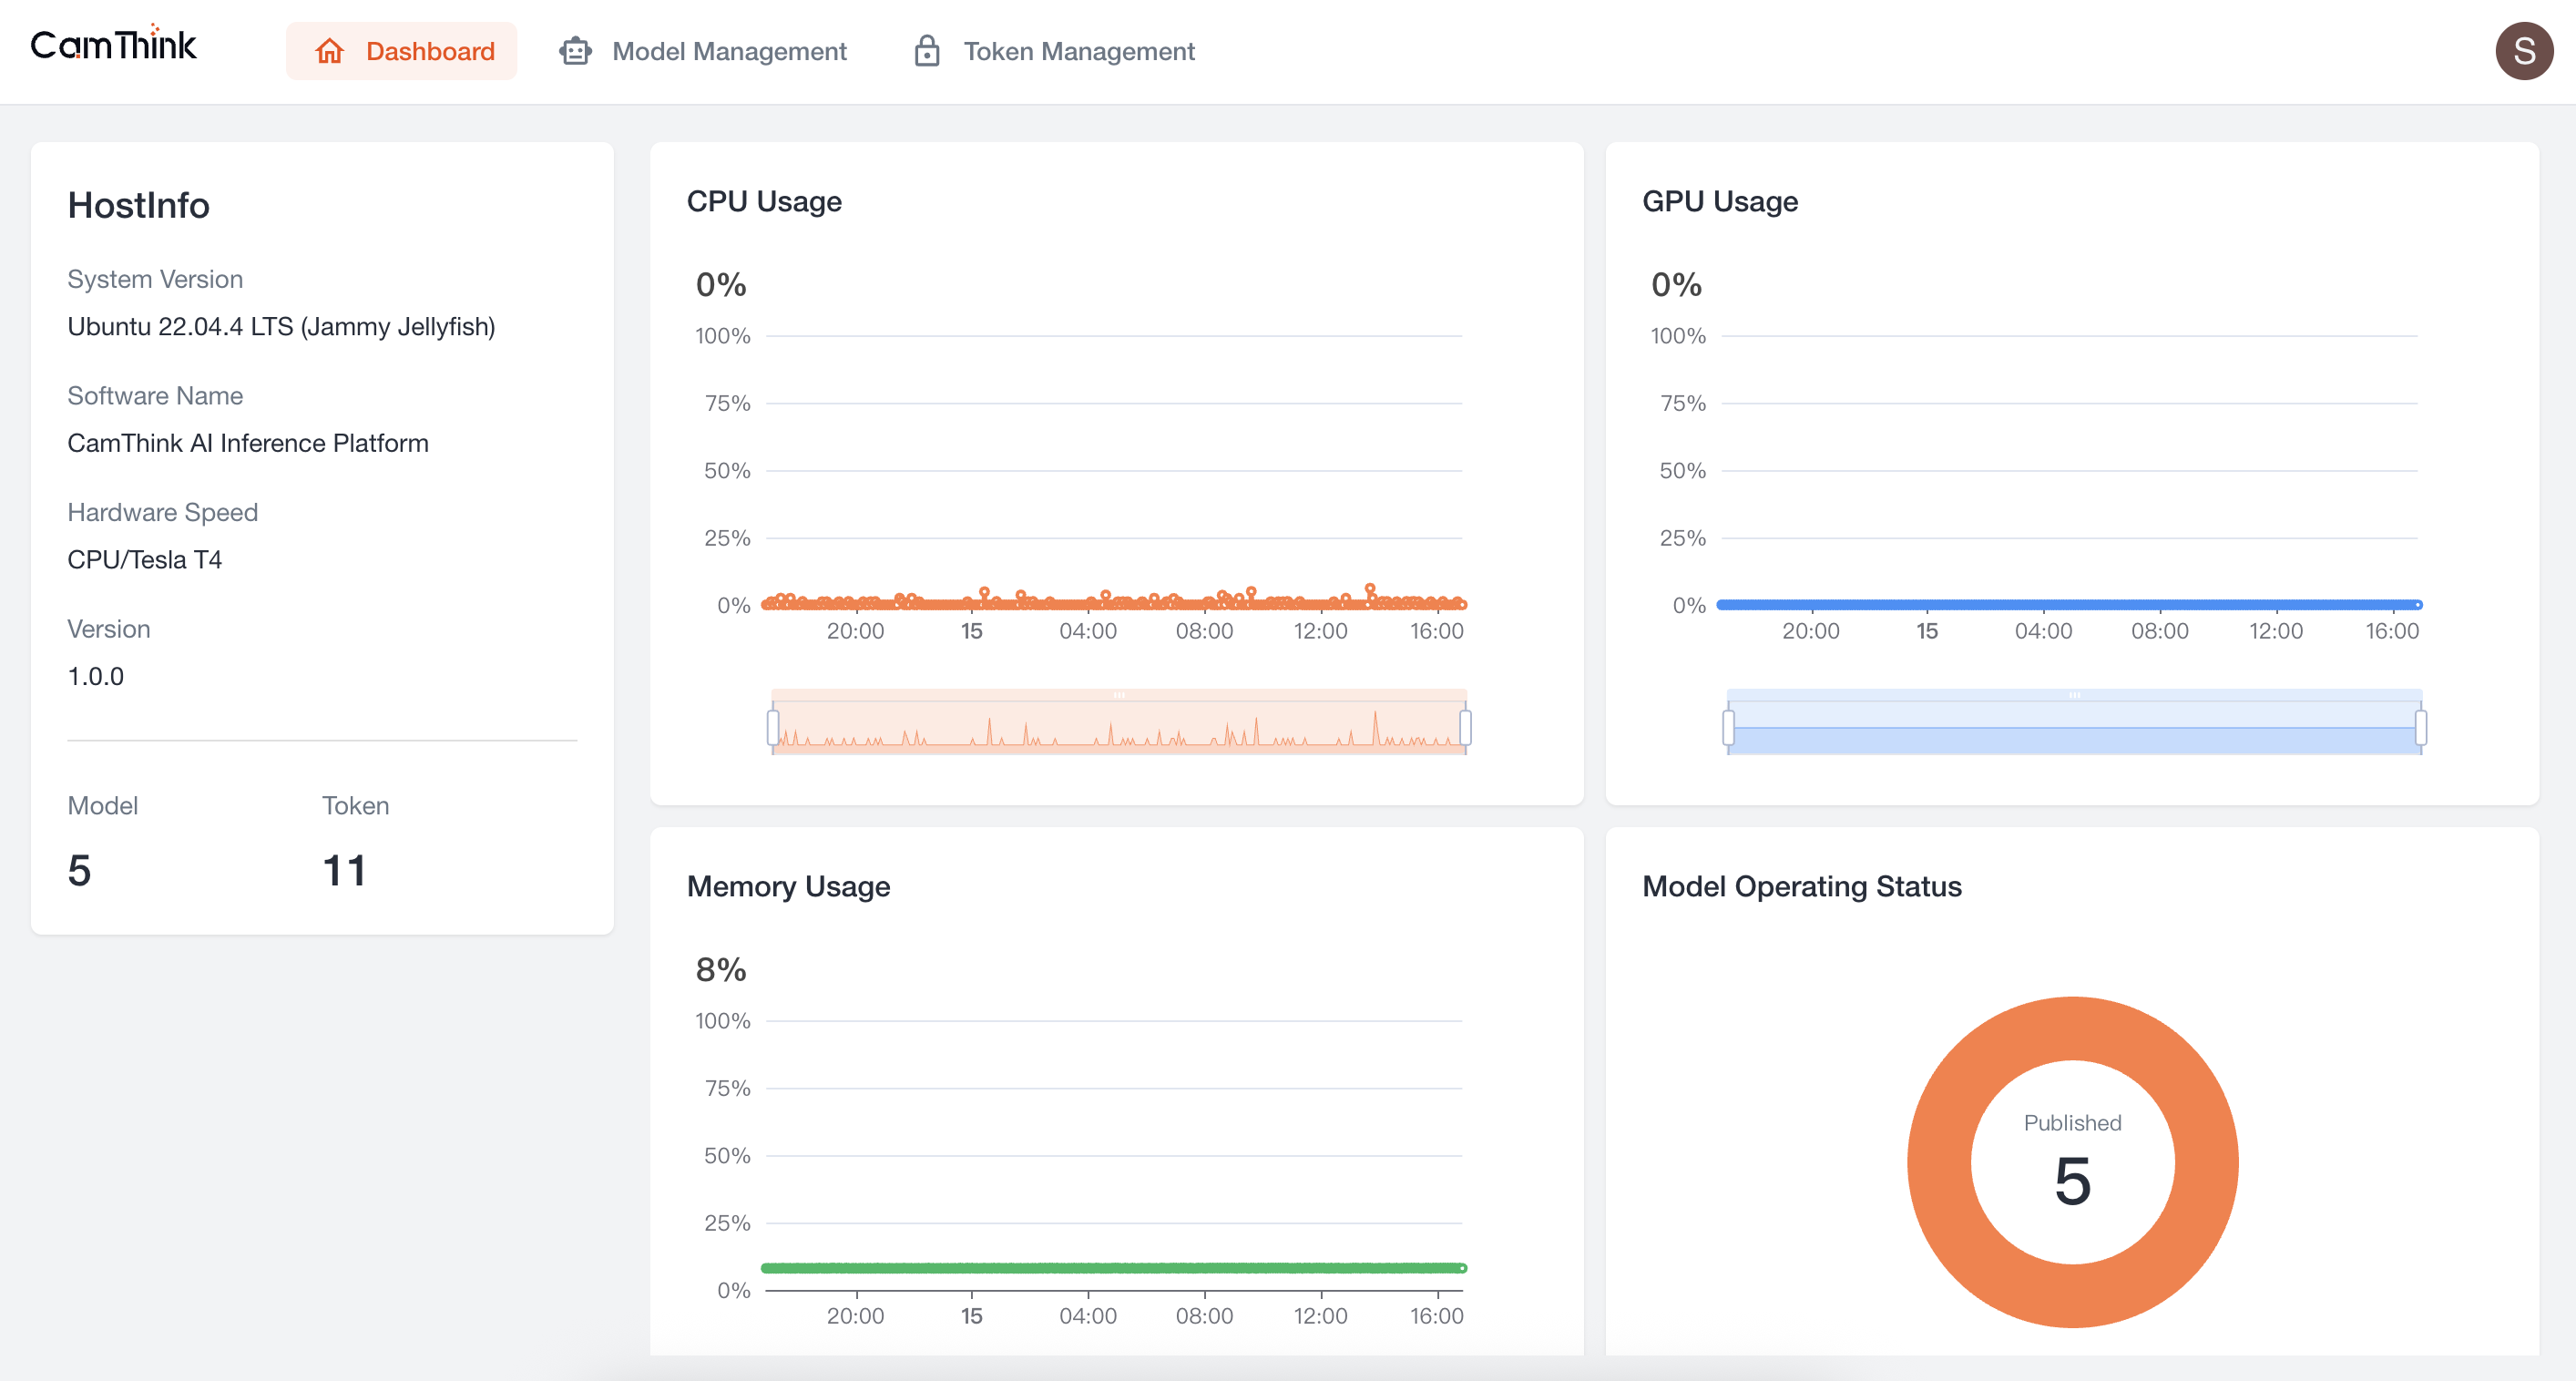
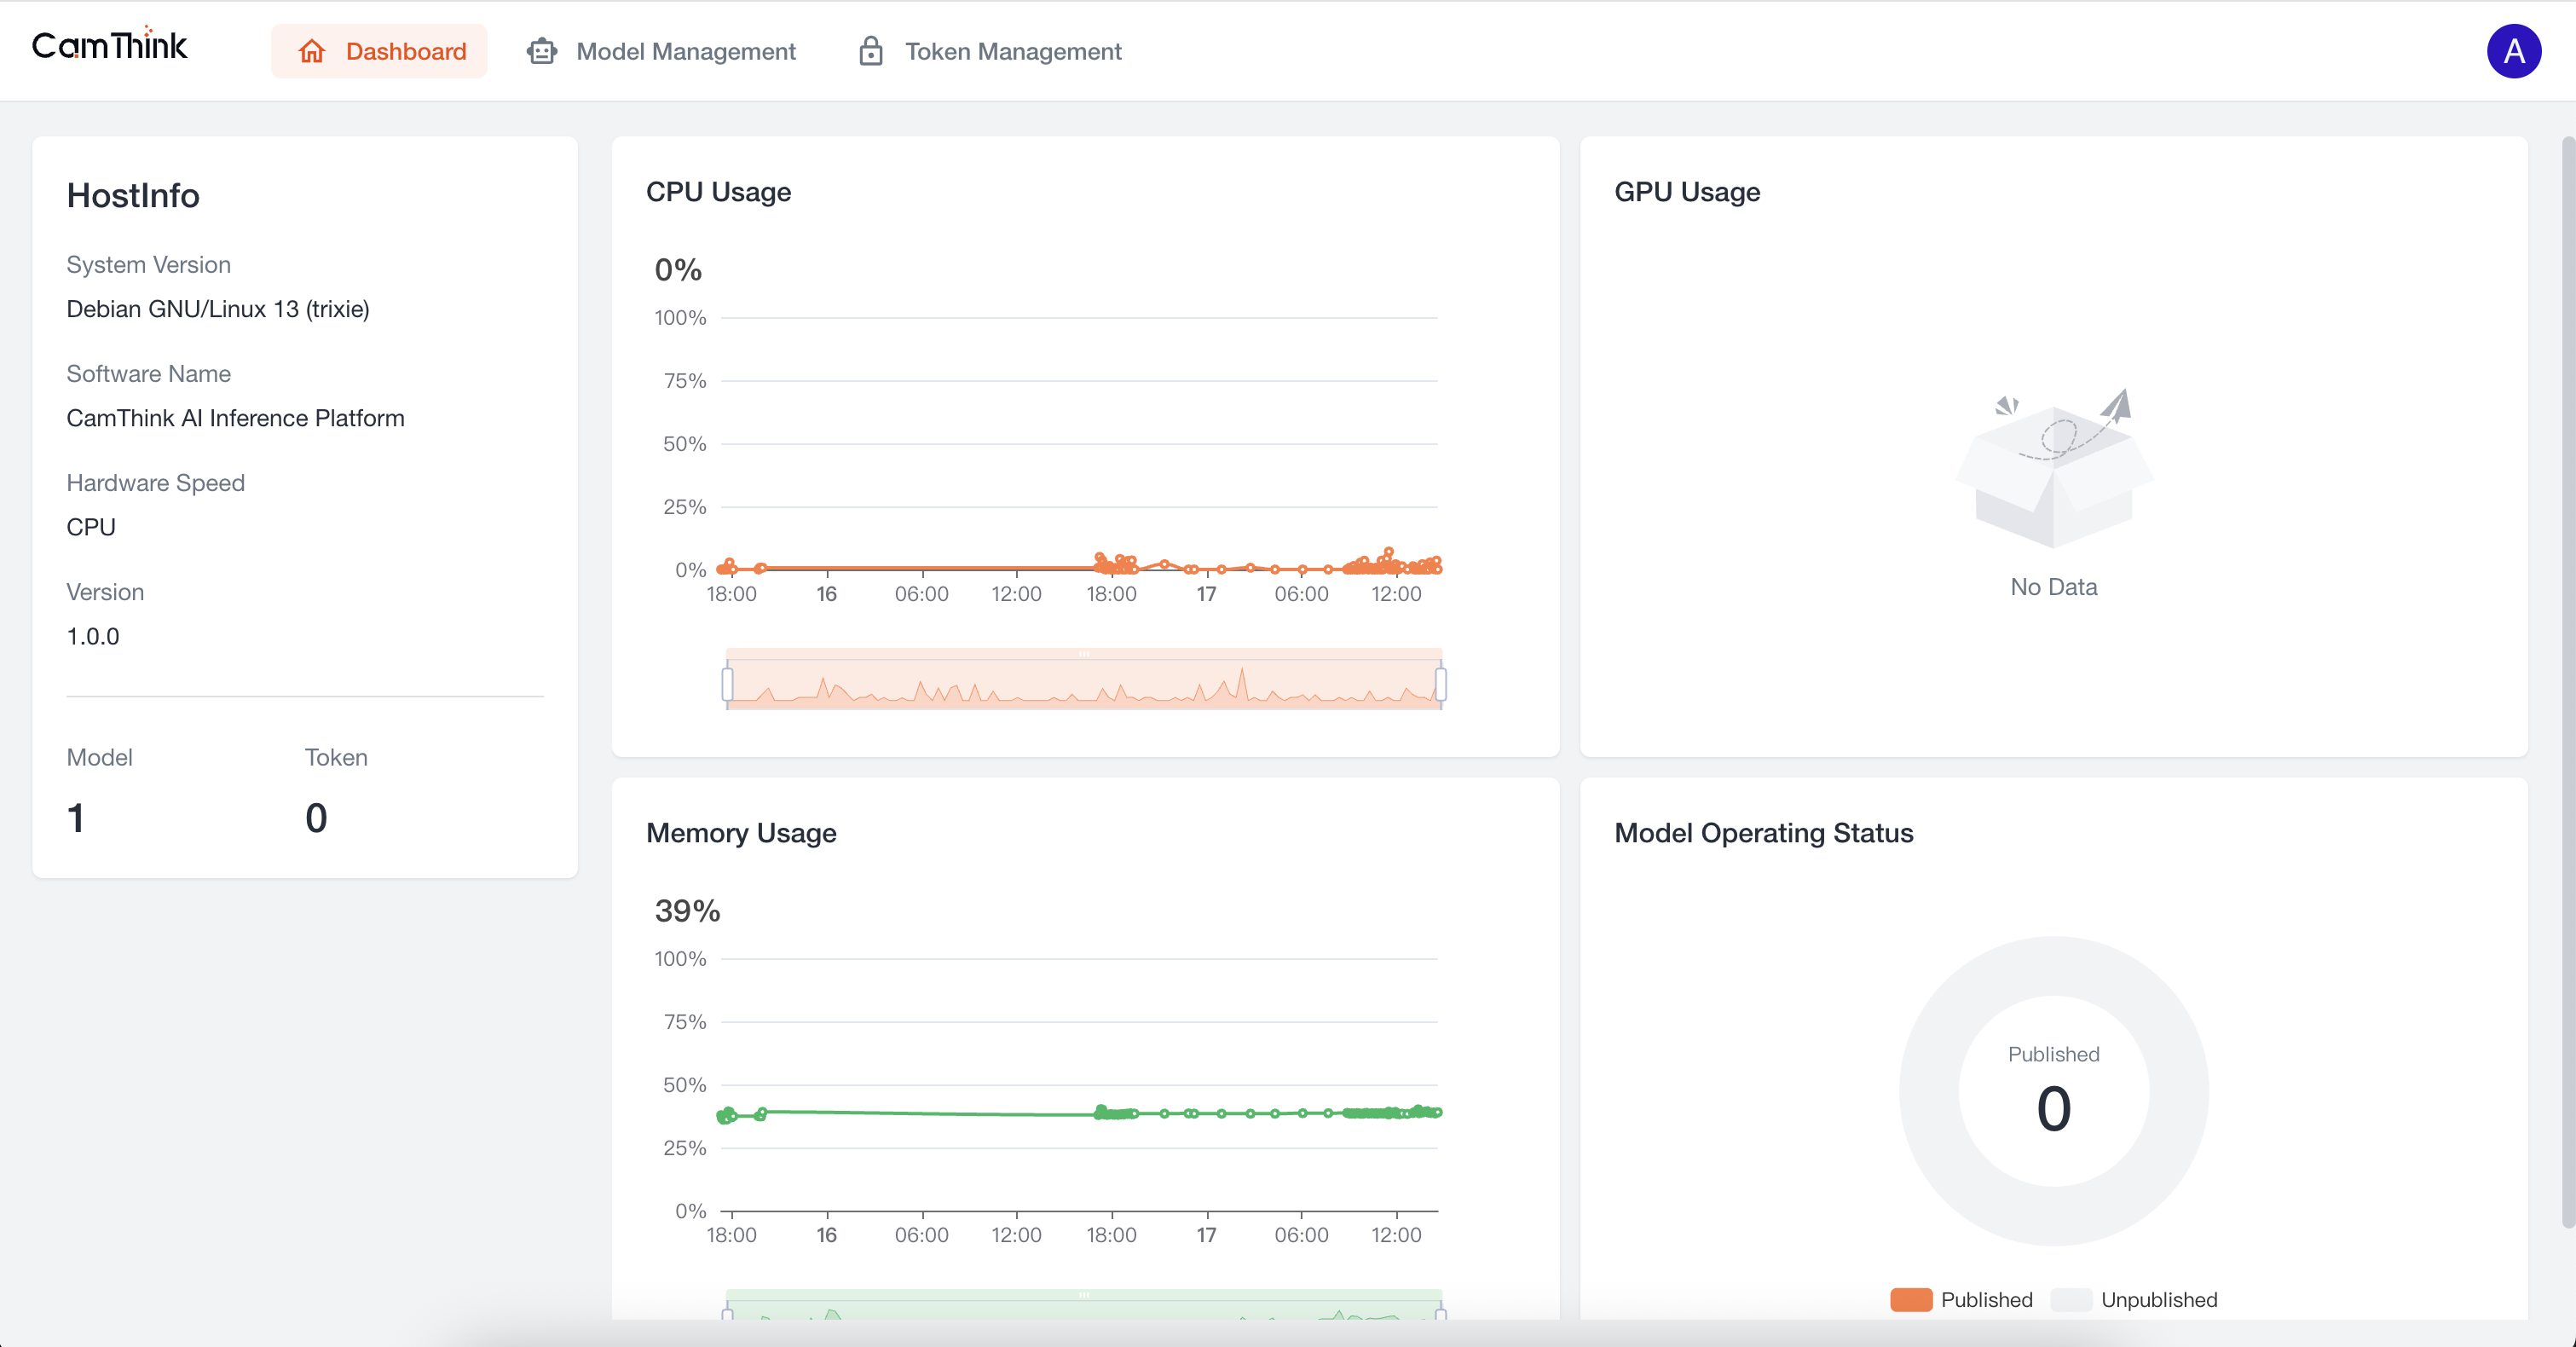
3. Enter the Home Page
After successful login, you will enter the Dashboard, where you can view the service’s resource usage.
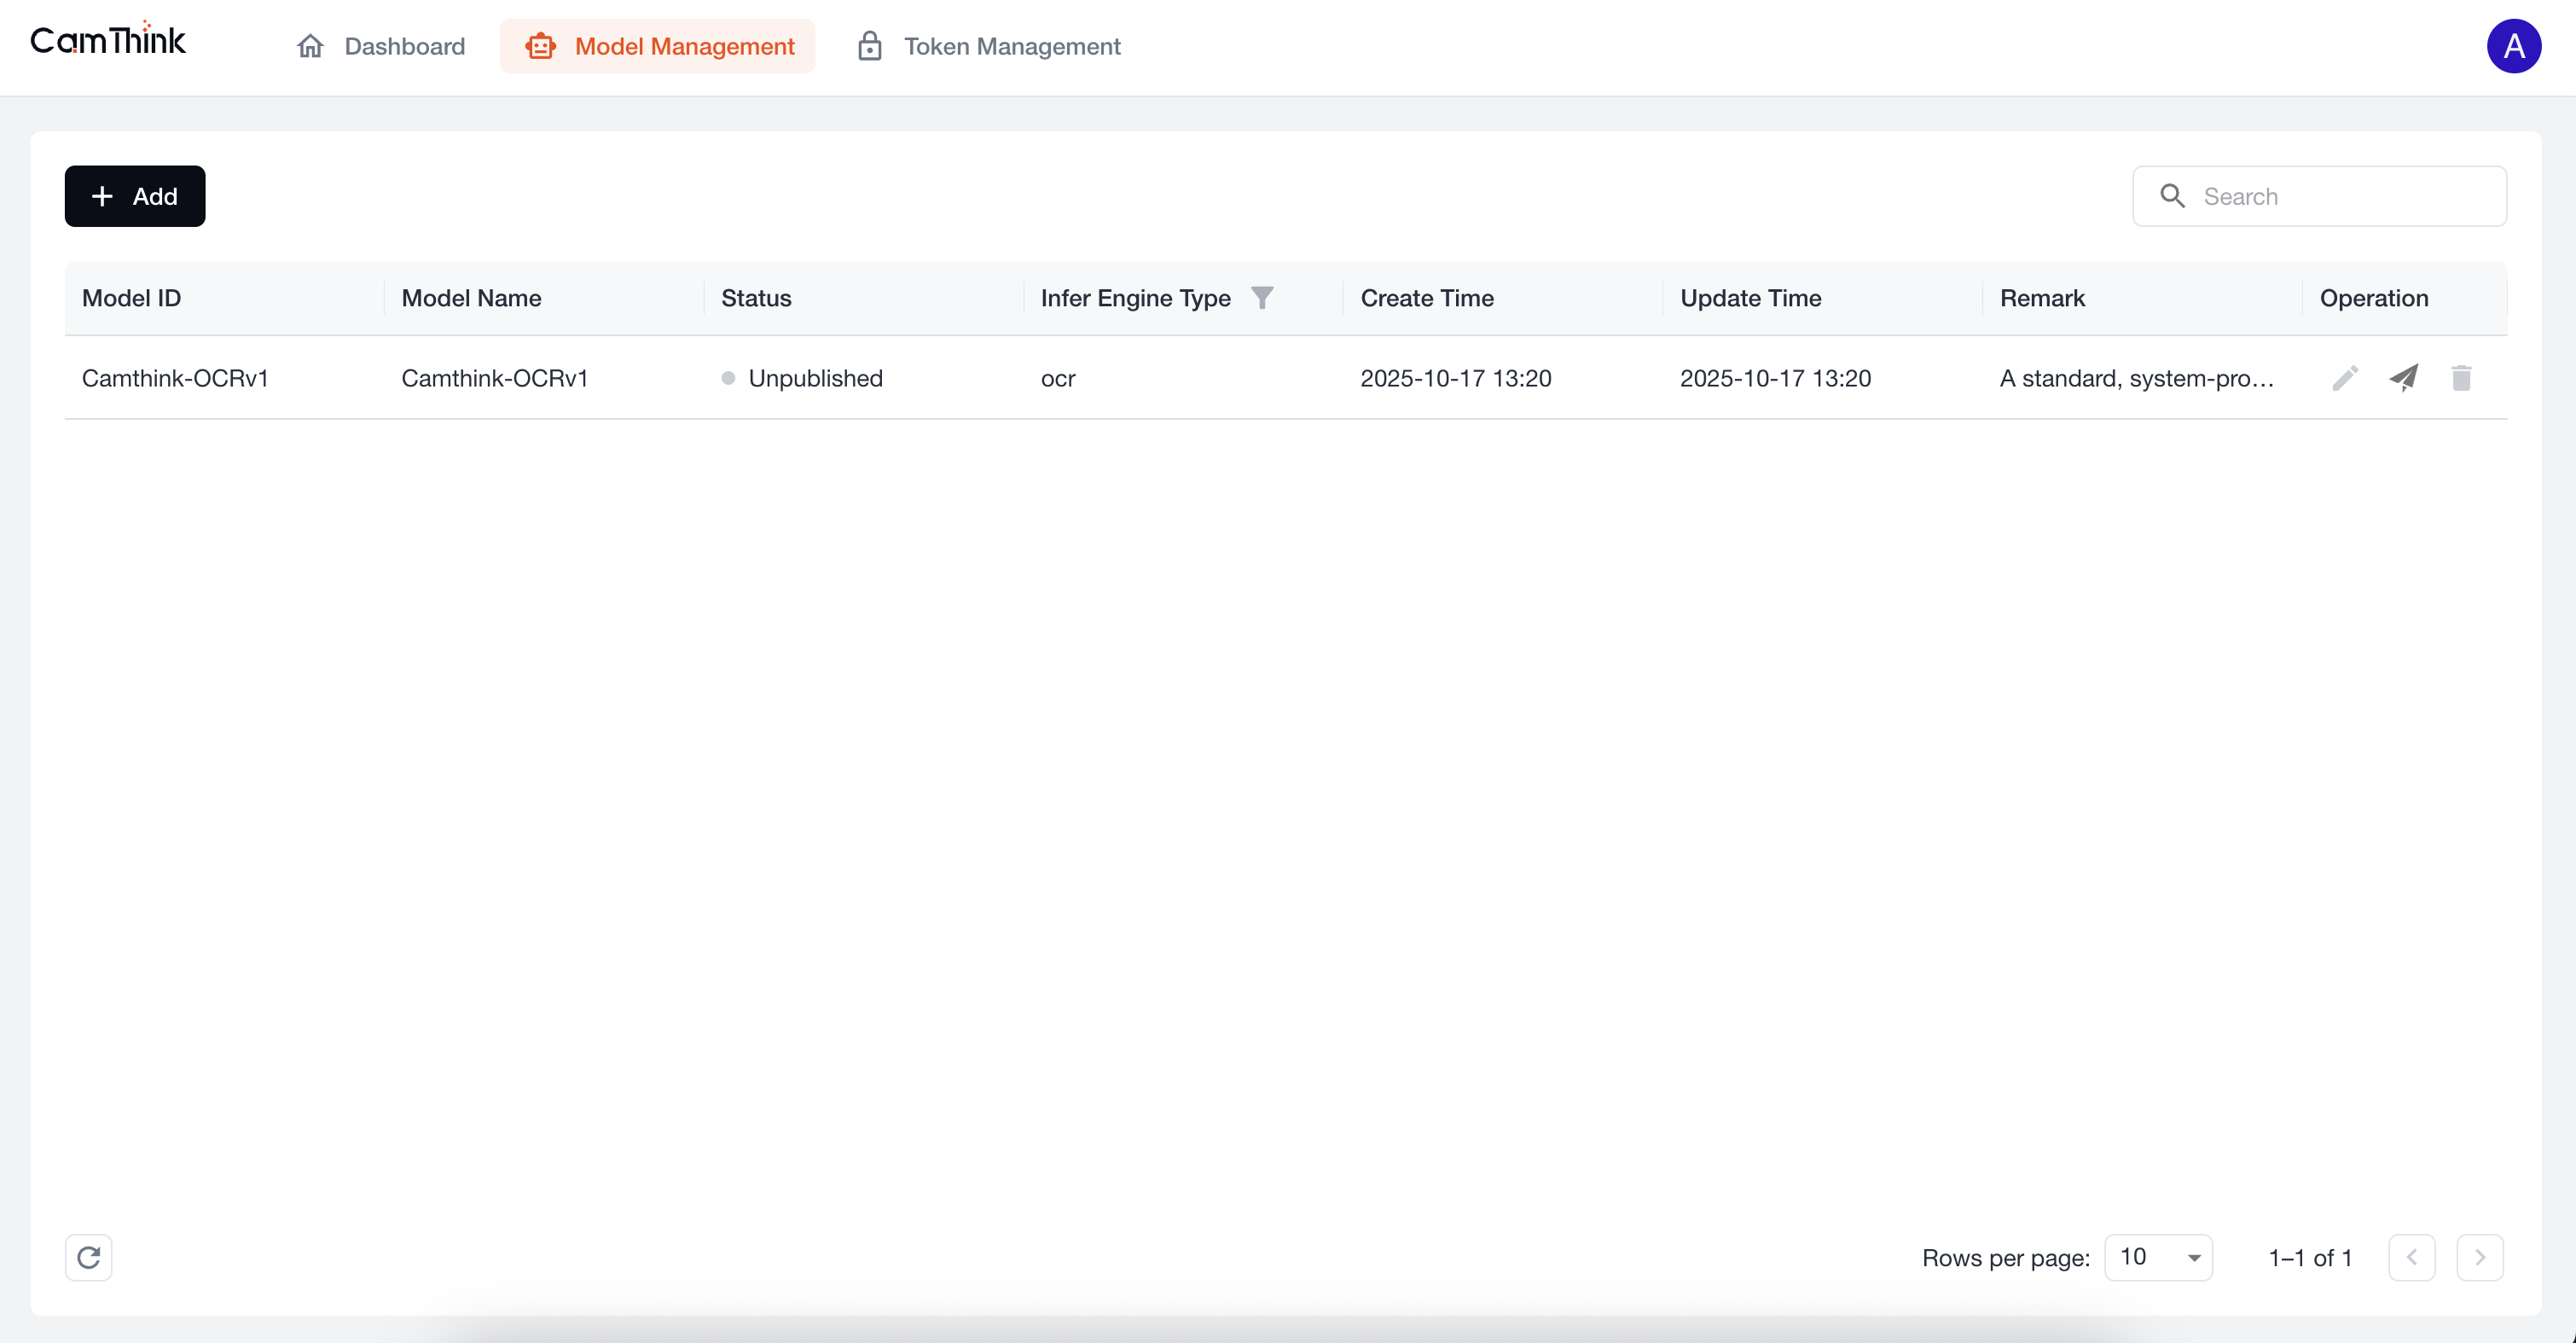
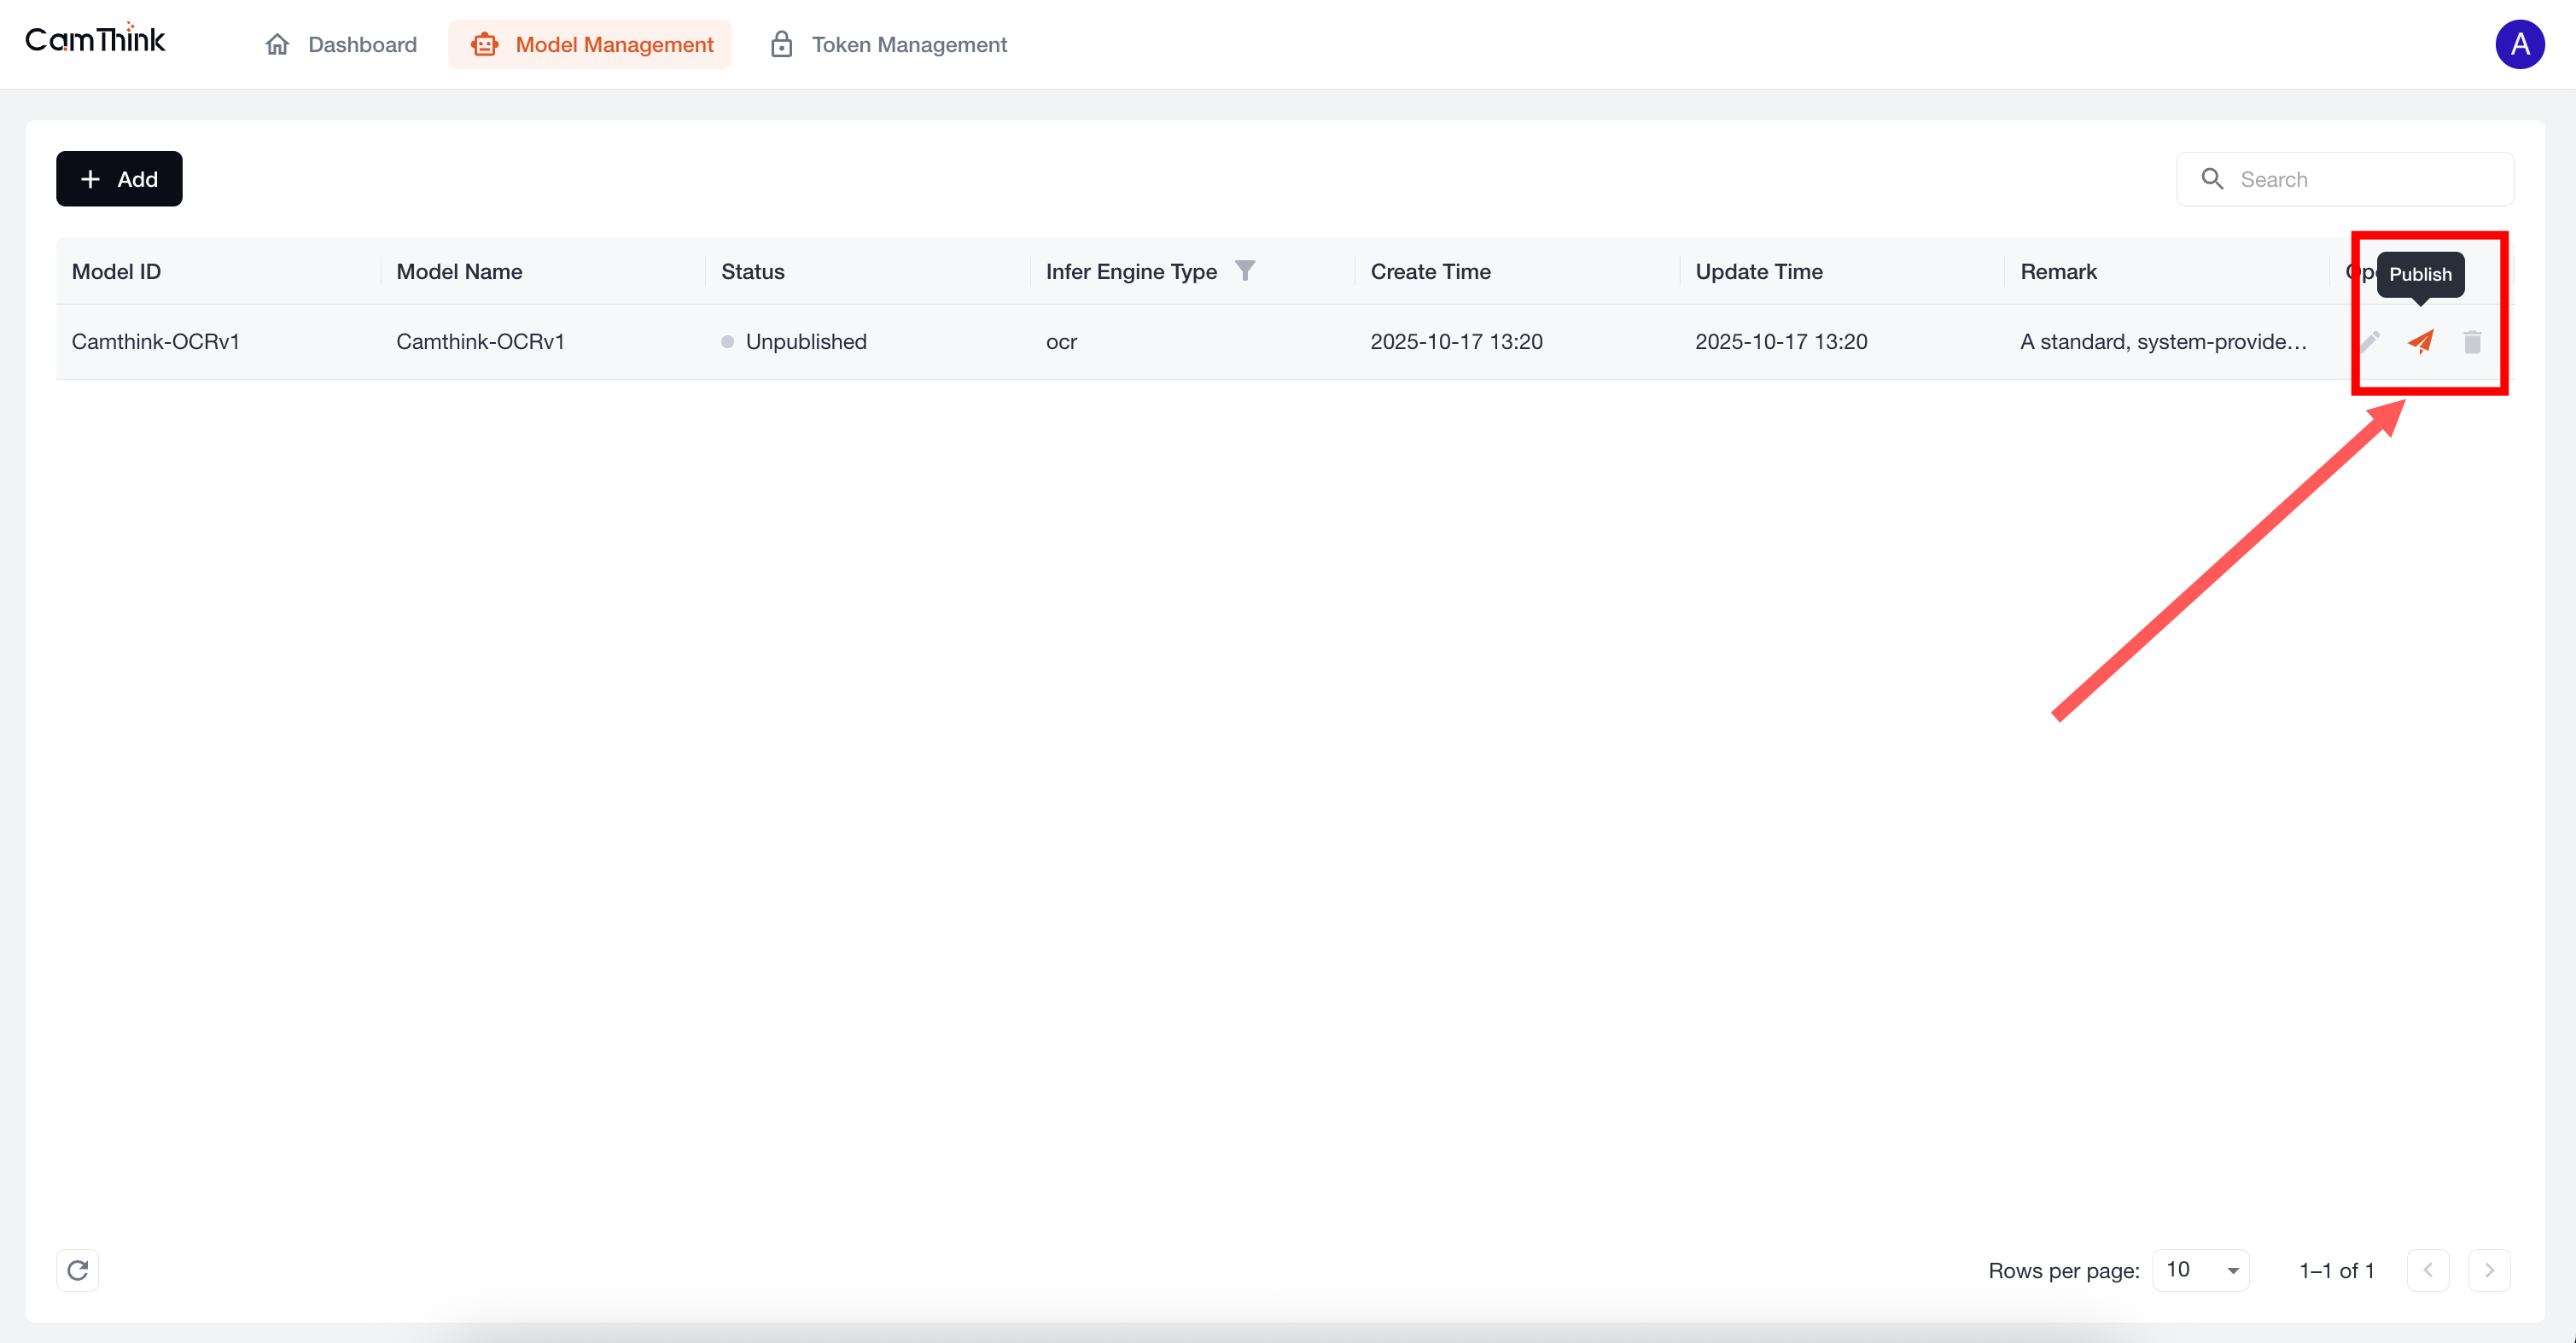
4. View Model Management
Click the Model Management menu to view the model list. The project currently includes a built-in OCR model. We can further test this model to verify that the service is functioning. First, click the "Publish" button on the right side of this default model to publish it, then create a Token. See the process below.
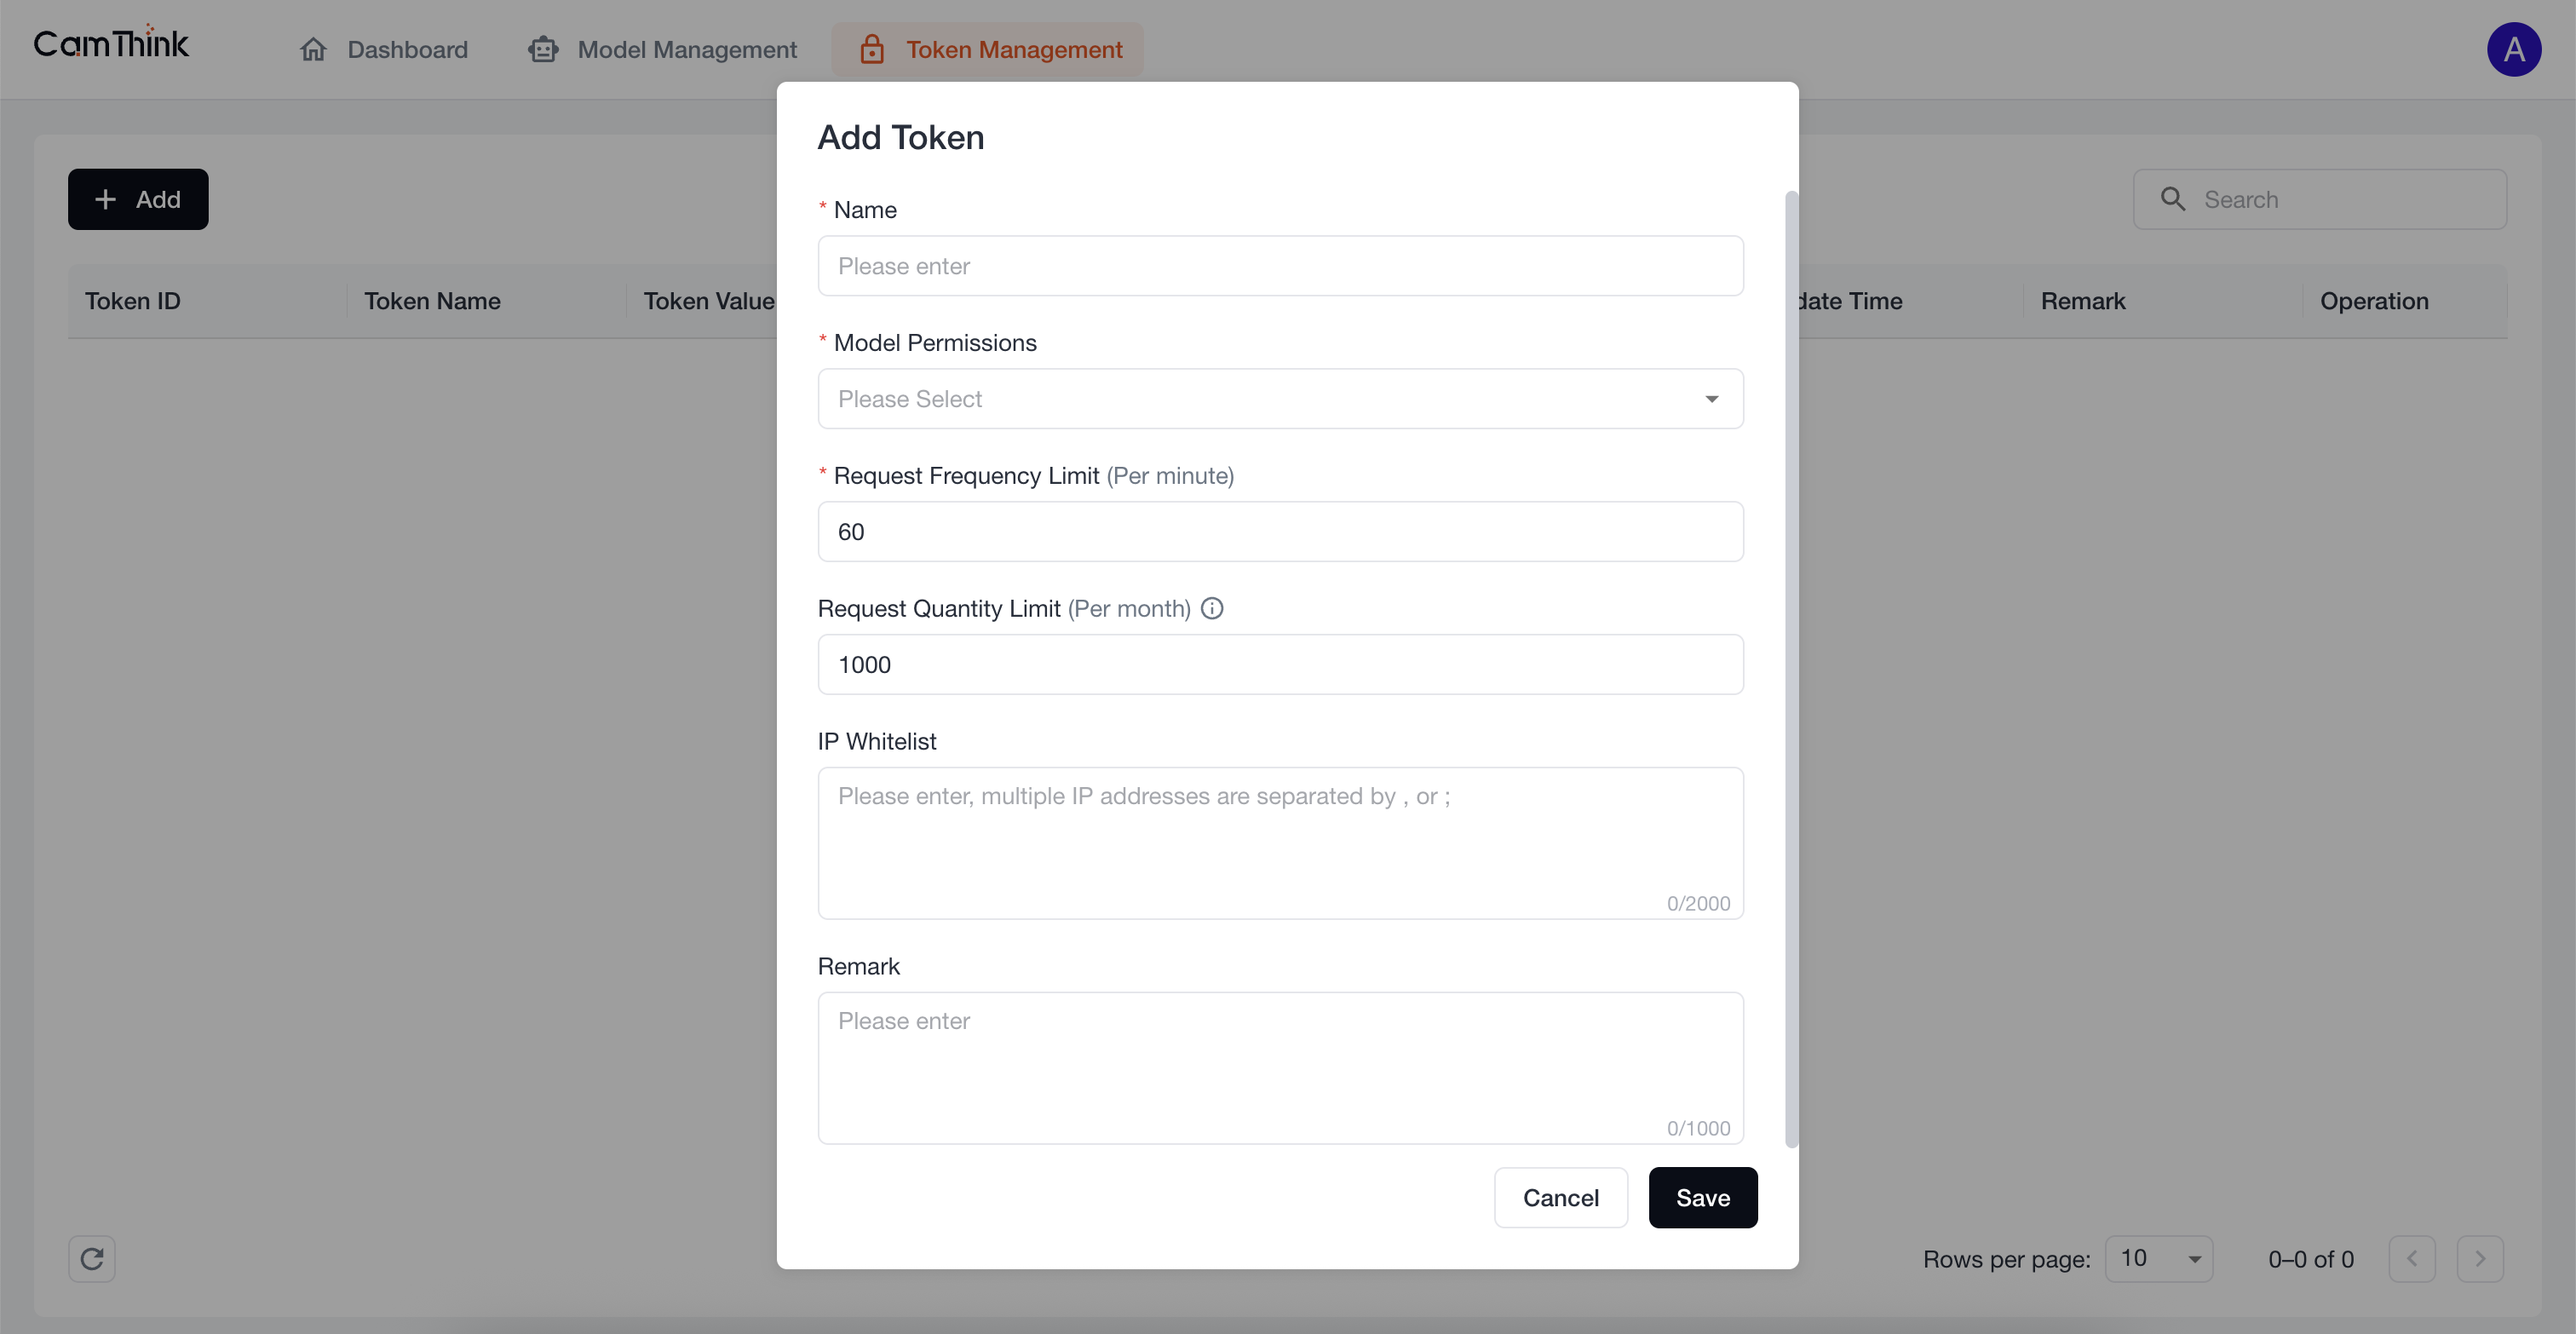
5. Create an API Request Token
Click the Token Management menu to view the token list. External services must obtain a token to request model APIs. Click the "Add" button, fill in the form, and enter the token name. In Model Permissions, select "All Models Selection" from the dropdown to set the models accessible by this token. After setting, click "Save", then click "Copy" in the popup to copy the token.
Service Testing
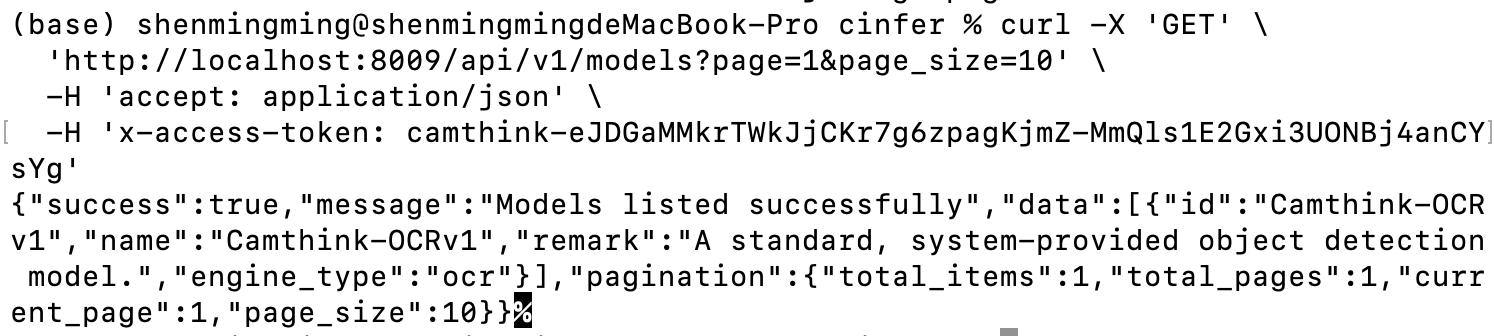
Get Model List: Use the following command to get the current model list. Replace YOUR_ACCESS_TOKEN with your configured token. Run the curl command below to test. You should get the built-in model Camthink-OCRv1. We can then call the API to view the model’s basic details.
curl -X 'GET' \
  'http://localhost:8000/api/v1/models?page=1&page_size=10' \
  -H 'accept: application/json' \
  -H 'x-access-token: YOUR_ACCESS_TOKEN'
After a successful request, you can view information about all currently published models. You can further obtain model details through the API below.
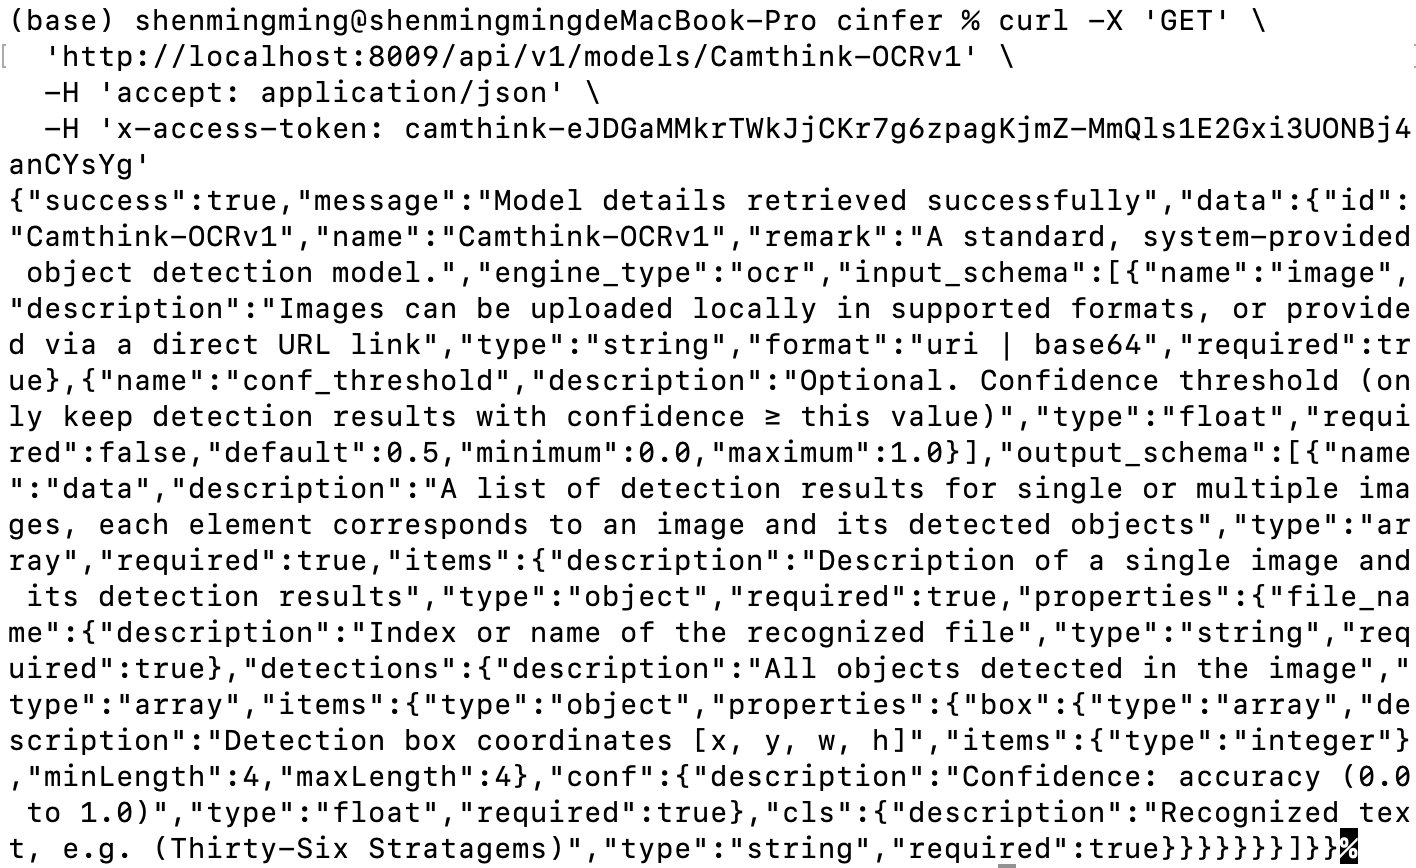
 Get Model Details: Next, we will call the model detail API to obtain detailed information. Replace
 model_id with the model id obtained from the previous list request. Fill in the id of the model you want to view and make the request below.
curl -X 'GET' \
  'http://localhost:8000/api/v1/models/{model_id}' \
  -H 'accept: application/json' \
  -H 'x-access-token: YOUR_ACCESS_TOKEN'
Upon success, you can view:
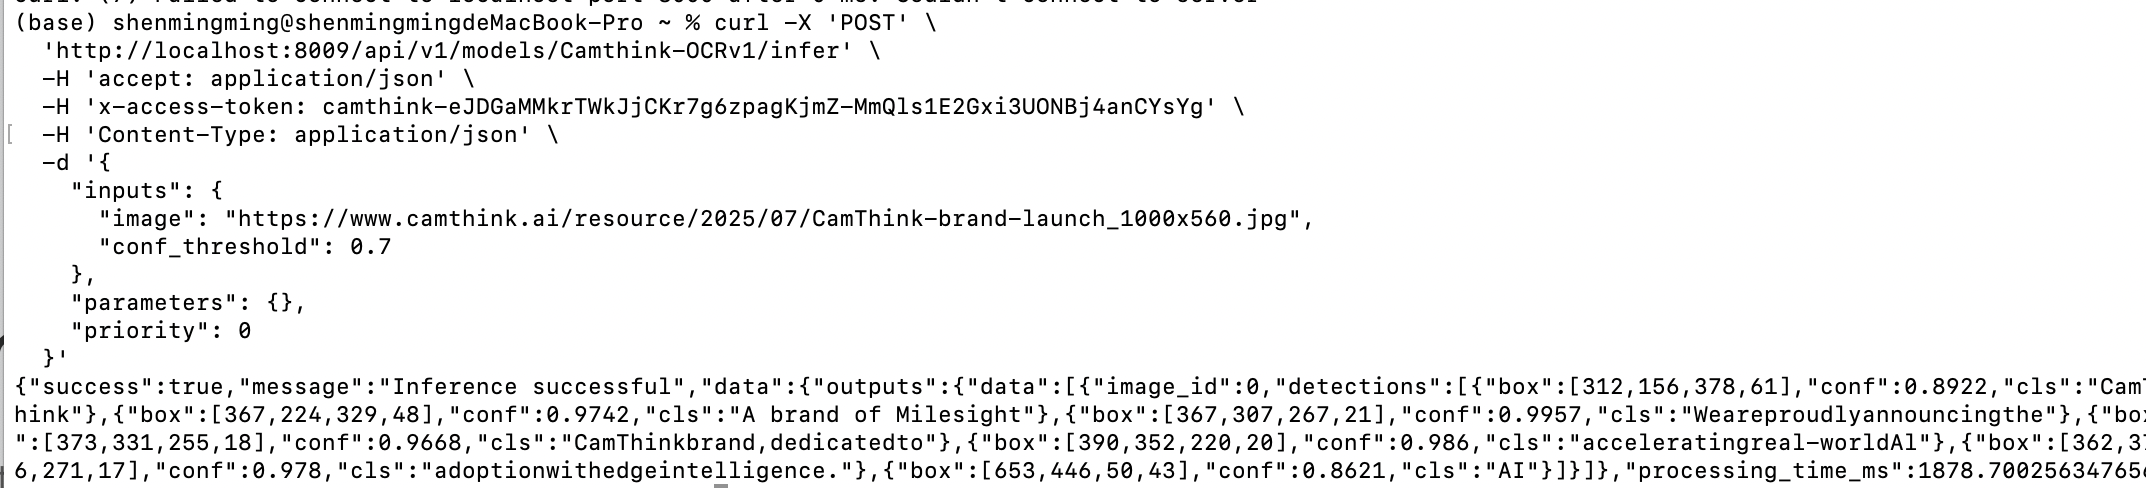
Request Model Inference: Now, using the model detail API, we know the model’s input and output parameters. We can pass an image to request AI inference according to the required inputs and outputs. Below is a test curl. Replace YOUR_ACCESS_TOKEN, set the inputs parameter, fill in the target image URL and other parameters to make an image AI inference request.
curl -X 'POST' \
  'http://localhost:8000/api/v1/models/Camthink-OCRv1/infer' \
  -H 'accept: application/json' \
  -H 'x-access-token: YOUR_ACCESS_TOKEN' \
  -H 'Content-Type: application/json' \
  -d '{
    "inputs": {
      "image": "https://www.camthink.ai/resource/2025/07/CamThink-brand-launch_1000x560.jpg",
      "conf_threshold": 0.7
    },
    "parameters": {},
    "priority": 0
  }'
As shown below, the API returns the OCR recognition results, including each line of text and the bounding box coordinates relative to the image pixels, which you can draw on your application UI.
 You have now completed the basic Cinfer tutorial and can start integrating it into your application.
Application Development
API Integration
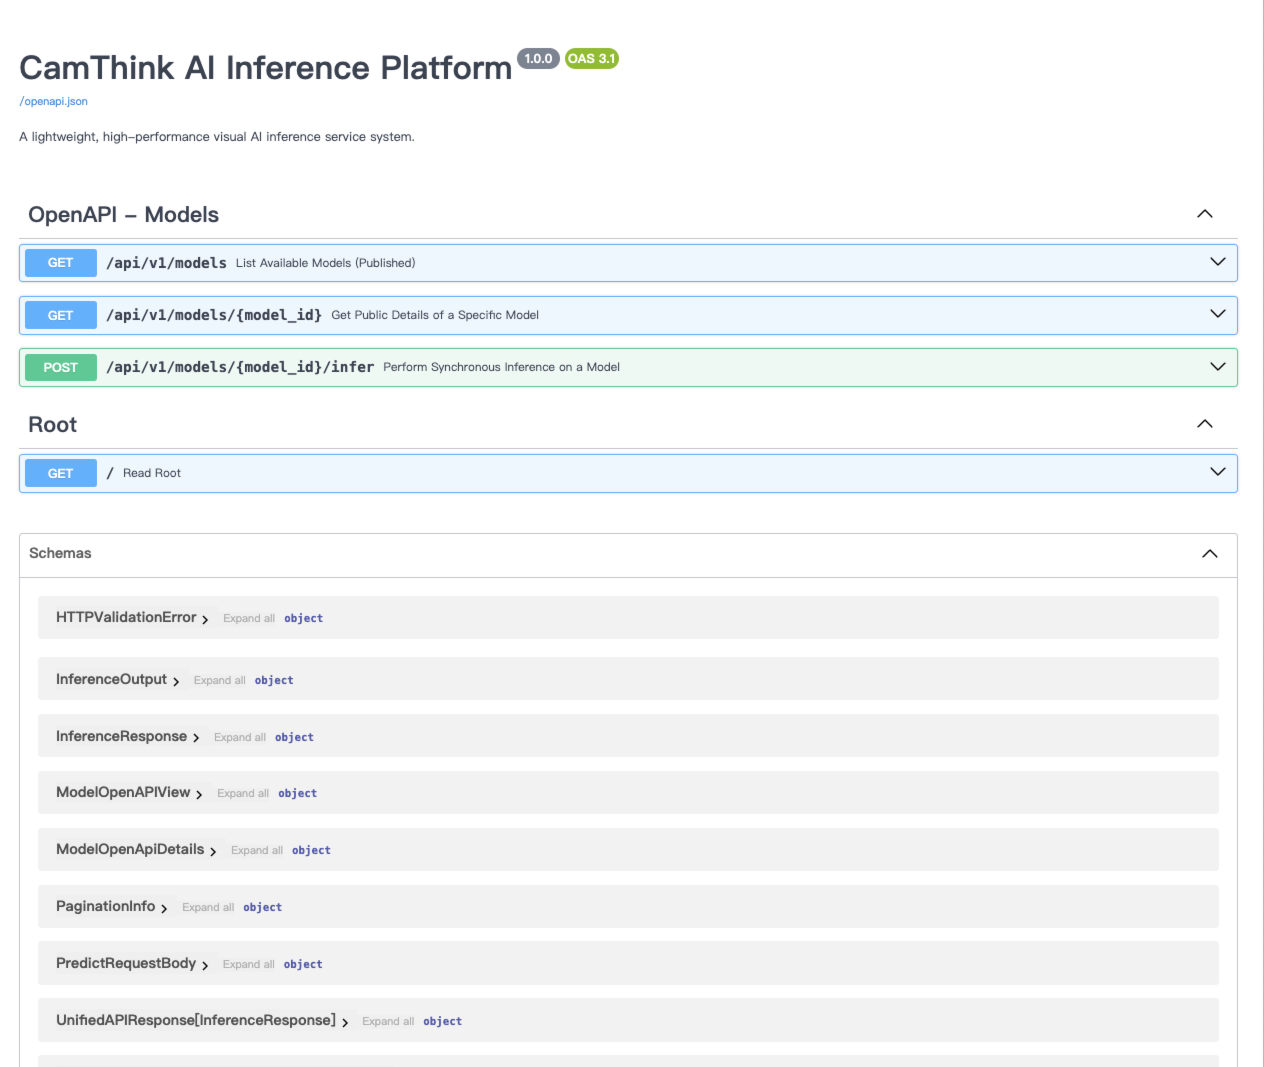
View the API documentation at http://localhost:8000/docs to integrate with your application.
BeaverIoT Integration
BeaverIoT has integrated the Cinfer inference service. See "Beaveriot Integration" for details.
User Guide
For detailed software instructions and operation, see "User Guide".
Other Commands
Multi-Instance Deployment
# Deploy production environment
./deploy.sh --name prod --gpu yes

# Deploy development environment simultaneously
./deploy.sh --name dev --backend-port 8009 --frontend-port 3009
Manage Instances
# Stop an instance
./deploy.sh --name prod --action down

# Restart an instance
./deploy.sh --name dev --action restart

# View logs
./deploy.sh --name prod --action logs
Deployment Script Options
| Option | Long Option | Description | Default |
|---|---|---|---|
| --arch | Specify GPU architecture: x86_64 or jetson. | Auto-detect | |
-g | --gpu | Whether to use GPU: yes or no | no |
-b | --backend-port | Backend service port | 8000 |
-f | --frontend-port | Frontend service port | 3000 |
-n | --name | Instance name | default |
-a | --action | Operation: up (start), down (stop), restart, logs (view logs), build (build) | up |
-h | --host | Backend hostname or IP address | backend |
-r | --rebuild | Whether to rebuild images: yes or no | no |
Manual Configuration
If you need manual deployment configuration, refer to the following steps:
Backend Configuration
Backend environment variables are configured in backend/docker/prod.env, mainly including:
- Server configuration (host, port, number of workers)
- Database configuration (type, connection info)
- Logging configuration
- Security configuration (JWT secrets, etc.)
- Model storage configuration
Frontend Configuration
The frontend configures the API proxy through Nginx. The configuration file is located at web/nginx.conf.
Data Persistence
Data is stored in the following locations:
- Backend data: Mounted to the container at
/app/data - Database: SQLite by default, stored at
/app/data/cinfer.db - Model files: Stored in
/app/data/models
Accessing the Service
After deployment, you can access the service via:
-
Separated Deployment:
- Frontend:
http://<host IP>:<frontend port>(default 3000) - Backend API:
http://<host IP>:<backend port>/api(default 8000) - Swagger Docs:
http://<host IP>:<backend port>/docs
- Frontend:
-
Integrated Deployment:
- App:
http://<host IP>:<integrated port>(default 8080) - API:
http://<host IP>:<integrated port>/api - Swagger Docs:
http://<host IP>:<integrated port>/docs
- App:
FAQ
1. Container fails to start
Check Docker logs for detailed error information:
docker logs <container ID or name>
2. Frontend cannot connect to Backend API
Ensure the proxy_pass in the Nginx configuration points to the correct backend address and port.
3. GPU support issues
Ensure the host has NVIDIA Docker correctly installed and that the GPU driver version is compatible.
4. Rebuilding after code changes
If you modified the Dockerfile or source code, use the --rebuild yes parameter to rebuild images:
./deploy.sh --rebuild yes