Quick Start
This guide walks you through the first deployment of the NE503: unboxing and installation → connection and configuration → camera verification → application deployment → system integration → device management → device maintenance. The entire process takes approximately 30 minutes.
Overview
Kit Contents
| Component | Qty | Description |
|---|---|---|
| NE503 main unit | 1 | Core processing board and interface board, IP67 rated |
| Wall-mount screw pack | 1 | Mounting screws and hardware |
Prerequisites
The following items must be provided by the user:
- PoE switch (802.3AT, recommended) + Ethernet cable: a single cable provides both power and network connectivity
- Or DC 12V power adapter + standard switch + Ethernet cable: for environments without a PoE switch
- Computer: equipped with an Ethernet port, running Windows / macOS / Linux, with a modern browser (Chrome / Edge / Firefox / Safari)
Device Installation and Power-On
1. Choose Installation Location
The NE503 serves as both a smart IPC and an edge computing platform. Consider both surveillance coverage and AI inference performance when choosing the installation spot:
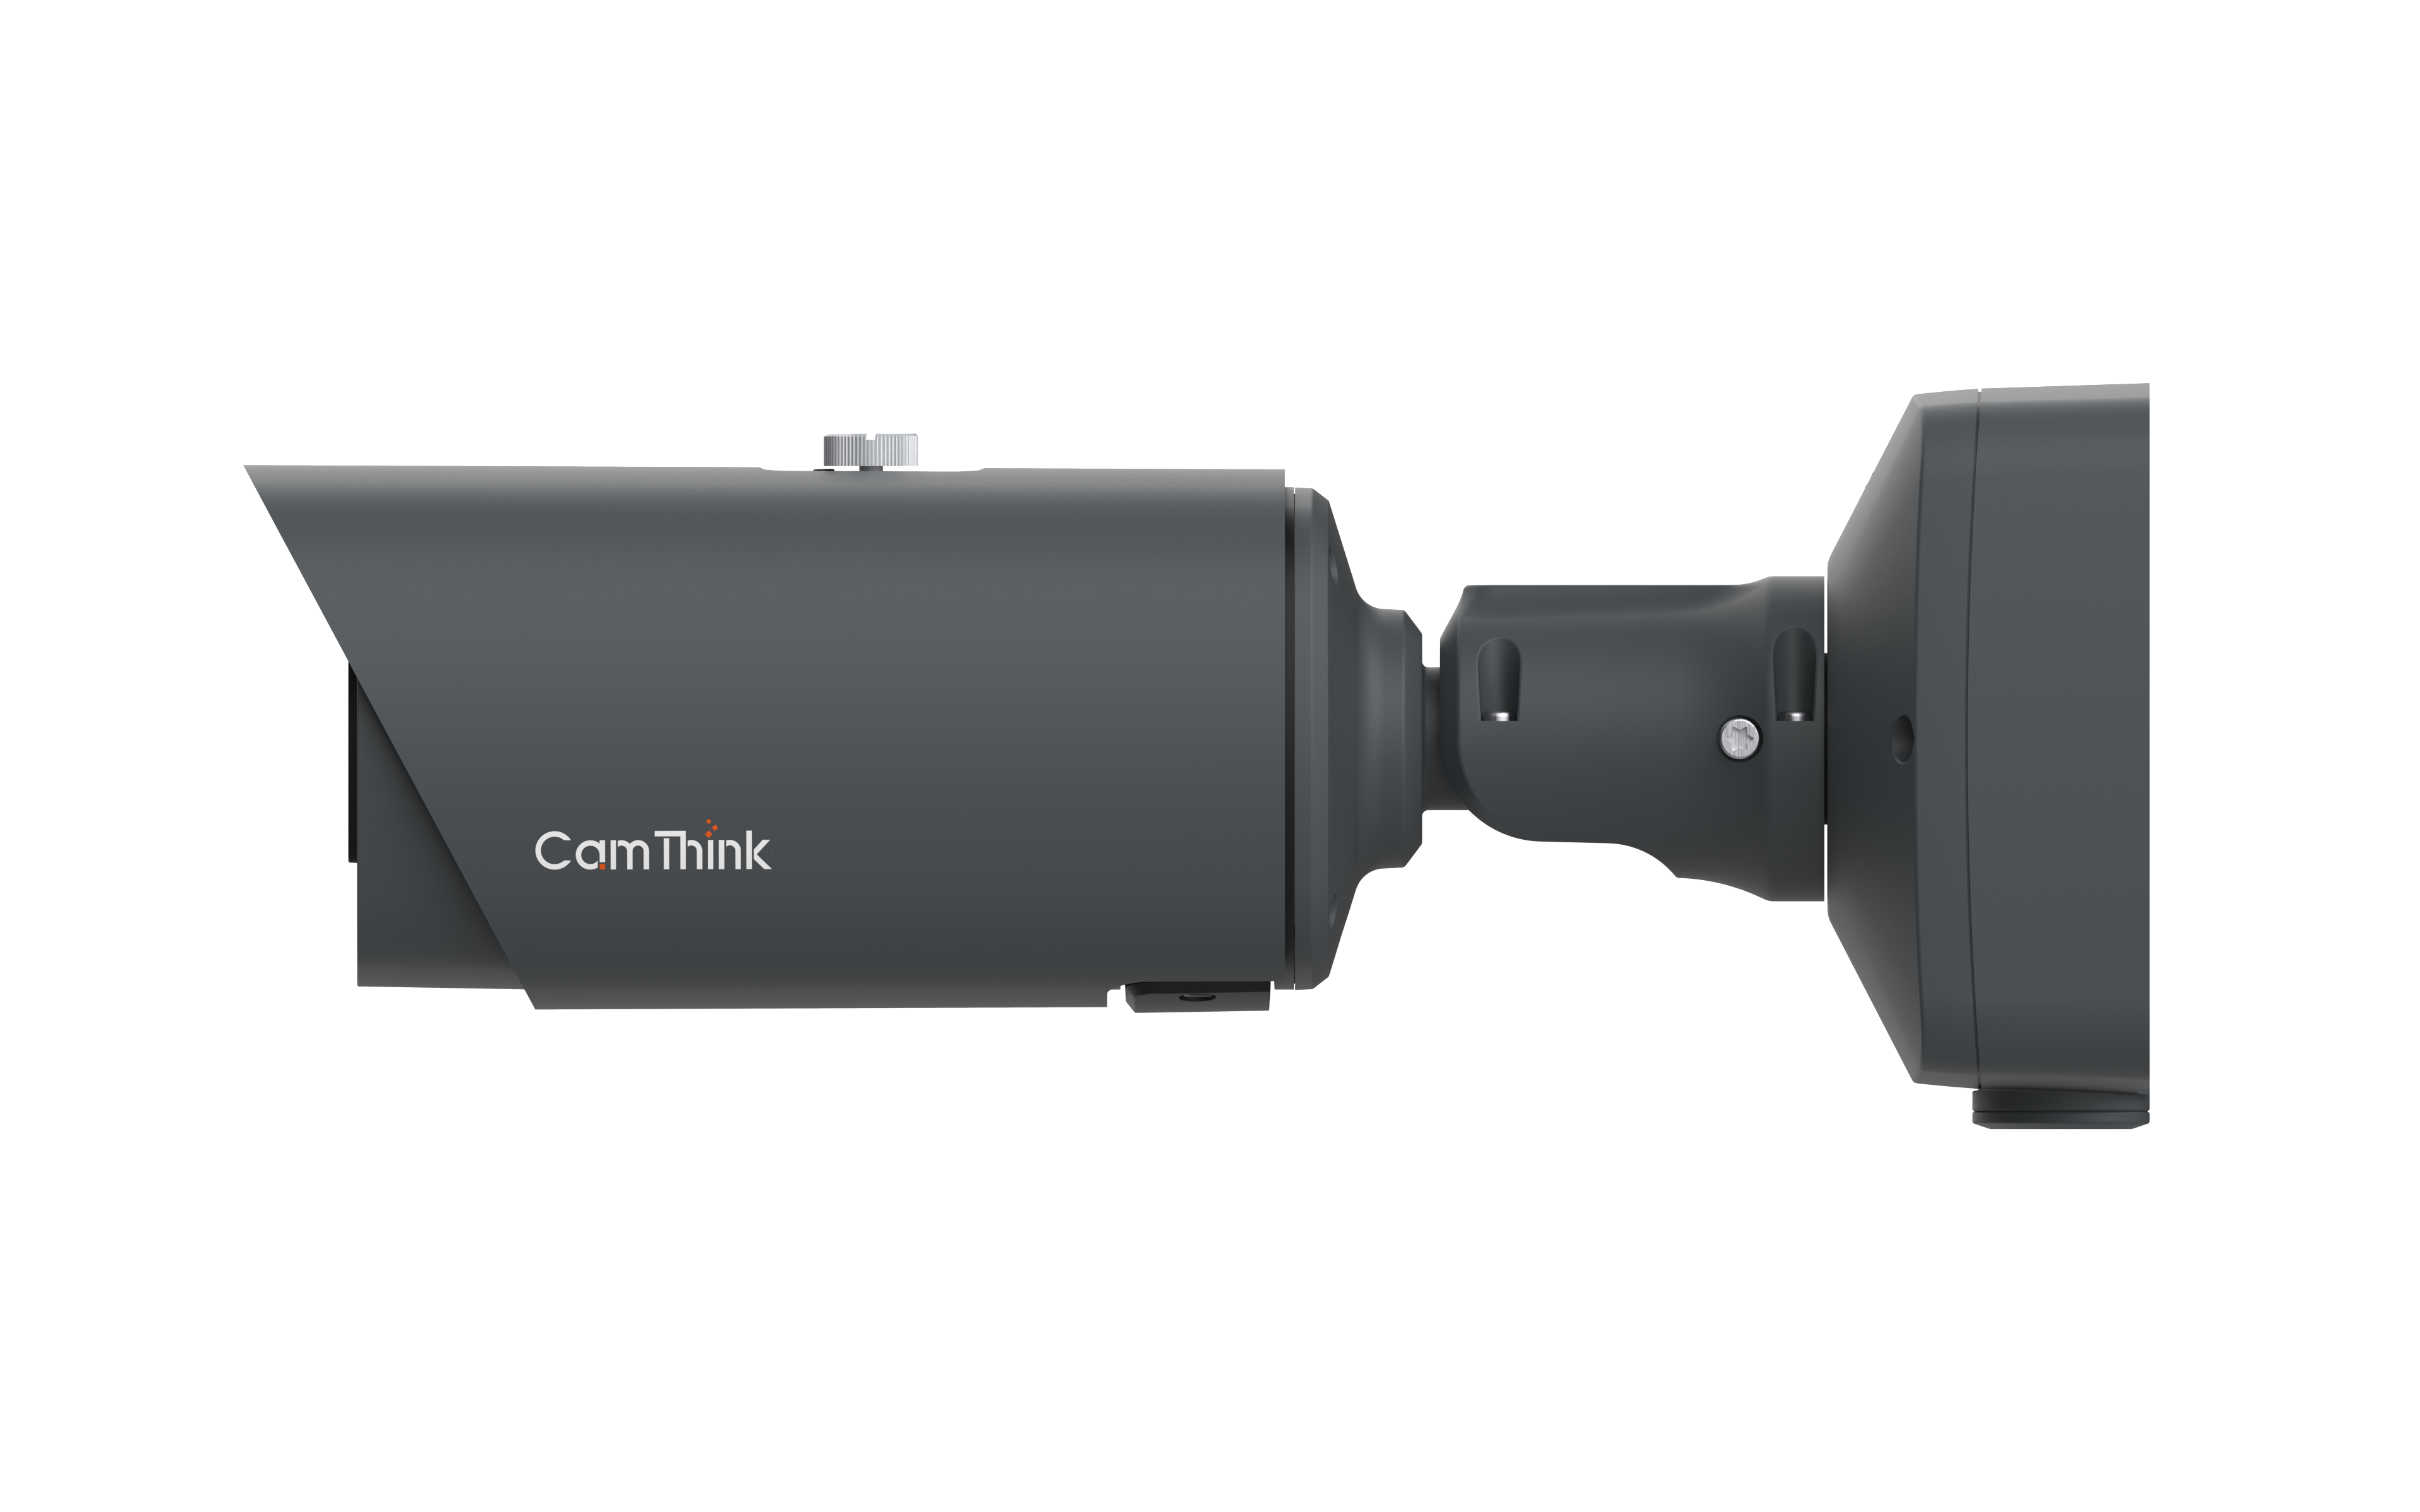
- Surveillance coverage: Select a position that covers the target area. Note the lens field of view (wide-angle: 45.1° horizontal, telephoto: 14.7°)
- Environmental requirements: IP67 rated, supports -40°C to +60°C operating temperature, suitable for outdoor installation
- Cable planning: Ensure the Ethernet cable from the PoE switch or router reaches the installation location
2. Wall-Mount Installation
- Secure the wall-mount bracket to the mounting surface (wall / pole / ceiling) using the included screw pack
- Align the NE503 with the bracket and tighten the mounting screws
Pole and ceiling mounting scenarios require additional bracket accessories, sold separately.
3. Power Supply and Boot
The NE503 supports two power supply methods, with power consumption 5–6W (typical load):
| Method | Connection | Use Case |
|---|---|---|
| PoE (recommended) | Connect Ethernet cable to a PoE switch (802.3AT) — single cable for power and network | Most deployment scenarios |
| DC adapter | Connect 12V adapter to DC port, Ethernet cable to standard switch | Environments without a PoE switch |
After powering on, the device indicator blinks during startup. Once it stays solid, the device is ready (approximately 30-60 seconds).
First-Time Connection and Initial Configuration
The NE503 ships with a default IP of 10.0.0.1. This section guides you through the first login, password change, network configuration, and time zone setup.
1. Configure Computer IP
For first-time access, set your computer's Ethernet IP to the 10.0.0.x subnet (e.g., 10.0.0.100, subnet mask 255.255.255.0), then run ping 10.0.0.1 to confirm connectivity.
2. Log In to the Web Console
Open a browser and navigate to http://10.0.0.1:8080:
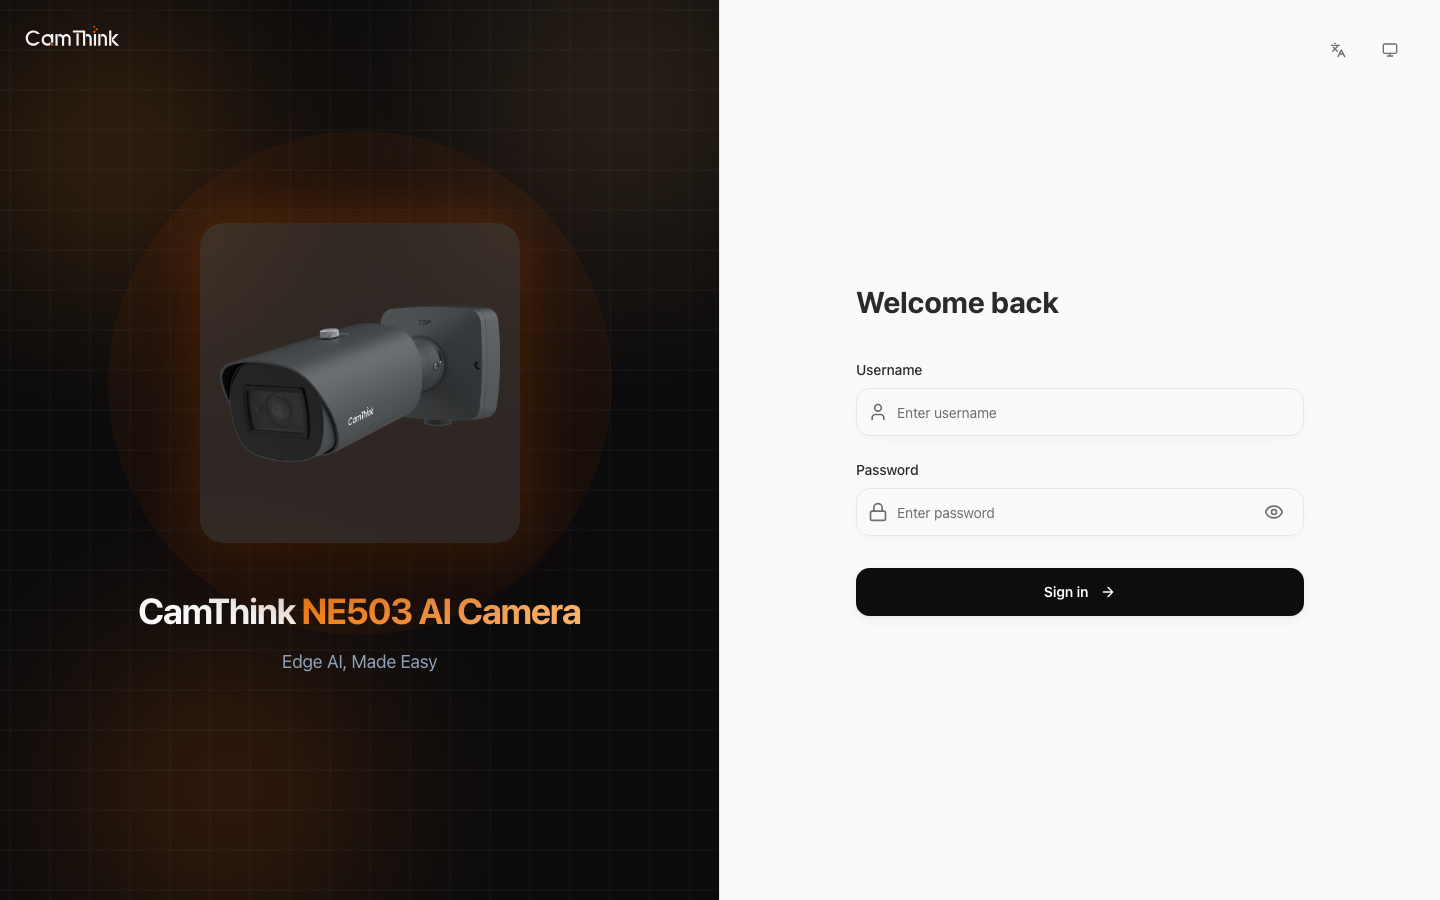
Log in with the default credentials: username admin, password password.
After logging in, you will see the Dashboard. The page is organized into the following sections from top to bottom:
- Device Status: Device uptime, chip temperatures (SoC / MCU / CPU / Board), light brightness, IR LED toggle, IR-CUT filter mode
- Resource Monitoring: Real-time gauges for CPU / NPU / Memory / Storage usage
- Stream Preview: Live camera preview
- Applications: Installed app list with running status and resource usage
- AI Models: Overview of loaded models
- Monitor: System resource trend charts
- Device Info: Device name, IP address, MAC address, firmware version, build date
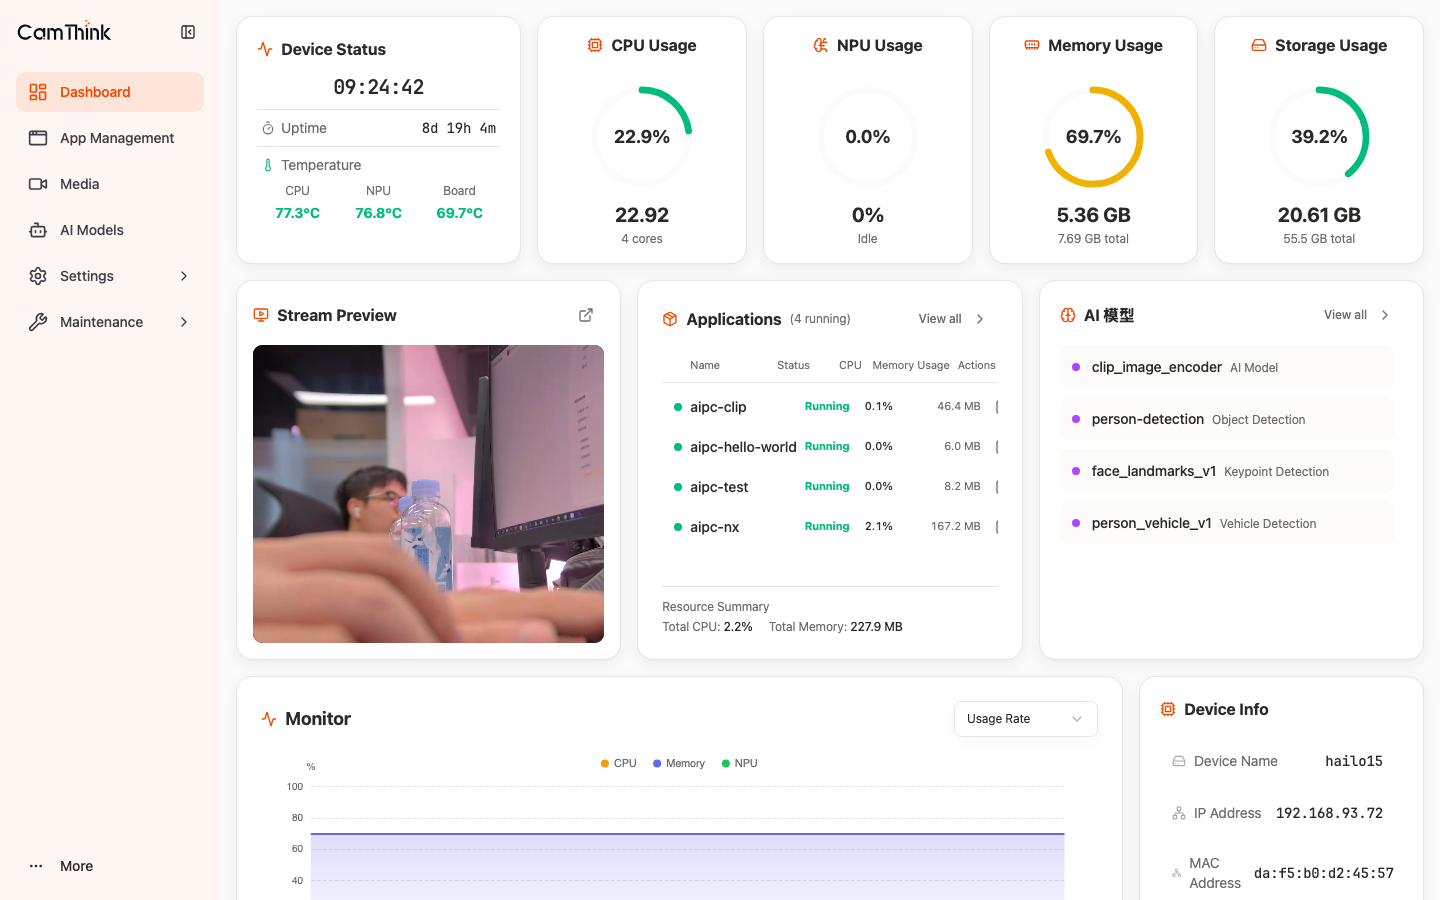
Click the expand icon in the top-left corner to show the navigation bar labels for easier page navigation.
3. Change the Default Password
Change the default password immediately after your first login to prevent unauthorized access. Expand the navigation bar and go to Settings → Device Info, find the password change section, enter the current and new passwords, then save.
4. Configure Network
The factory IP 10.0.0.1 is for initial configuration only. After connecting the device to your actual LAN, switch to DHCP or assign a static IP so other devices can reach it.
Go to Settings → Network:
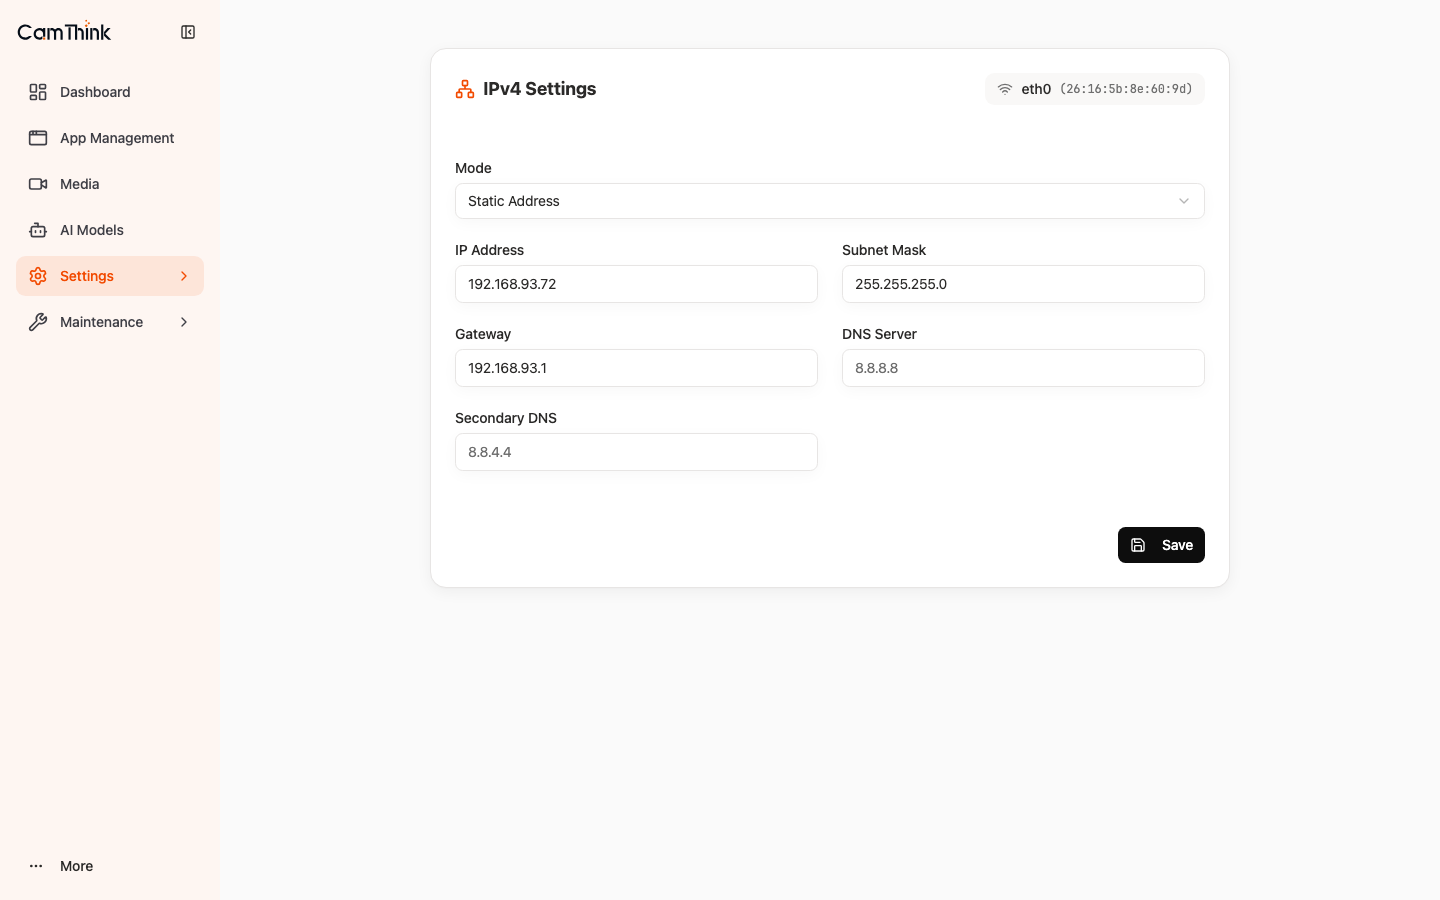
| Mode | Use Case | Action |
|---|---|---|
| DHCP | Automatic IP from router | Enable directly; consider binding the MAC address in the router to prevent IP changes |
| Static IP | Production environments requiring a fixed IP | Manually enter IP, subnet mask, gateway, and DNS |
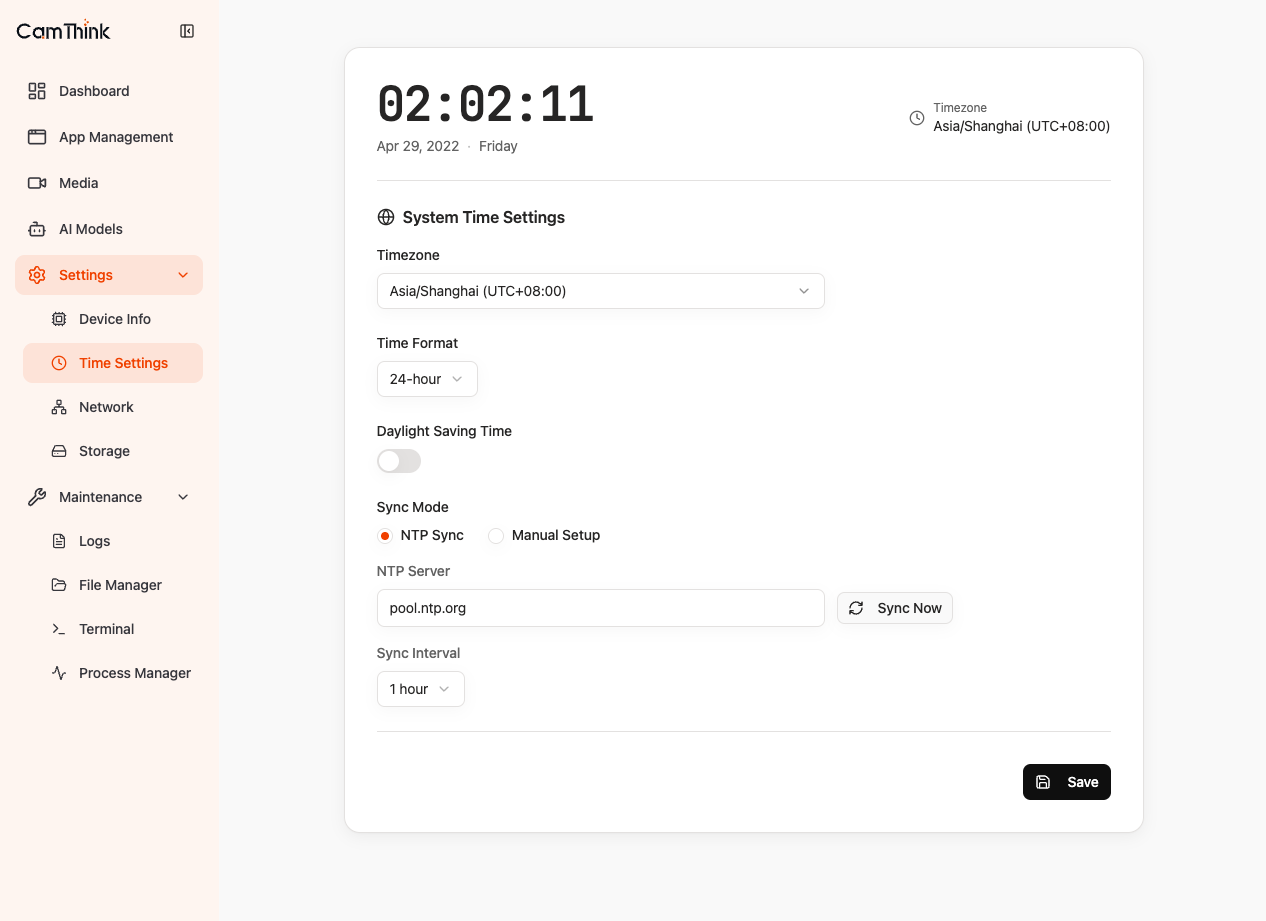
5. Set Time Zone
Go to Settings → Time Settings and select the correct time zone and configure an NTP server. Time zone settings directly affect video stream OSD timestamps and recording file names — ensure they match your deployment location.
Verifying Camera Operation
After completing the initial configuration, verify that the camera feed and video stream output are working before proceeding with application deployment.
1. Live View and Lens Control
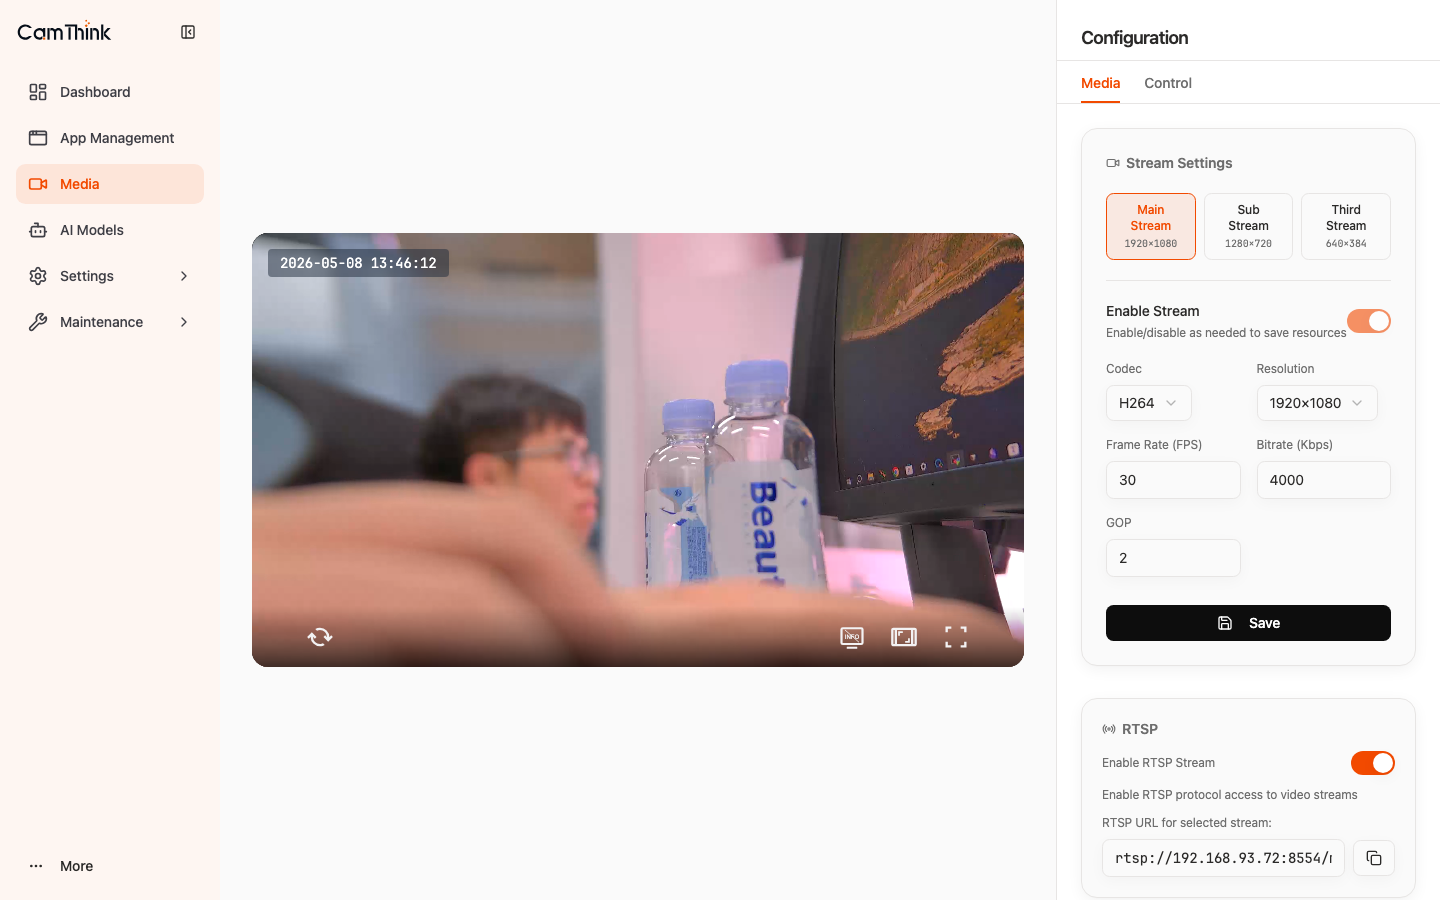
Go to the Media page, which has four tabs: Media, Control, Image, and Audio.
Media tab: Displays the live camera preview. Below the preview are stream settings (codec, resolution, frame rate, bitrate, GOP) and an RTSP toggle with the stream URL.
Control tab: Provides the lens control panel, including optical zoom (4x), manual/auto focus, IR-CUT filter switching (auto/day/night), and fill light control. After zooming, click auto focus to ensure a sharp image.
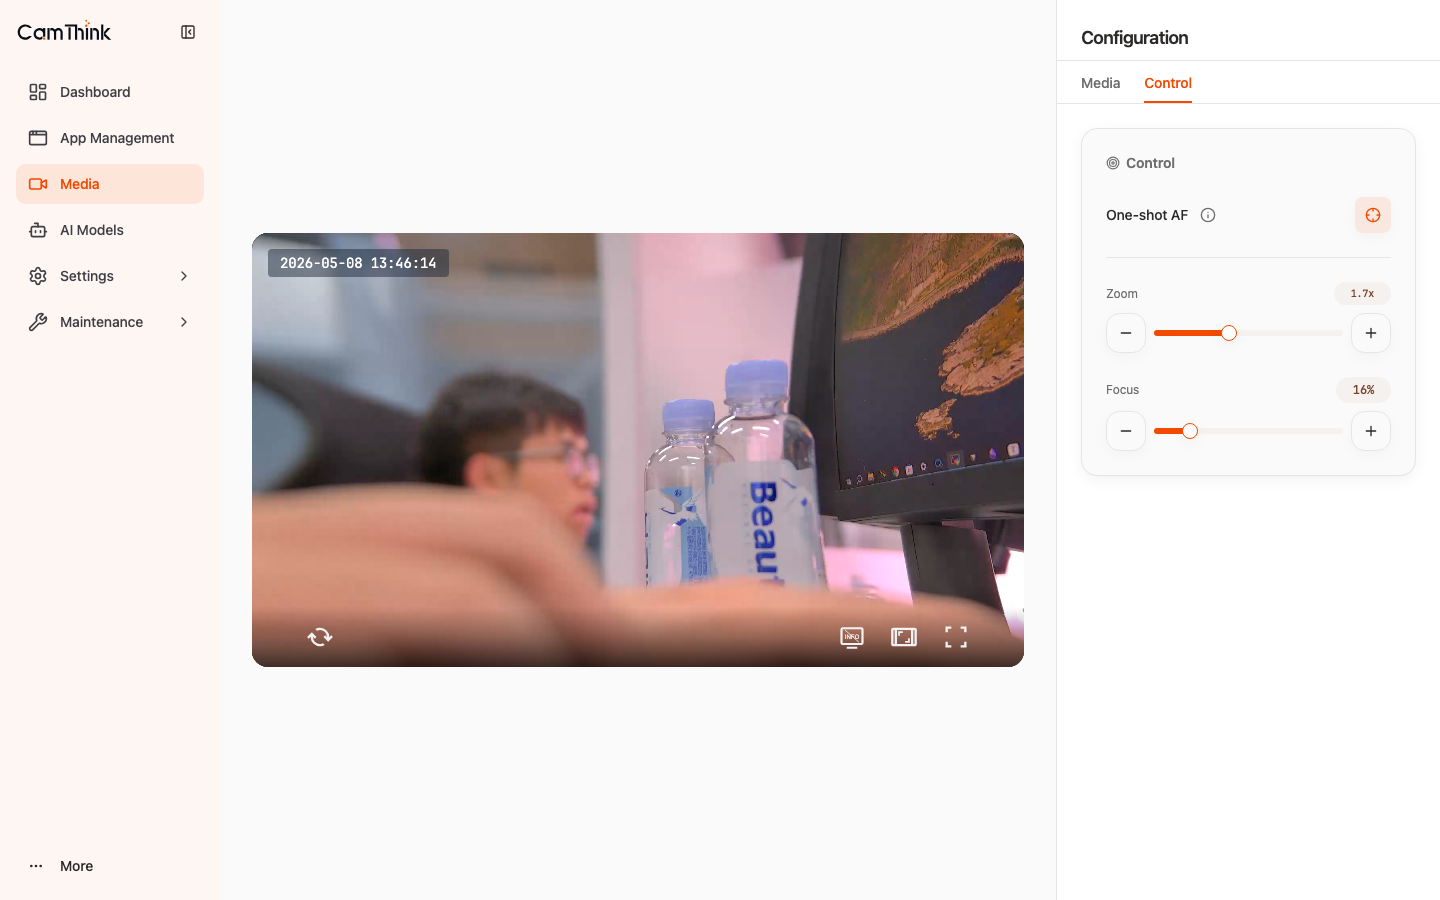
Wide-angle (8mm) is for panoramic surveillance; telephoto (32mm) is for long-range identification (e.g., license plates, faces).
2. RTSP Stream Verification
RTSP is the primary video protocol for integrating NE503 with external systems. The device provides three streams:
| Stream | Address | Use Case |
|---|---|---|
| Main stream | rtsp://<device-ip>:8554/main | 4K high-definition recording (3840×2160) |
| Sub stream | rtsp://<device-ip>:8554/sub | Low-bandwidth preview |
| Third stream | rtsp://<device-ip>:8554/third | AI analysis / mobile |
Verifying with VLC:
- Open VLC → Media → Open Network Stream, enter the RTSP address
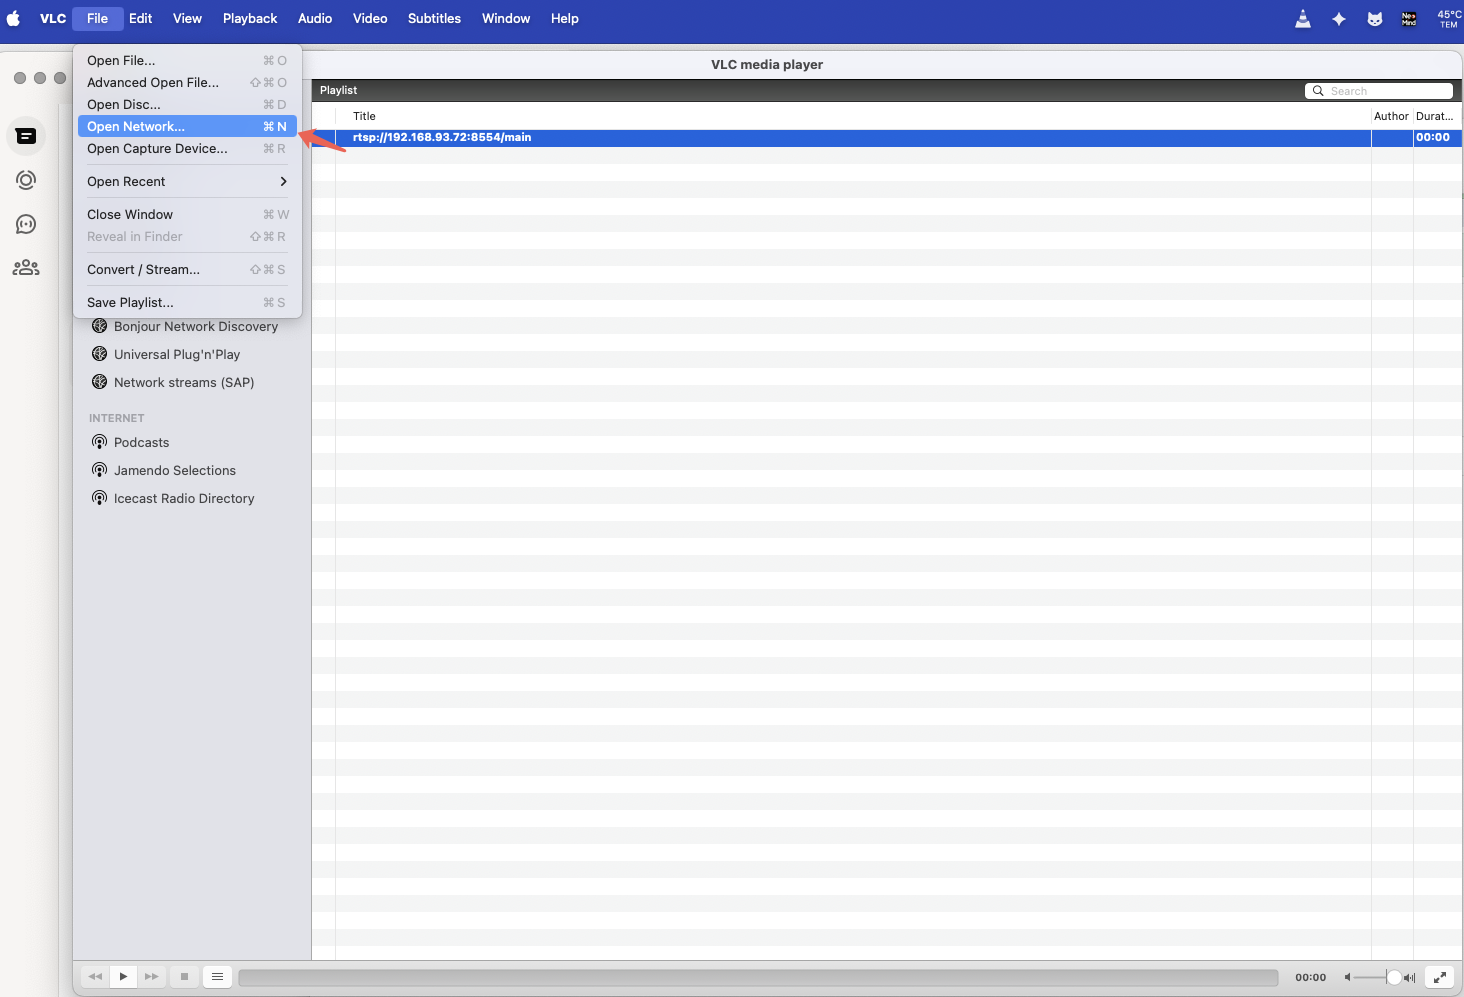
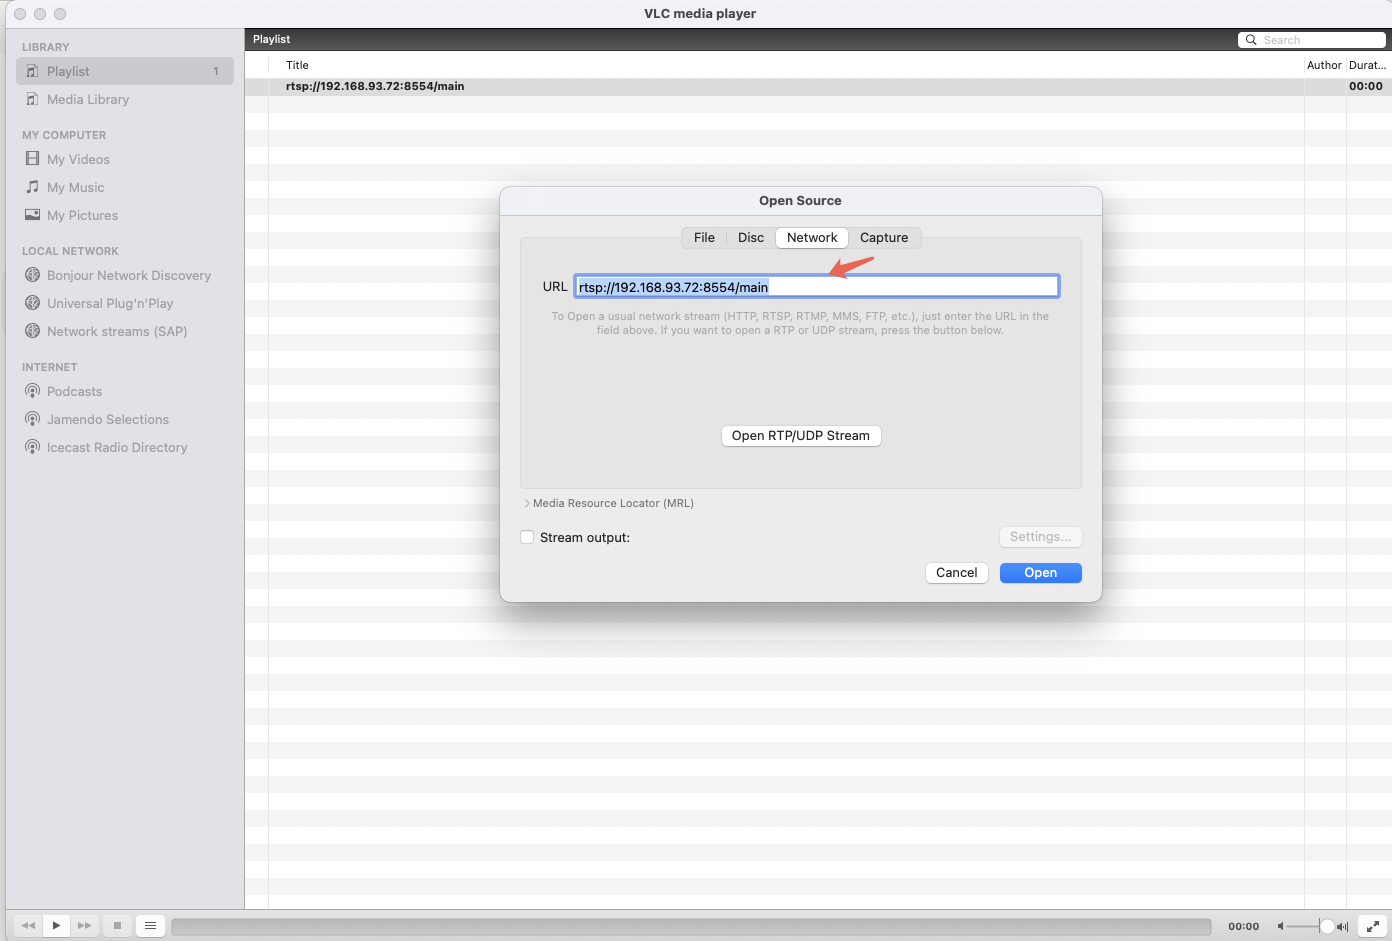
- Click Play and confirm smooth playback without artifacts


The default RTSP port is 8554. If you cannot pull the stream, verify stream status with
aipc-cli stream list.
Deploying Your First AI Application
The NE503 deploys third-party AI applications through a container runtime. Users can develop and install applications to meet various business needs. This section demonstrates the complete installation wizard workflow using NX Witness Video Management System as an example.
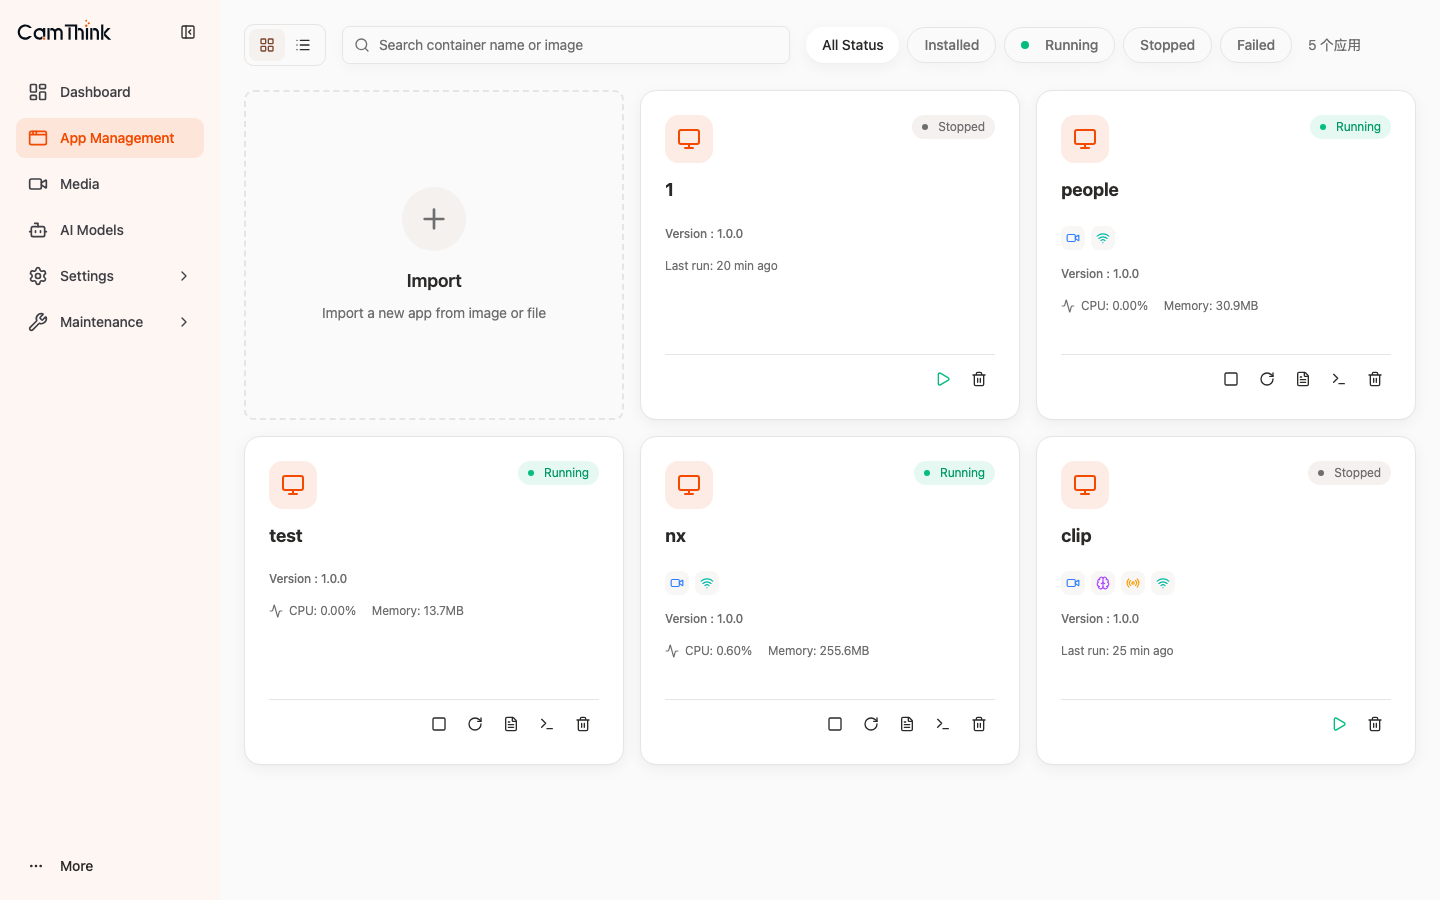
1. Access Application Management
Select App Management in the navigation bar. Click the Import card at the top of the page to start the installation wizard.
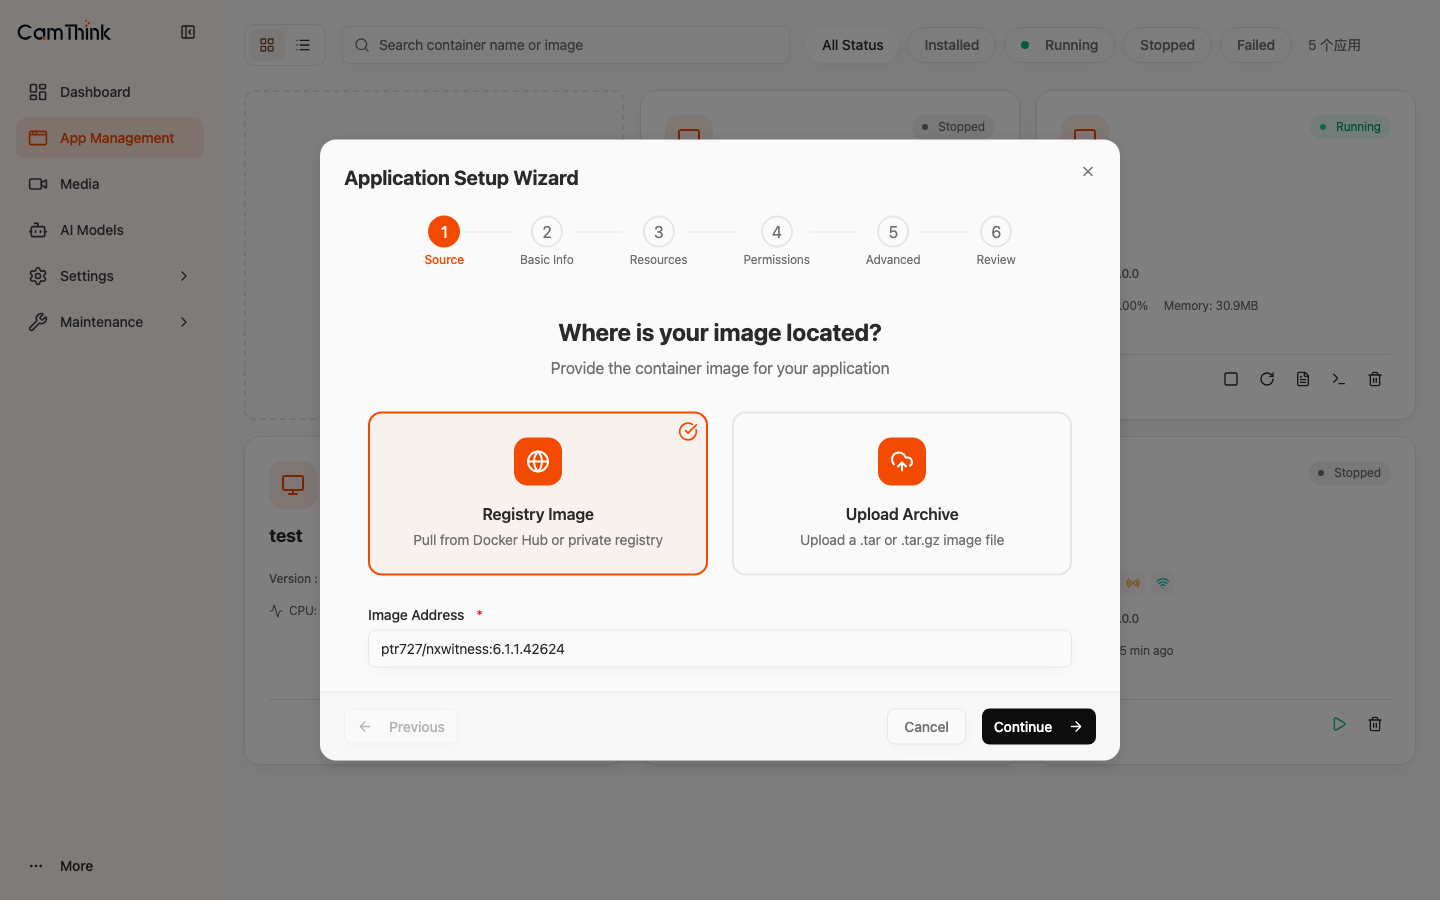
2. Installation Wizard
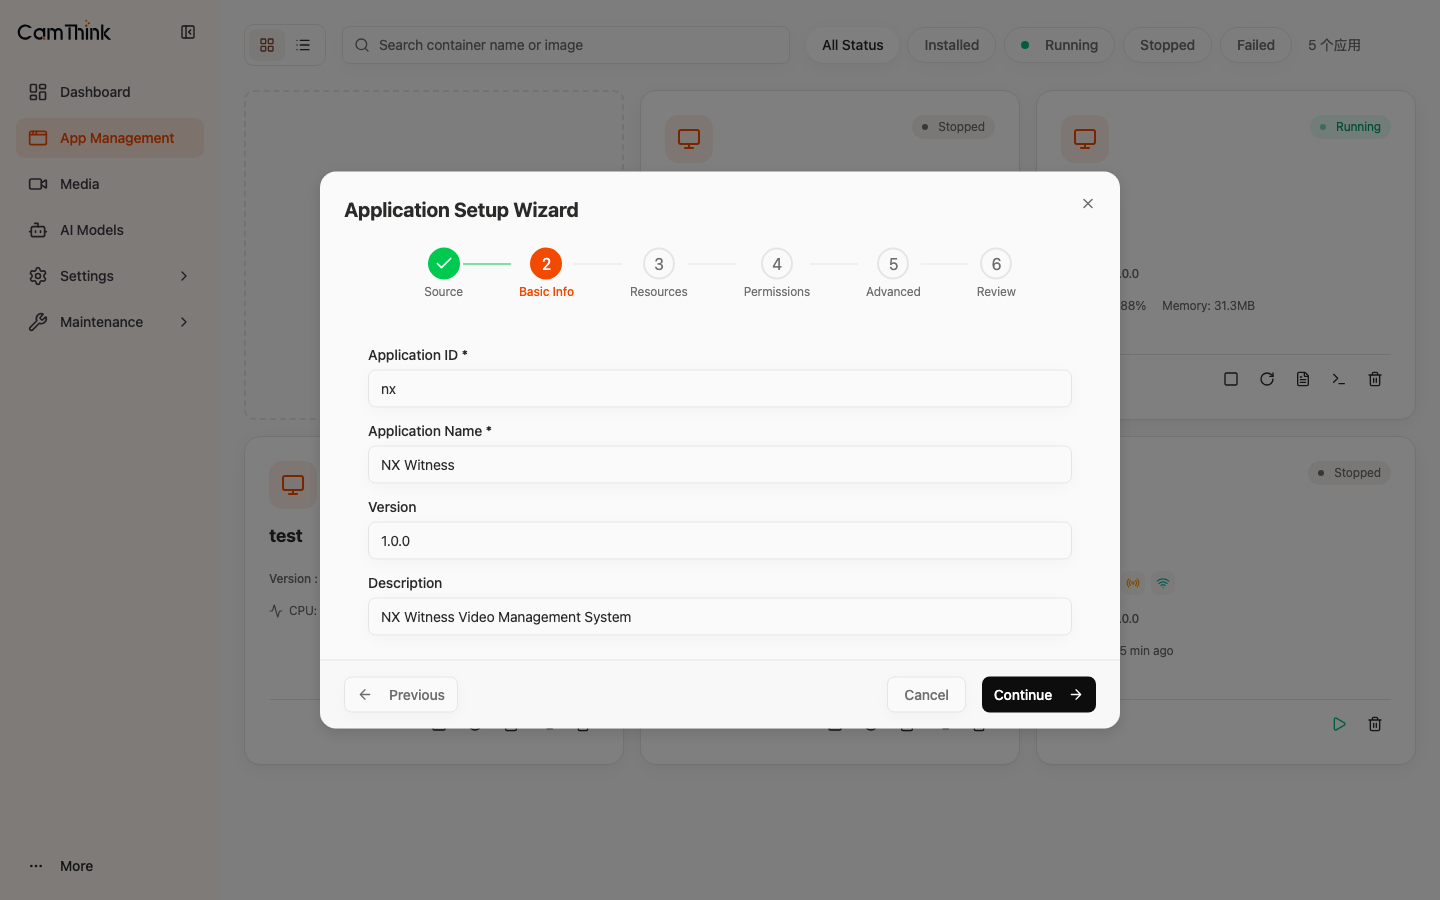
Clicking the Import card opens the Application Setup Wizard with 6 steps:
Step 1 · Source — Select the image source and enter the address. Supports Registry Image (pull from Docker Hub or private registry), Upload Archive (upload a local .tar / .tar.gz file), and Upload Package (upload an app.yaml manifest + image file for complete configuration). For NX Witness, select Registry Image and enter ptr727/nxwitness:6.1.1.42624, then click Continue.
Step 2 · Basic Info — Enter Application ID (nx, cannot be changed after creation), name (NX Witness), version, and description (optional).
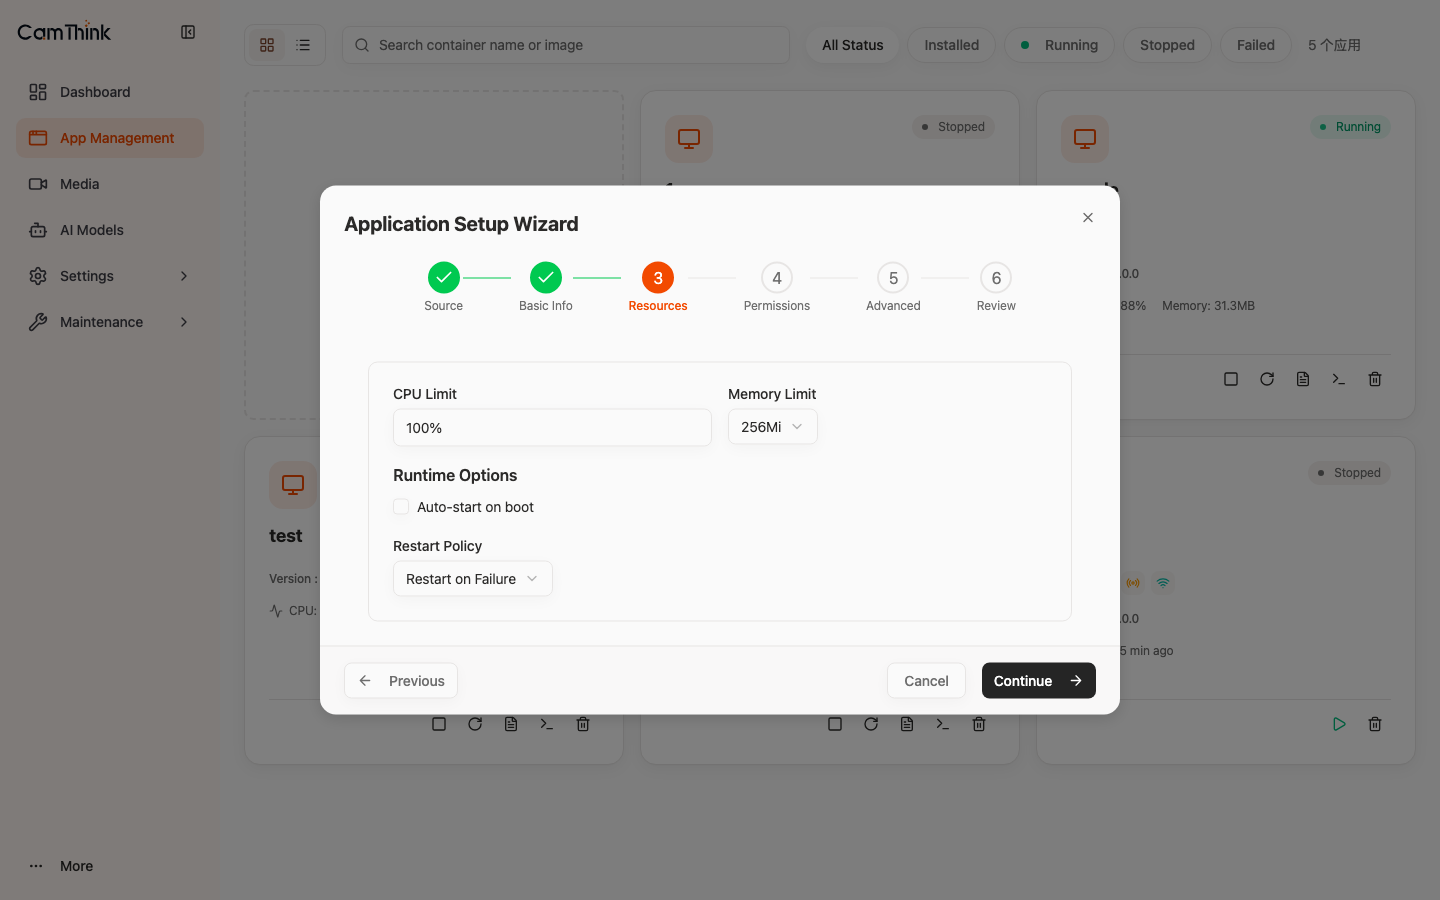
Step 3 · Resources — Configure resource limits and runtime policies. Adjust CPU Limit and Memory Limit as needed (defaults: 50% / 256Mi). Enable Auto-start on boot and Restart on Failure.
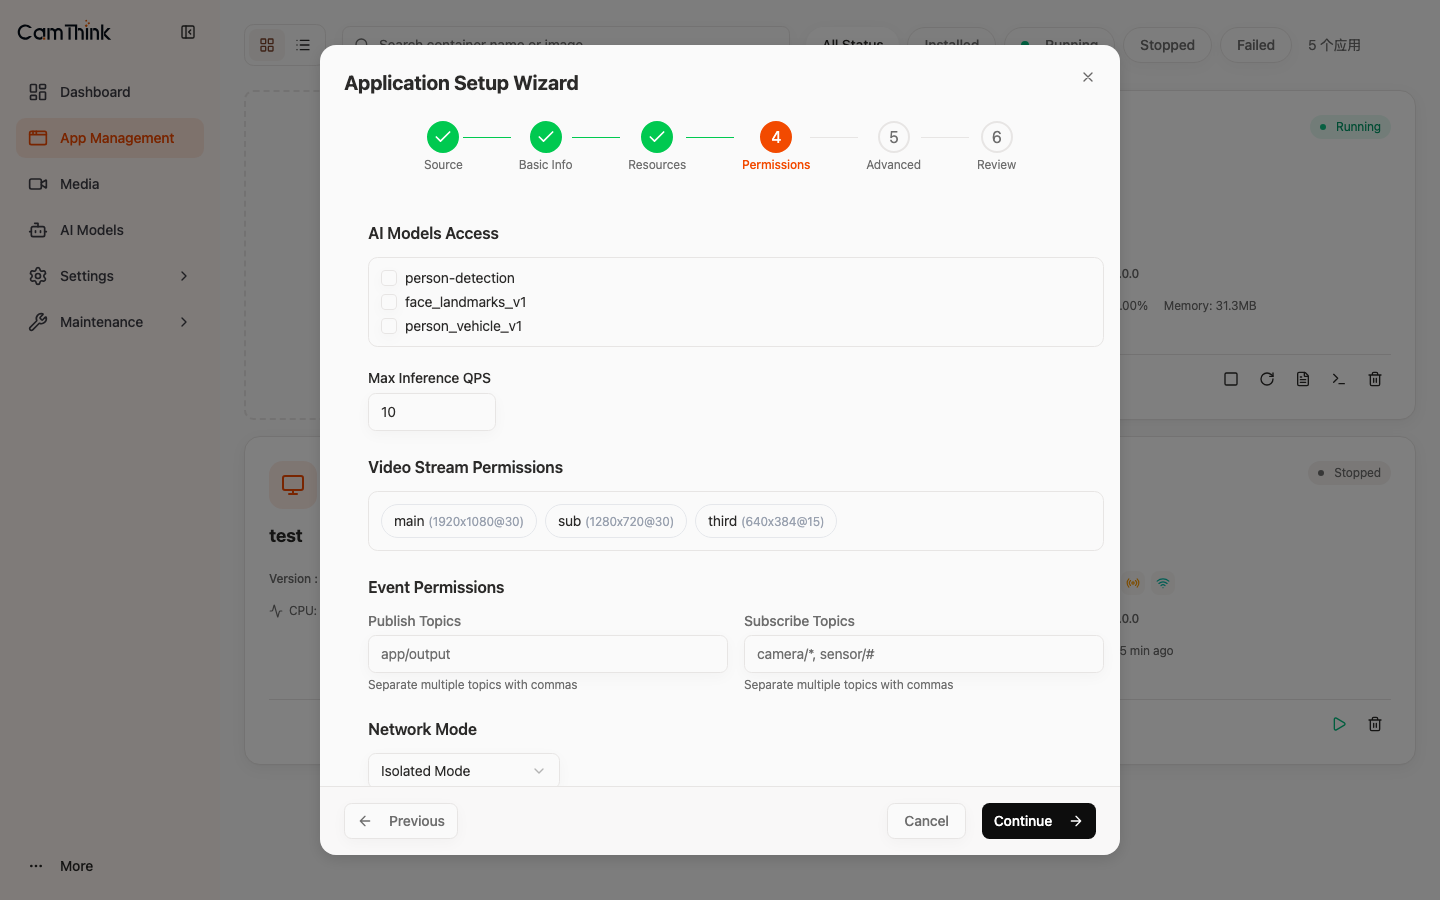
Step 4 · Permissions — Configure application access: select available AI models and video streams (main / sub / third), set Event Bus publish/subscribe topics. Network defaults to Isolated Mode; disable it for NX Witness to use Host networking.
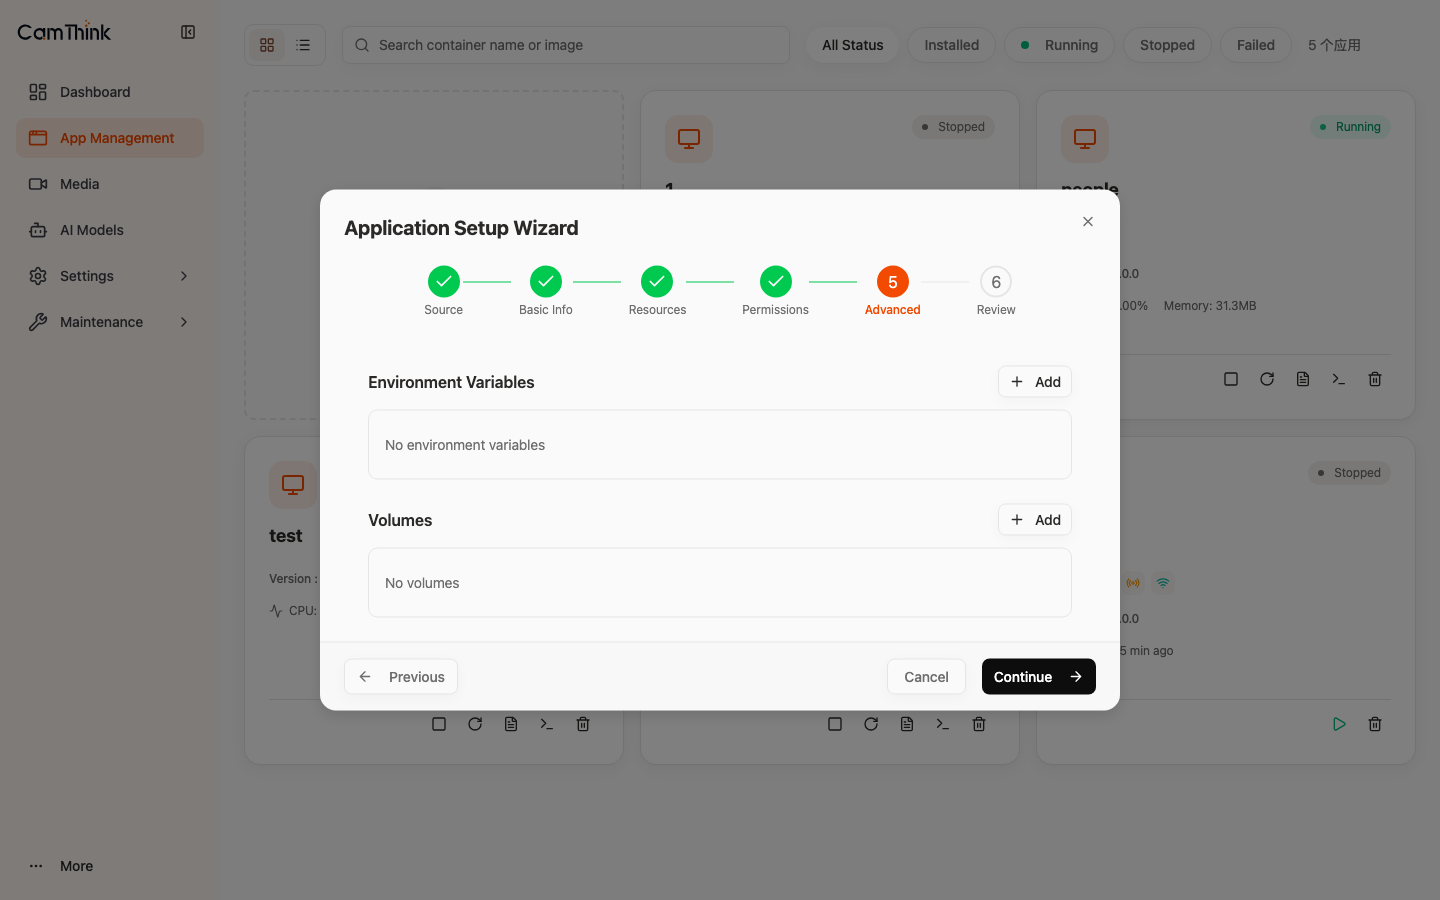
Step 5 · Advanced — Add environment variables and volume mounts (optional).
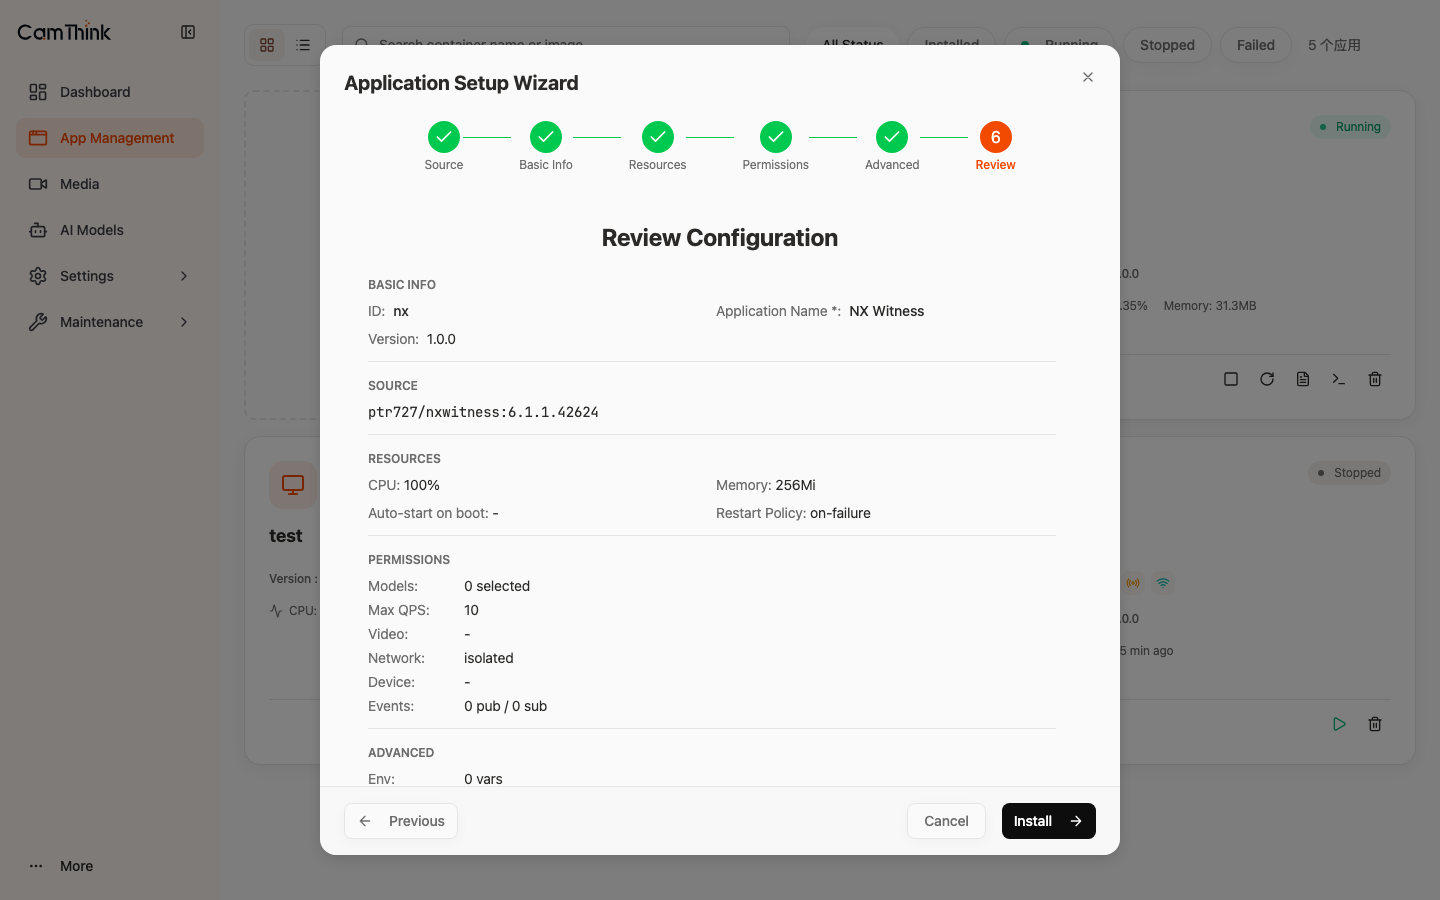
Step 6 · Review — Confirm the configuration and click Install. Wait for the image download to complete.

3. Verification and Operation
After installation, the application appears in the App Management list. Click the application card to view its running status, resource usage, and perform start / stop / restart / uninstall operations.
NX Witness verification:
| Service | Address |
|---|---|
| NX Witness management interface | https://<device-ip>:7001 |
| RTSP stream | rtsp://<device-ip>:554/ (specific stream path depends on NX Witness configuration) |
Port 554 in the table above is NX Witness's own RTSP service port, which is different from NE503's port 8554. When adding the NE503 camera stream in NX Witness, use the NE503 RTSP address
rtsp://<device-ip>:8554/main.
Open https://<device-ip>:7001 in a browser. On first access, the NX Witness setup wizard appears. Select Setup New Site, follow the wizard to create an admin account, and add the NE503 RTSP stream (rtsp://<device-ip>:8554/main) to get started.
NX Witness Troubleshooting:
| Symptom | Cause | Solution |
|---|---|---|
Container STOPPED with no new privileges in logs | Security policy blocking privilege escalation | Confirm container security settings allow privilege escalation |
| Web interface inaccessible | Network mode is not Host | Disable Isolated Mode during installation |
| Image download fails or is slow | No internet connection or DNS issues | Check device network connectivity |
| Container restarts repeatedly | Insufficient memory | Memory Limit should be at least 1GB |
4. AI Model Management
Go to the AI Models page to view loaded model running status and inference frame rate. Click a model card for detailed information (ID, version, load time, model path, associated applications).
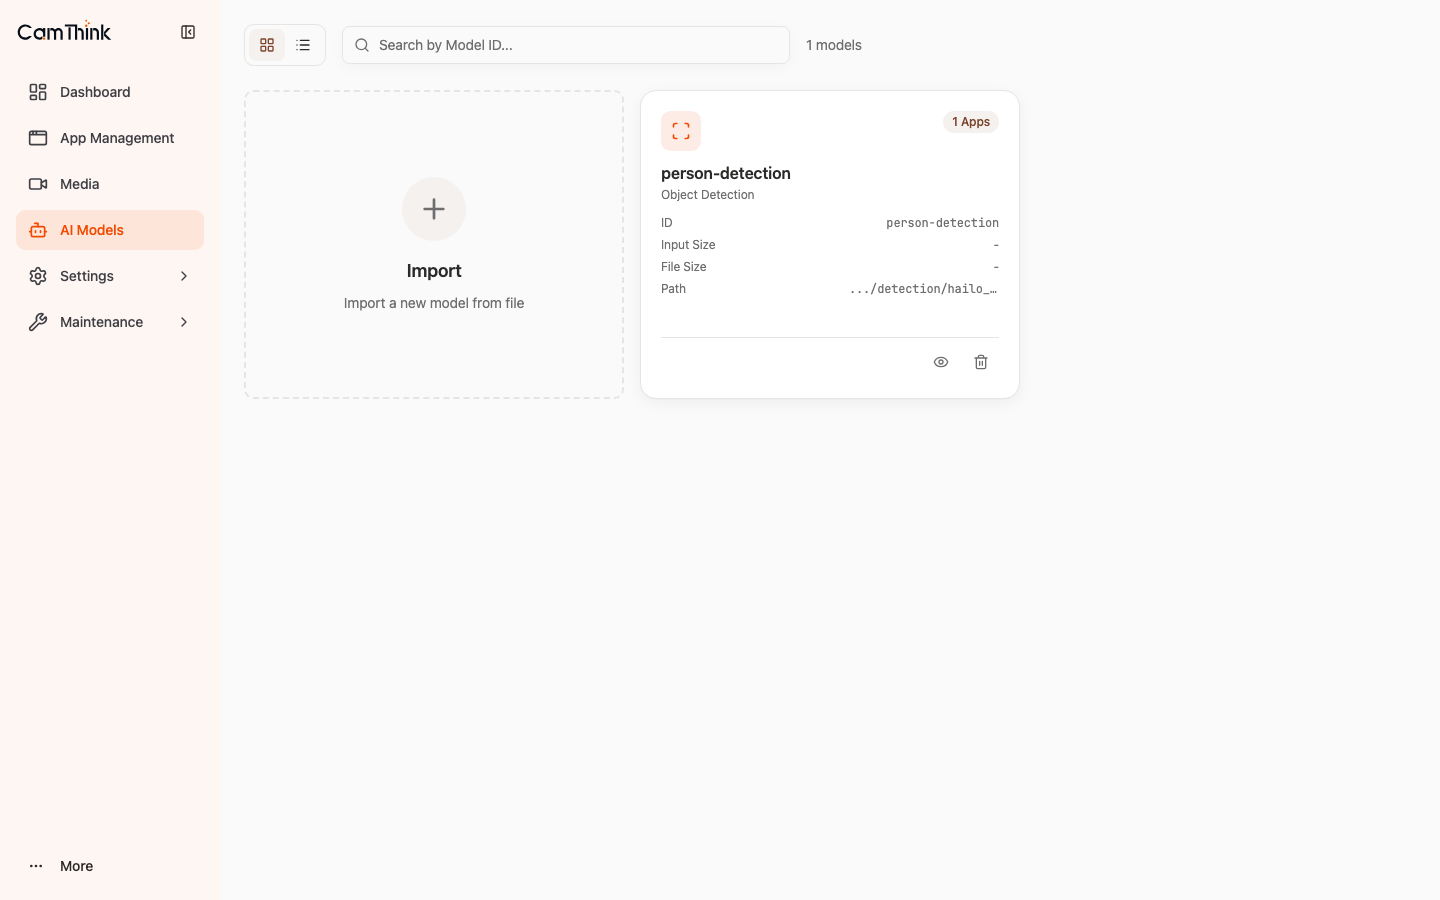
The NE503 comes with a pre-installed person detection model (YOLOv8n) ready to use. To load a custom model, click the Import card at the top of the page, upload a .hef file, and fill in Model ID, Model Type, Threshold, and other parameters:
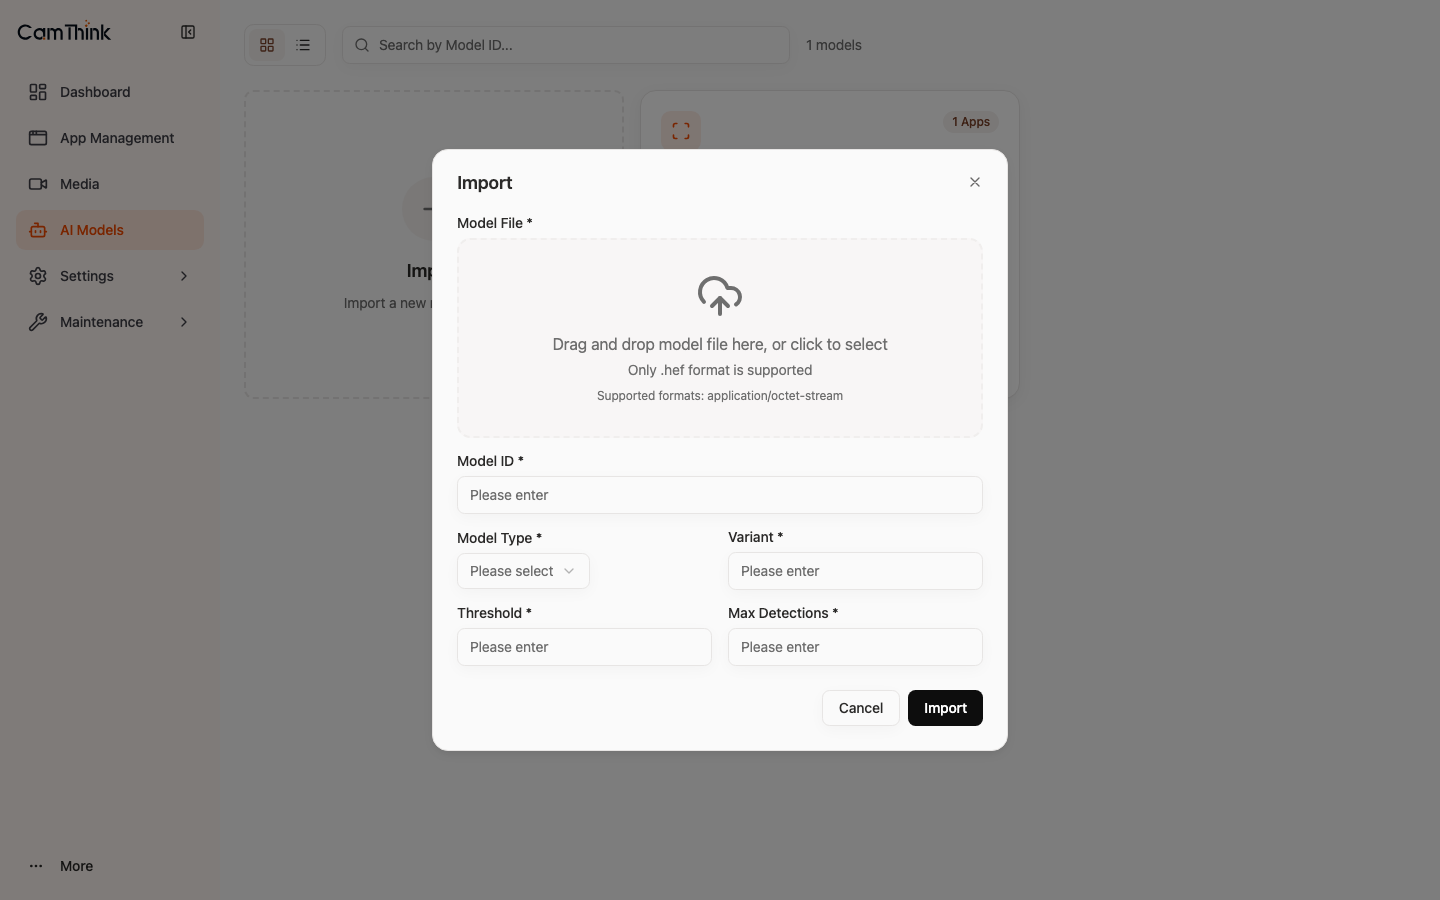
After import, the model loads automatically and inference results are output via Event Bus. You can also register models via command line with aipc-cli model register <.hef>.
System Integration
1. Video Stream Integration
The NE503 RTSP streams follow standard protocols and can be connected directly to mainstream NVR / VMS platforms (NX Witness / Milestone / Genetec) or pulled using FFmpeg / GStreamer. Recommendation: use the main stream for recording, the sub stream for live preview, and the third stream for AI analysis.
2. API Integration
The NE503 provides a RESTful API for programmatic management and data retrieval. All endpoints require Bearer Token authentication:
# Login to get Token
curl -X POST http://<device-ip>:8080/api/login \
  -H "Content-Type: application/json" \
  -d '{"username":"admin","password":"<your-password>"}'

# Query device information
curl http://<device-ip>:8080/api/v1/system/info \
  -H "Authorization: Bearer <token>"
| Module | Path Prefix | Purpose |
|---|---|---|
| System | /api/v1/system | Device info, reboot, OTA upgrade |
| Media | /api/v1/media | Video parameters, OSD, AI overlay |
| Device | /api/v1/device | PTZ, lens, GPIO control |
| Applications | /api/v1/apps | Application lifecycle management |
| Storage | /api/v1/storage | Disk management |
3. Event Bus Integration
AI inference results and device alerts are output as structured events through the Event Bus, supporting MQTT subscription and publish/subscribe patterns for real-time integration with business systems.
Device Management
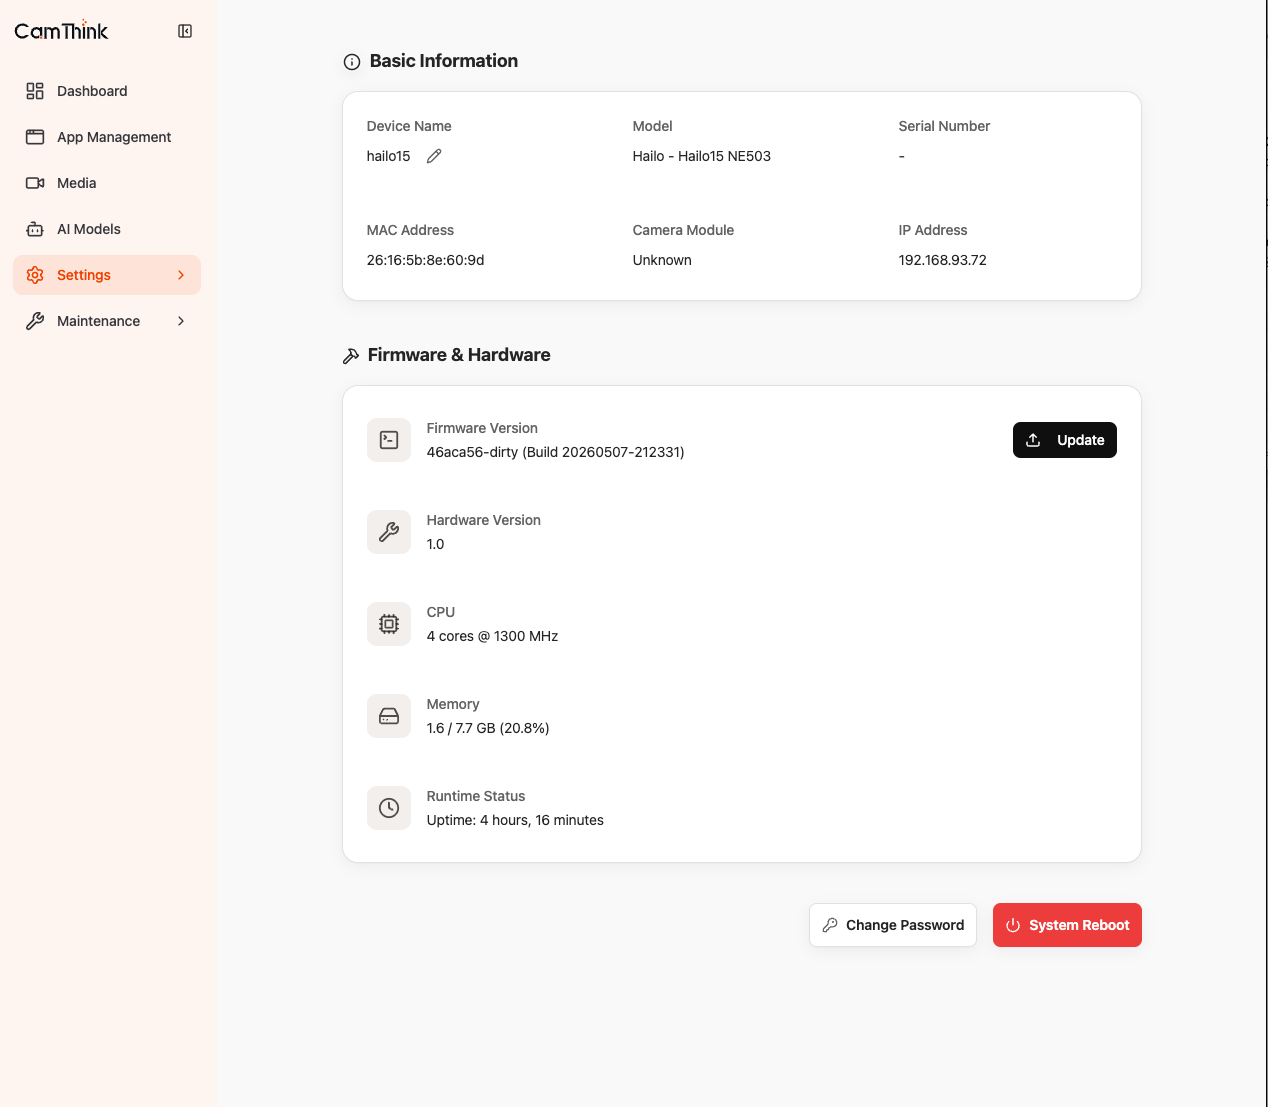
1. Device Information and Firmware Upgrade
Go to Settings → Device Info to view hardware model, firmware version, and system uptime. To upgrade firmware, click Update next to Firmware Version, upload the firmware package, and the system will automatically parse, verify, and begin writing. The device reboots automatically when complete.
The upgrade process takes approximately 2-5 minutes. Do not power off or operate the device during this time. Perform upgrades during off-peak hours.
2. Storage Management
Go to Settings → Storage:
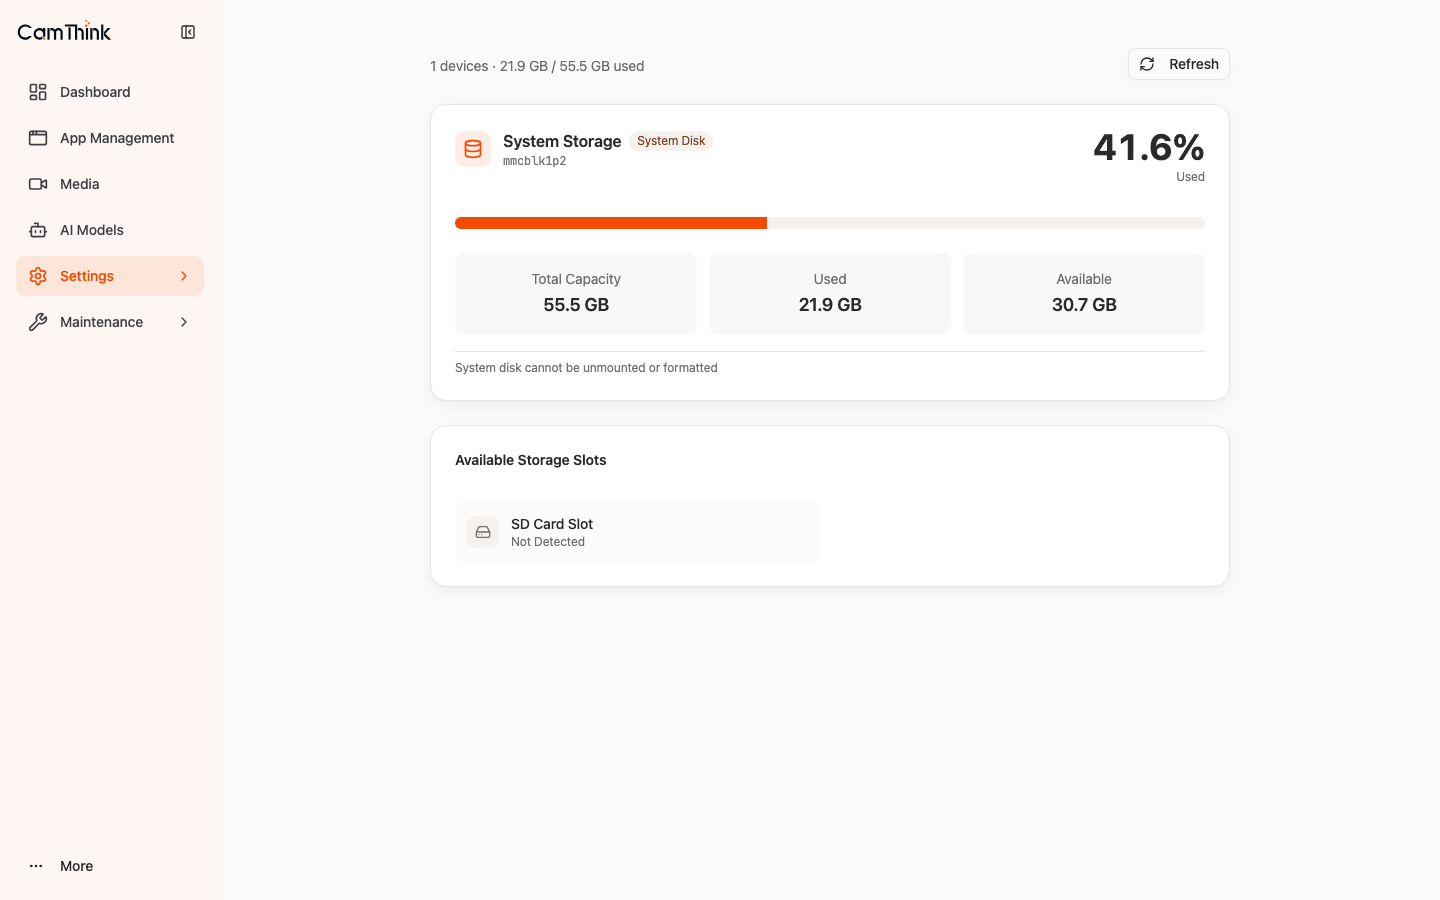
The NE503 has built-in 64GB eMMC for system and application data. To expand storage, use a TF card (UHS-I supported). The M.2 SSD (SoC natively supports PCIe Gen4, see hardware documentation for details) interface is not yet supported and will be enabled via a future firmware update. Clean up or expand when storage usage exceeds 80%.
Device Maintenance
Select Maintenance in the navigation bar to access four maintenance tools:
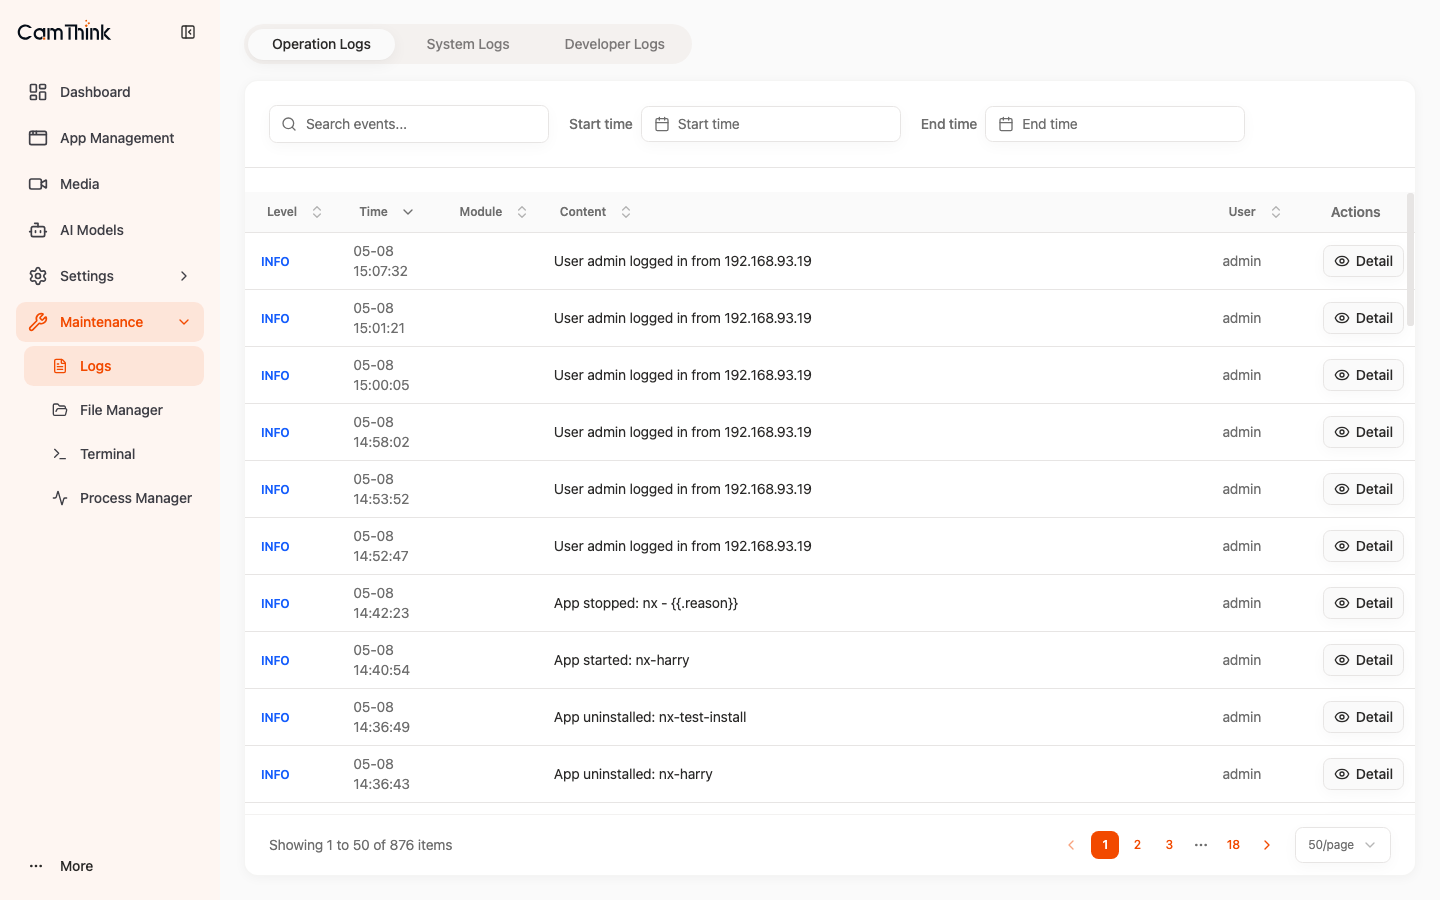
1. Log Viewer
The log page provides three views: Operation Logs, System Logs, and Developer Logs. Filter by time range and severity level to view user logins, application start/stop events, and system events.
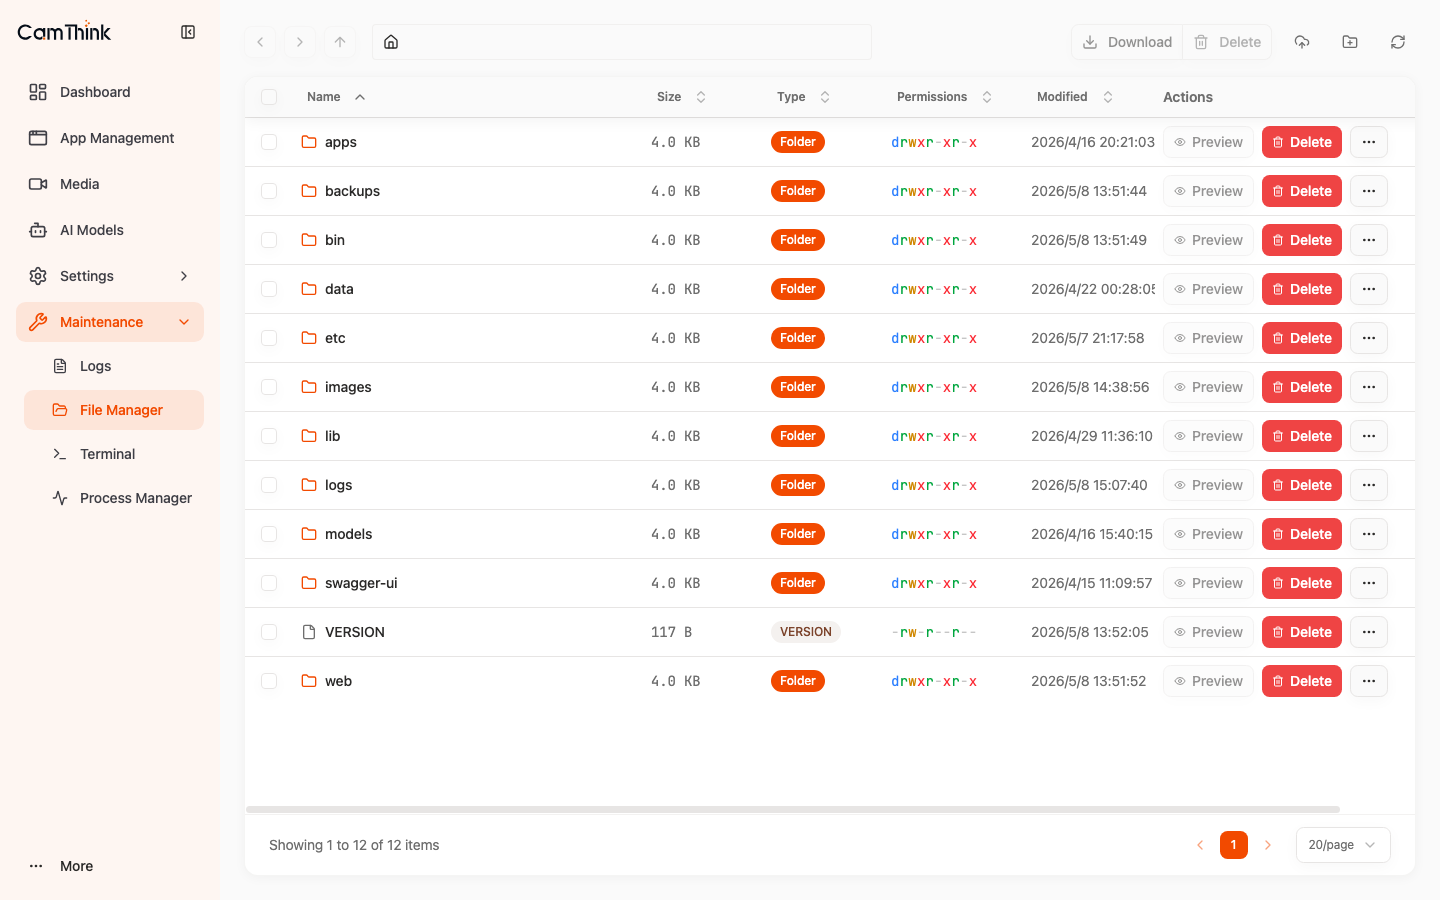
2. File Manager
The file manager provides web-based file browsing. View the device file system directory structure with support for file preview, download, and delete operations.
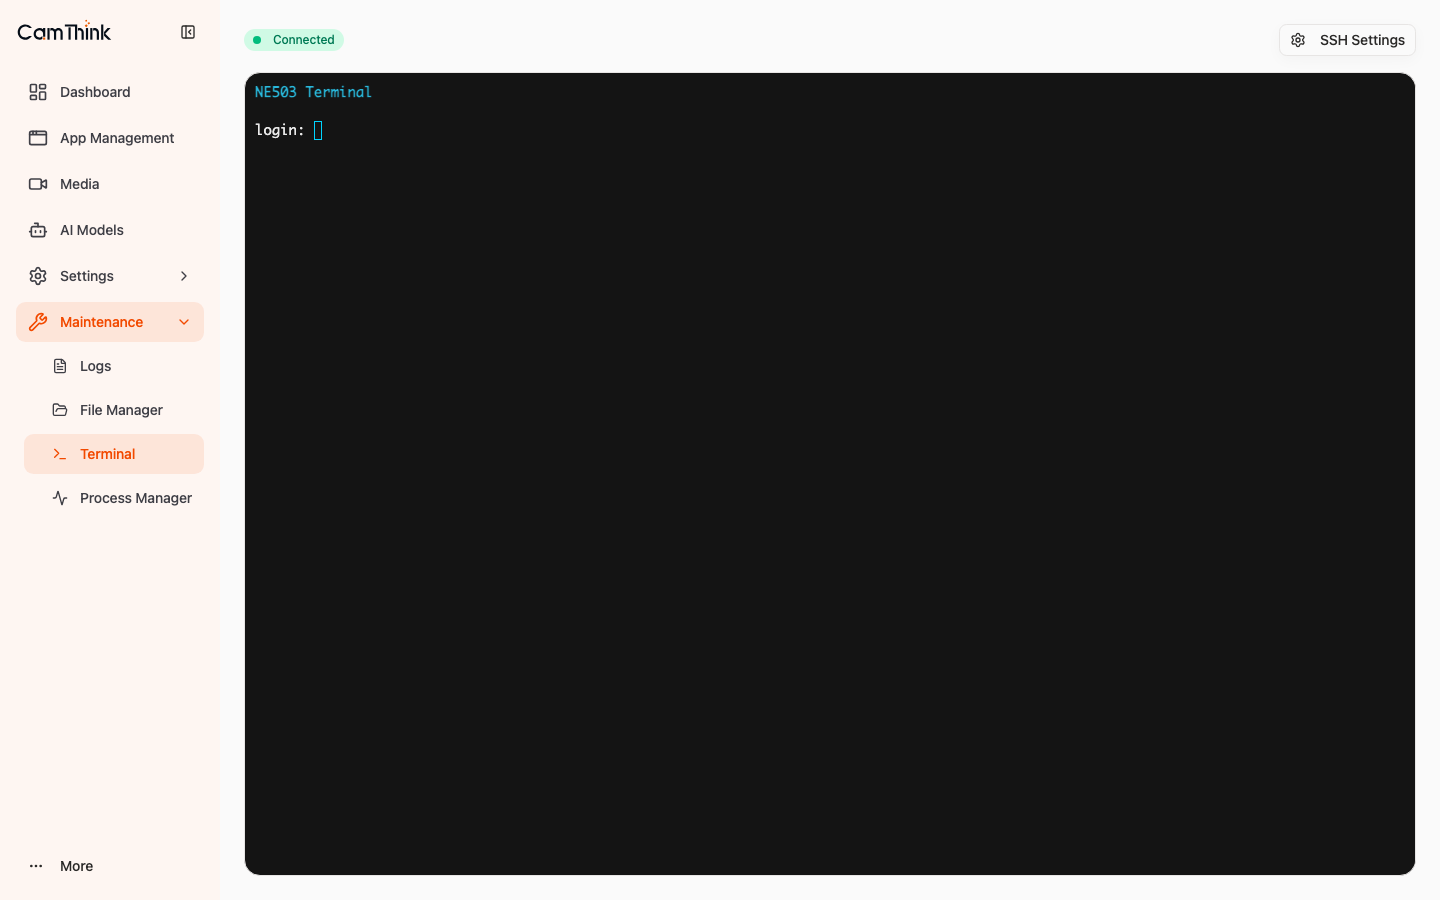
3. Web Terminal
A built-in web SSH terminal lets you access the device command line directly in the browser without additional tools. Click SSH Settings to configure terminal parameters.
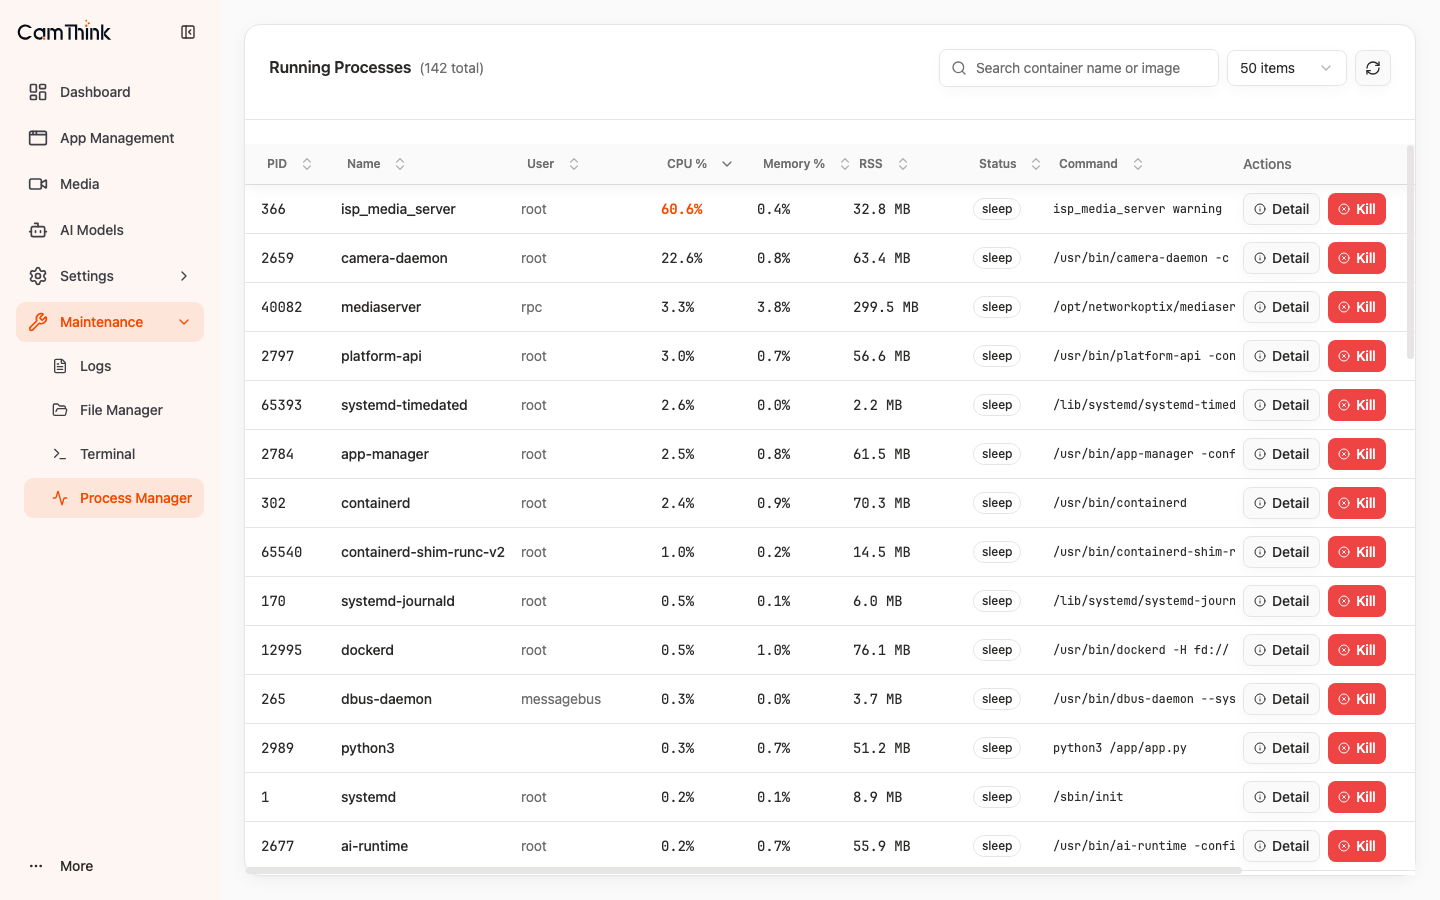
4. Process Manager
The process manager lists all running processes on the device, displaying PID, name, user, CPU / memory usage, and start command. Supports viewing process details and terminating abnormal processes.
Reference Card
Quick Reference
| Item | Value | Item | Value |
|---|---|---|---|
| Web Console | http://<device-ip>:8080 | Web Login | admin / password |
| SSH Login | root / root | Default IP | 10.0.0.1 |
| RTSP Main Stream | rtsp://<device-ip>:8554/main | RTSP Sub Stream | rtsp://<device-ip>:8554/sub |
| RTSP Third Stream | rtsp://<device-ip>:8554/third | Power Supply | PoE 802.3AT or DC 12V, 5–6W |
aipc-cli Command Reference
aipc-cli system info / health          # System info / health check
aipc-cli app list / start / stop <id>  # Application management
aipc-cli app logs <id> -f              # View application logs in real time
aipc-cli device zoom in 5              # Zoom (in/out/stop, speed 1-10)
aipc-cli device focus auto             # Auto focus
aipc-cli stream list / url <id>        # Stream management
aipc-cli model list / register <.hef>  # AI model management
Output format: -o table (default) / -o json / -o yaml
Troubleshooting
| Issue | Troubleshooting Steps |
|---|---|
| Cannot access Web Console | Verify computer IP is in 10.0.0.x subnet → ping 10.0.0.1 → If DHCP, find IP via router |
| RTSP stream won't play | Confirm same network → Check if IP changed → aipc-cli stream list to verify stream status |
| Container fails to start | aipc-cli app logs <id> for logs → Check memory and internet connectivity |
| Forgot Web password | SSH login (root/root) → Reset password with aipc-cli |