Training & Deployment
Before You Start: Assess Your Needs
Before starting work, you can first assess whether you currently have an available model. If you are considering deploying an existing model to NE301, you can jump to this location to read "Deploy Existing Models to NE301"
If you haven't trained any models and want to complete model training and model deployment from scratch, please start reading from here "From Training to Deployment"
Model Training
Model Training
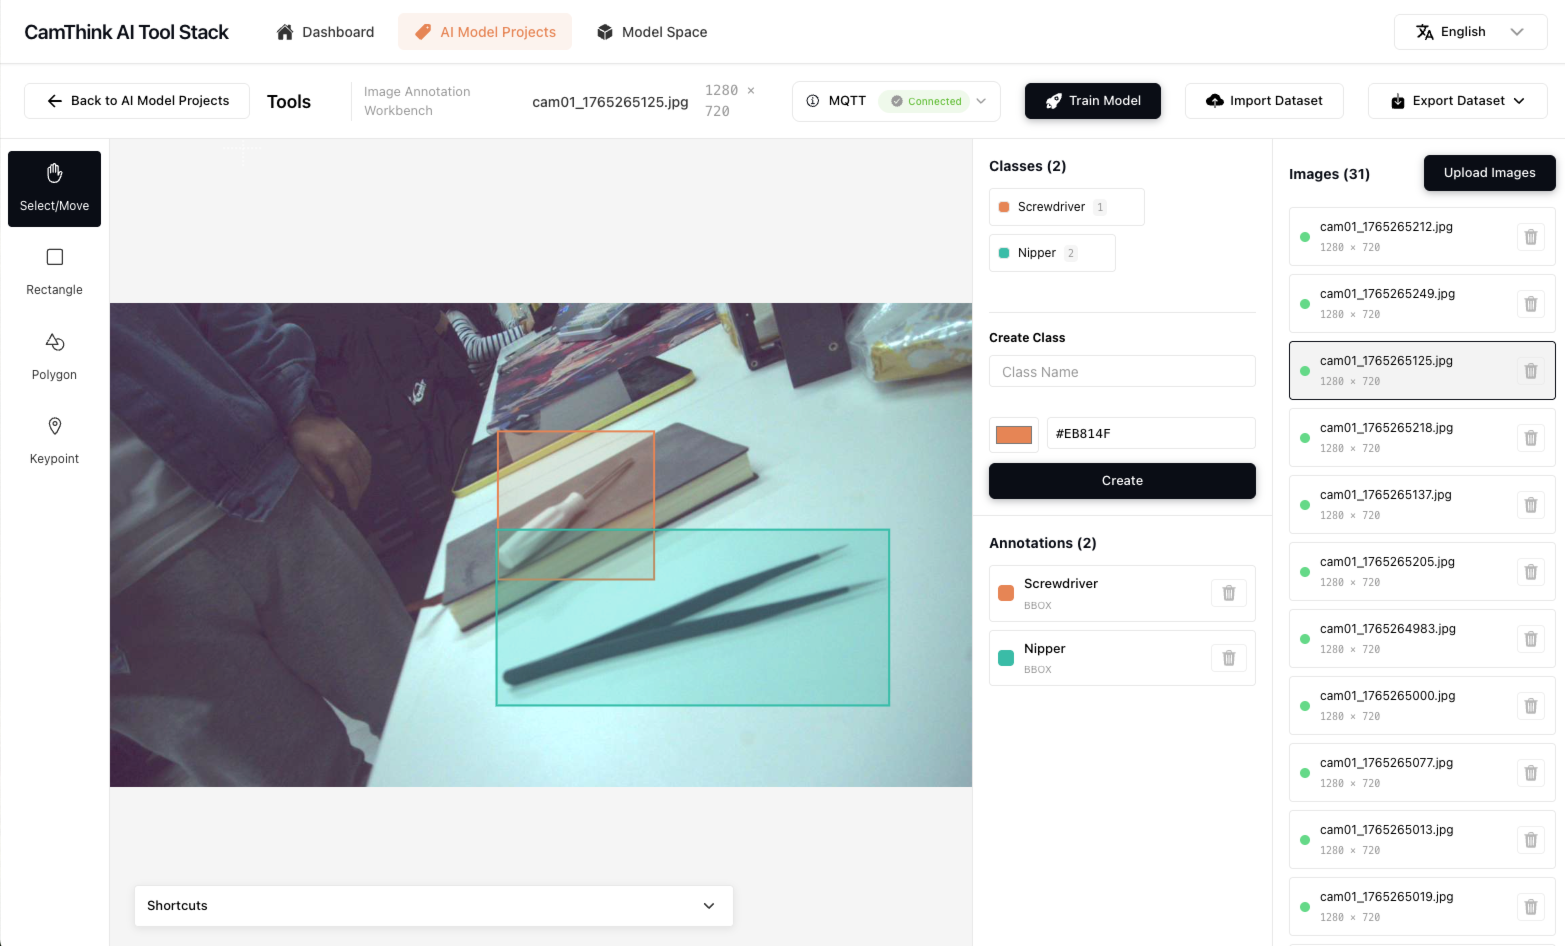
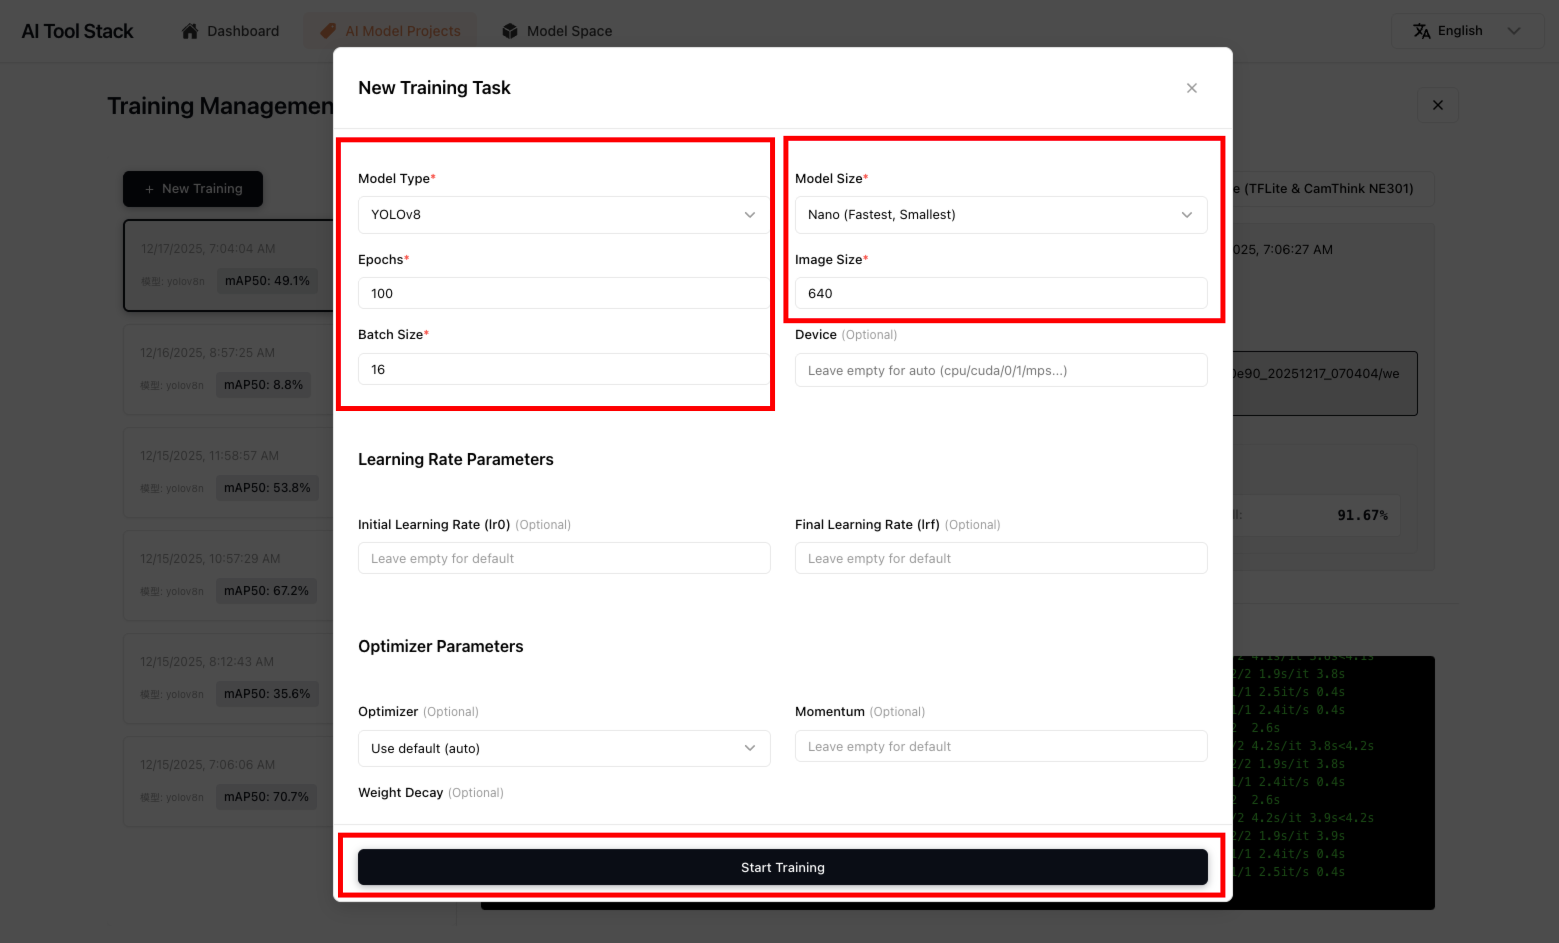
After completing all data annotation, click "Train Model" to start training the model. After entering the training interface, you need to build a new training task for the current project dataset. Click "New Training", configure training information. If you don't fully understand the training parameters, we recommend you directly use the default configuration settings. Advanced parameters don't need to be adjusted; they will all run with default values. Click "Start Training" to start the training task. After the task starts, check the training process logs and wait for training to complete.
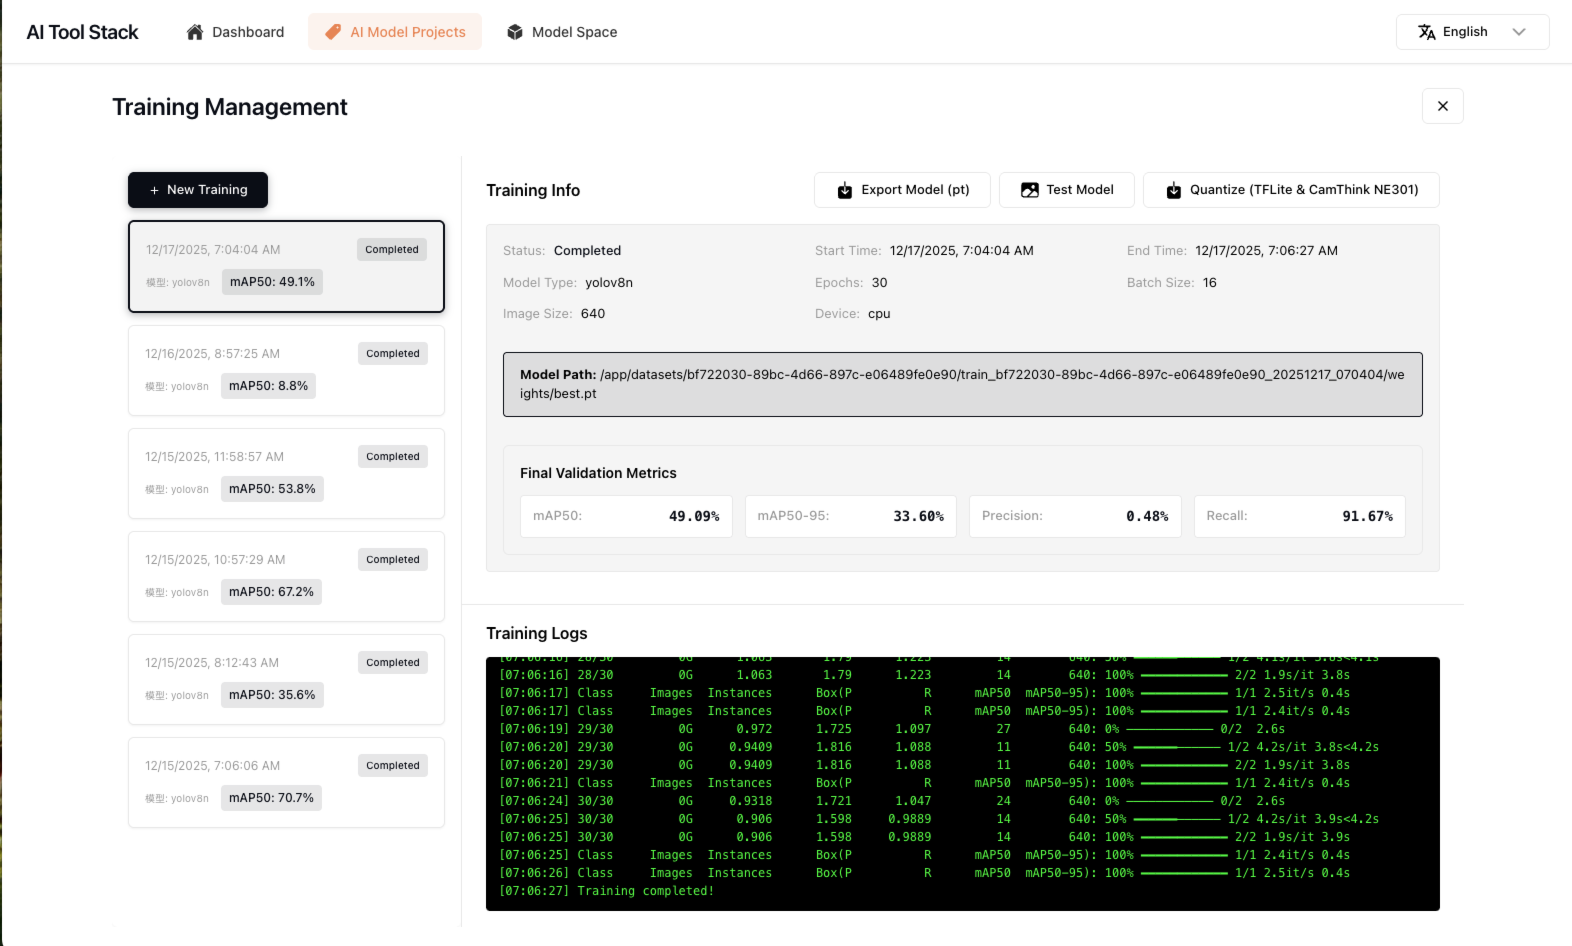
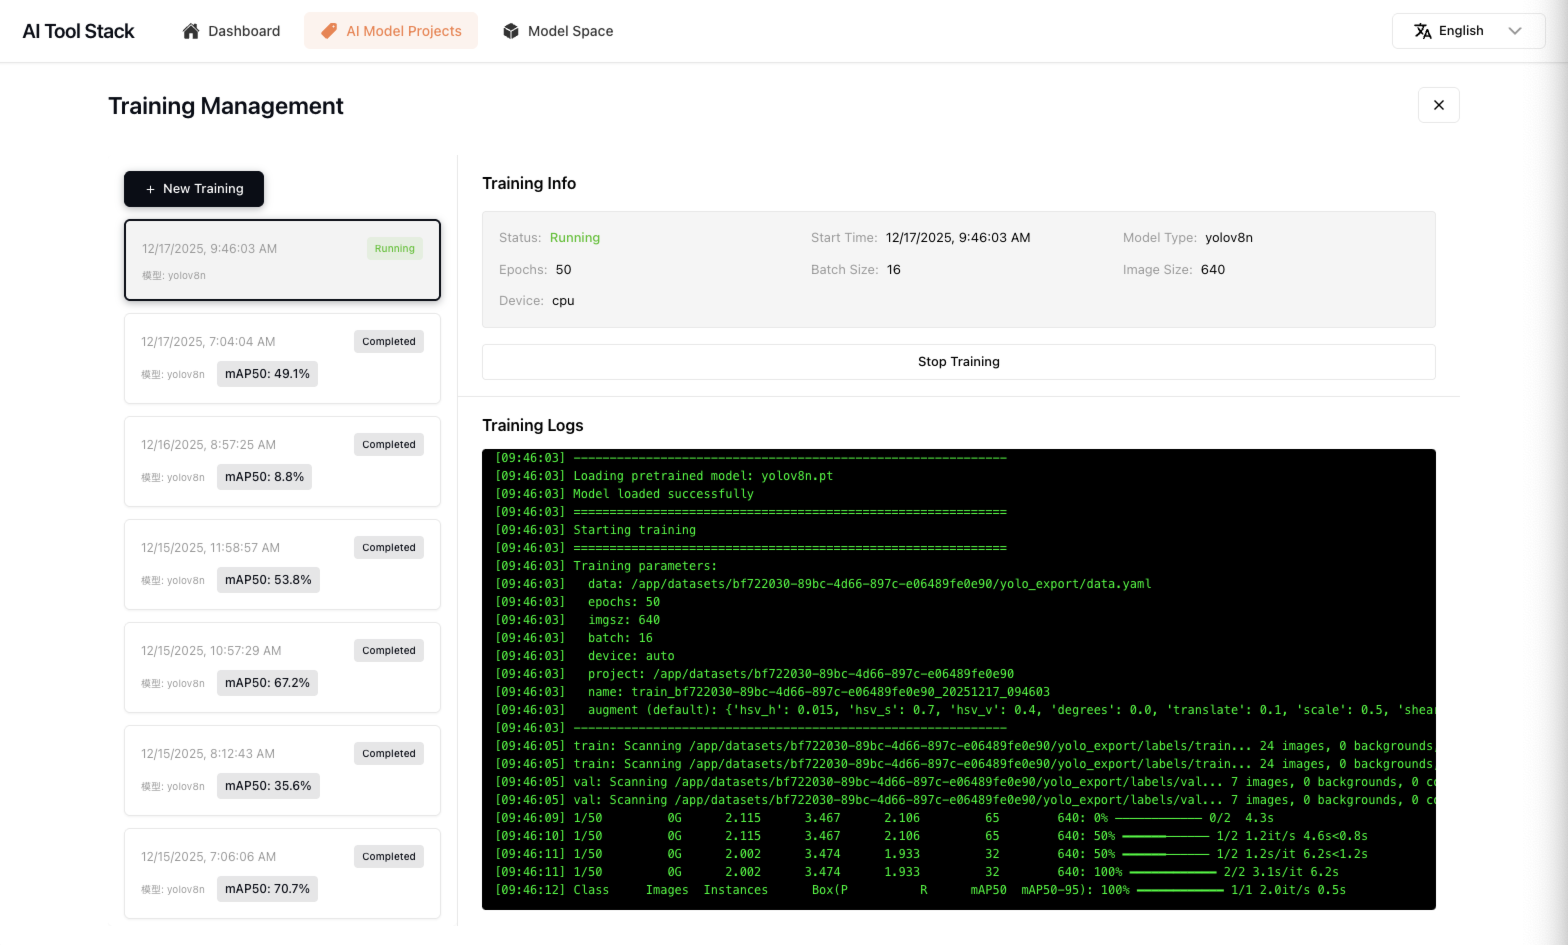
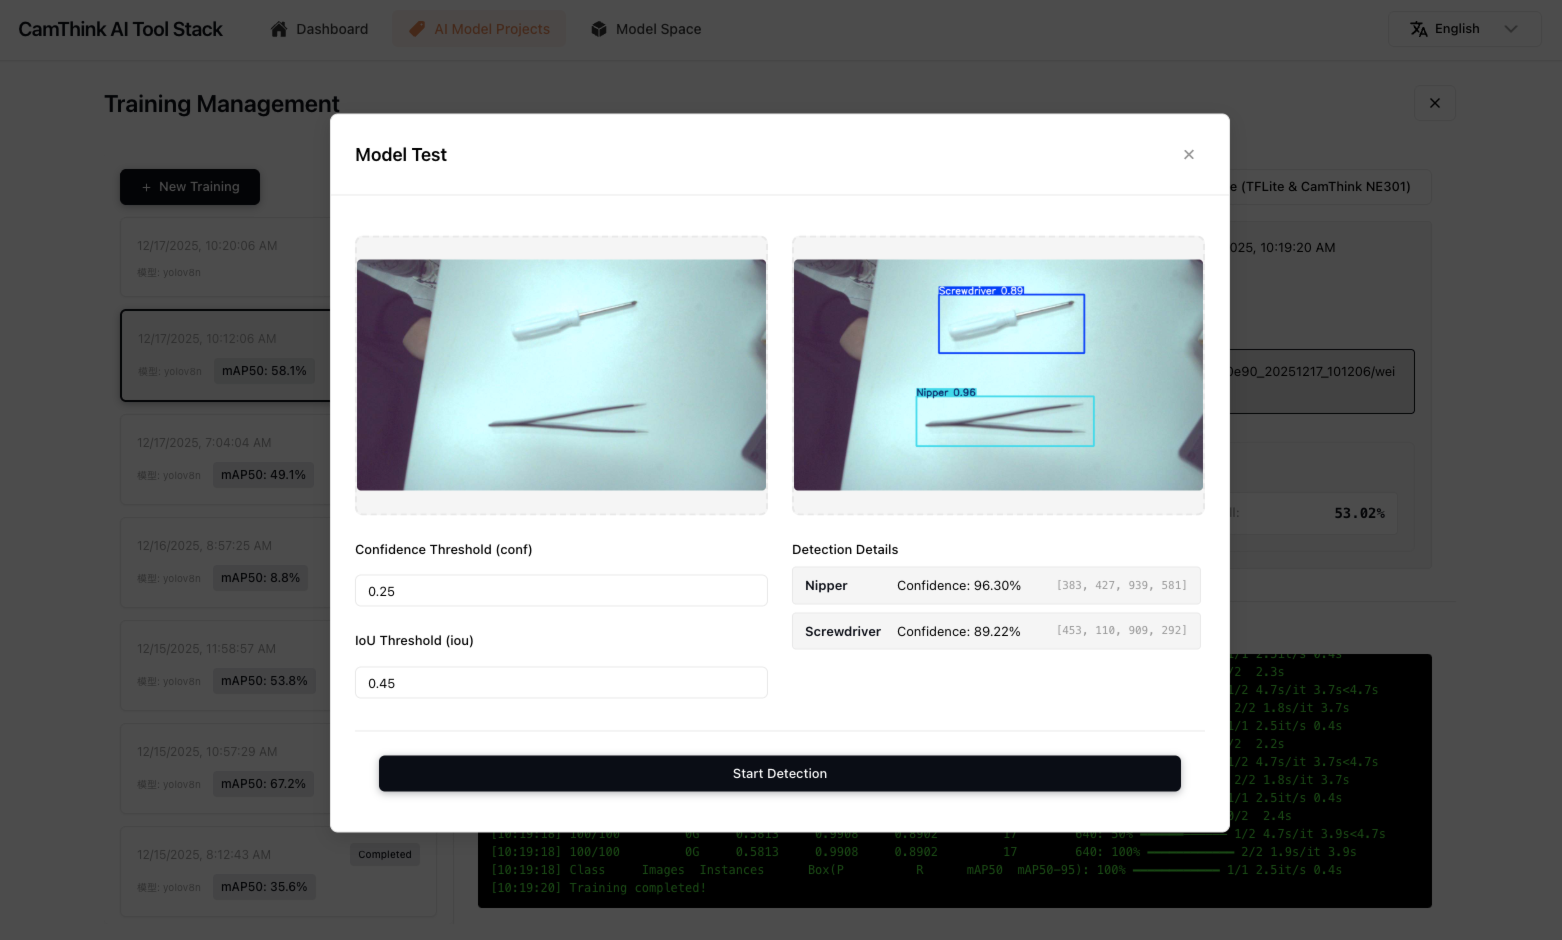
After completing model training, you can view logs in the training details, as well as the accuracy performance of the trained model. You can also operate the following functions. All model files can be found in the list in Model Space:
- Export Model: Can export the trained .pt model to a local folder
- Test Model: Can upload images to test the overall detection effect of the current trained model to evaluate training results
- Quantize (TFLite & CamThink NE301): Can quantize to tflite models and NE301-usable model file packages. If you need to deploy to NE301 devices, this step is necessary
Model Quantization
Model Quantization
This action is necessary if you want to deploy the model to NE301 devices. Quantization requires the NE301 development environment Docker. Please ensure you have installed "NE301 Dev Docker"
After testing the model effects, you can start quantization work and prepare to deploy the quantized model to NE301.
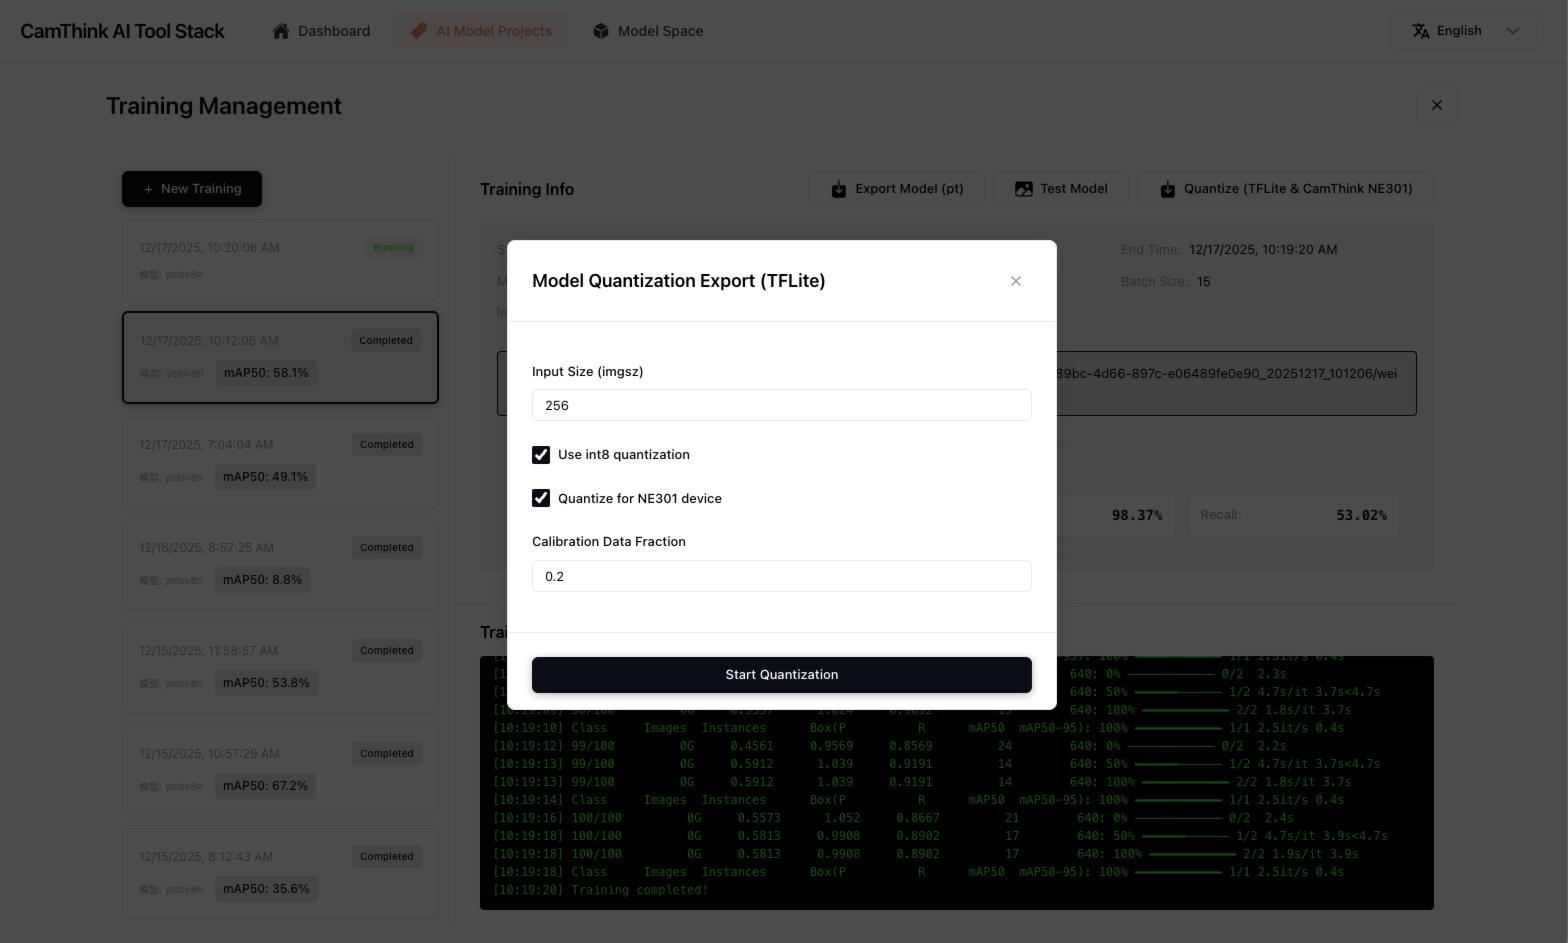
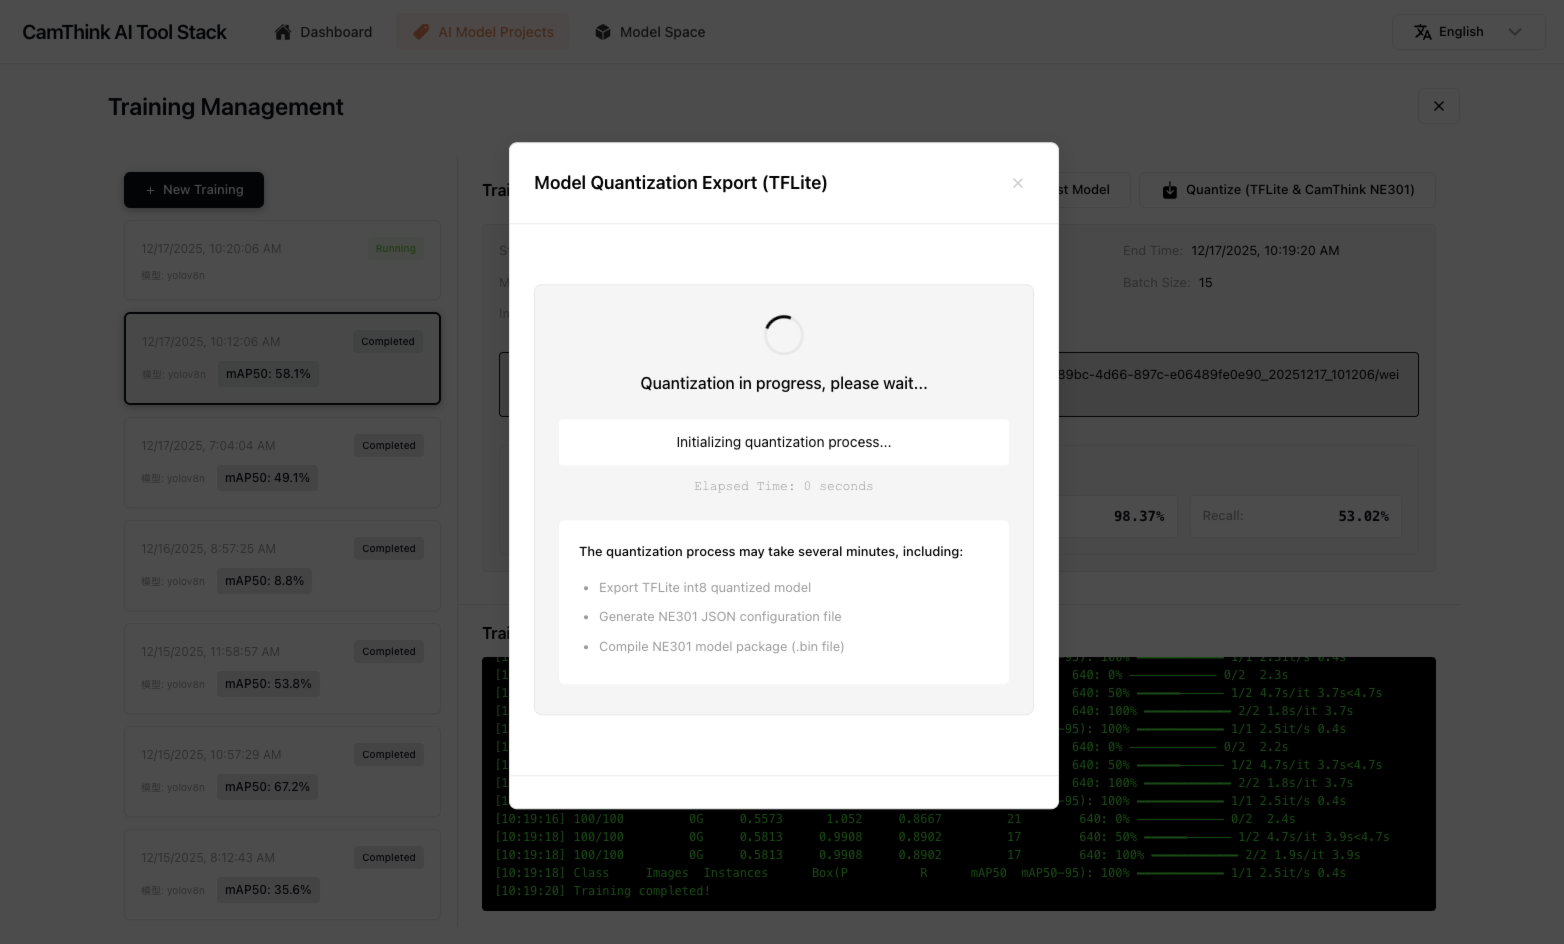
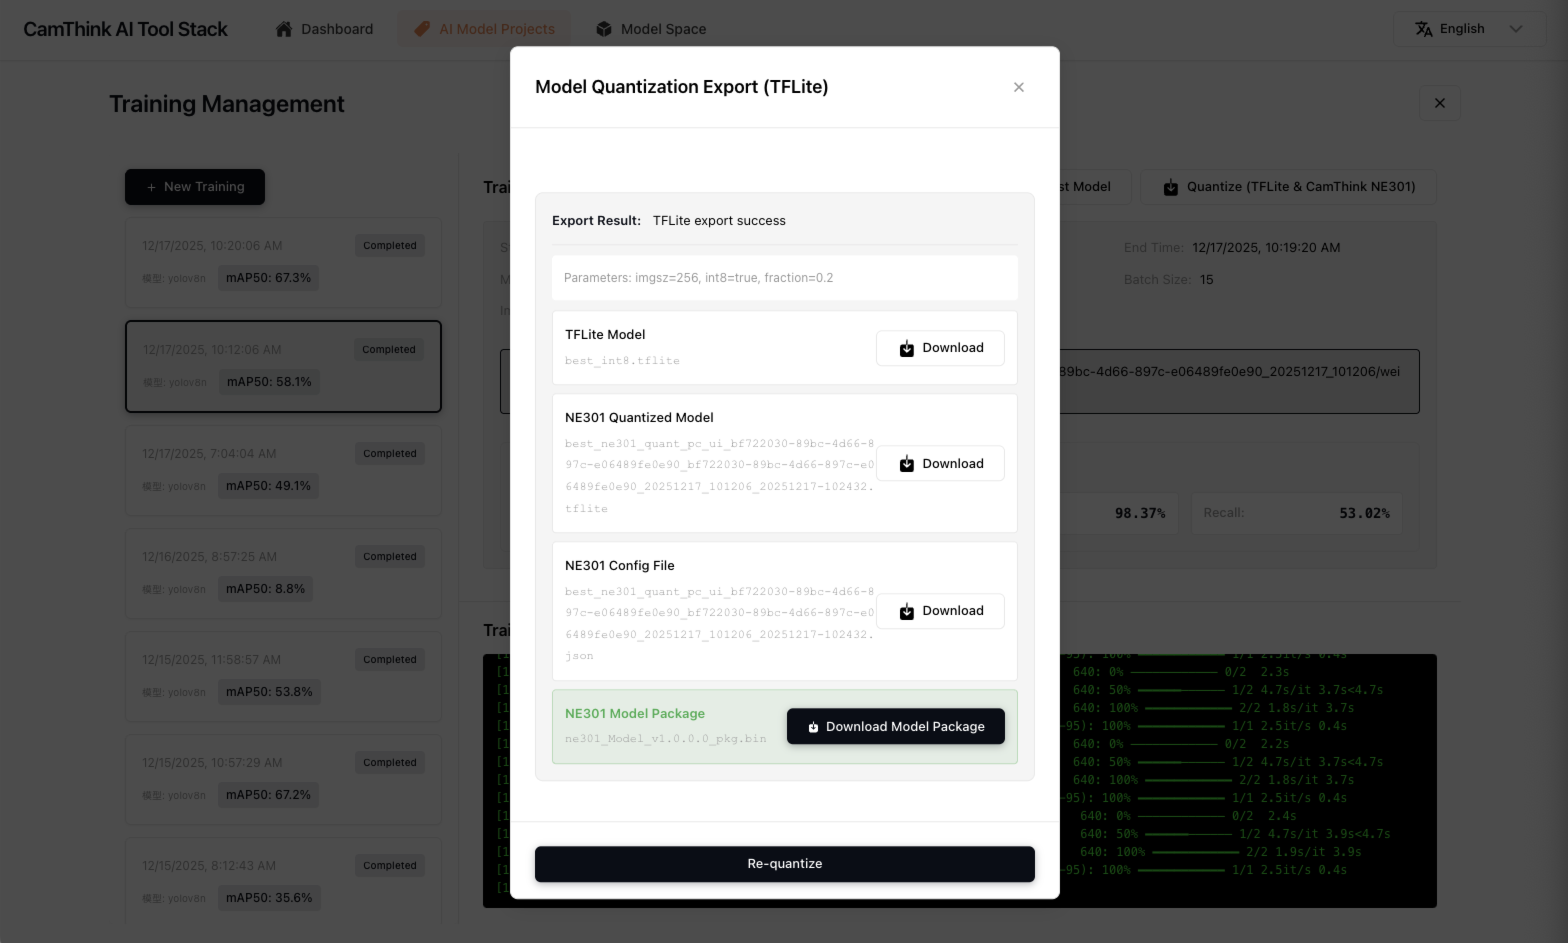
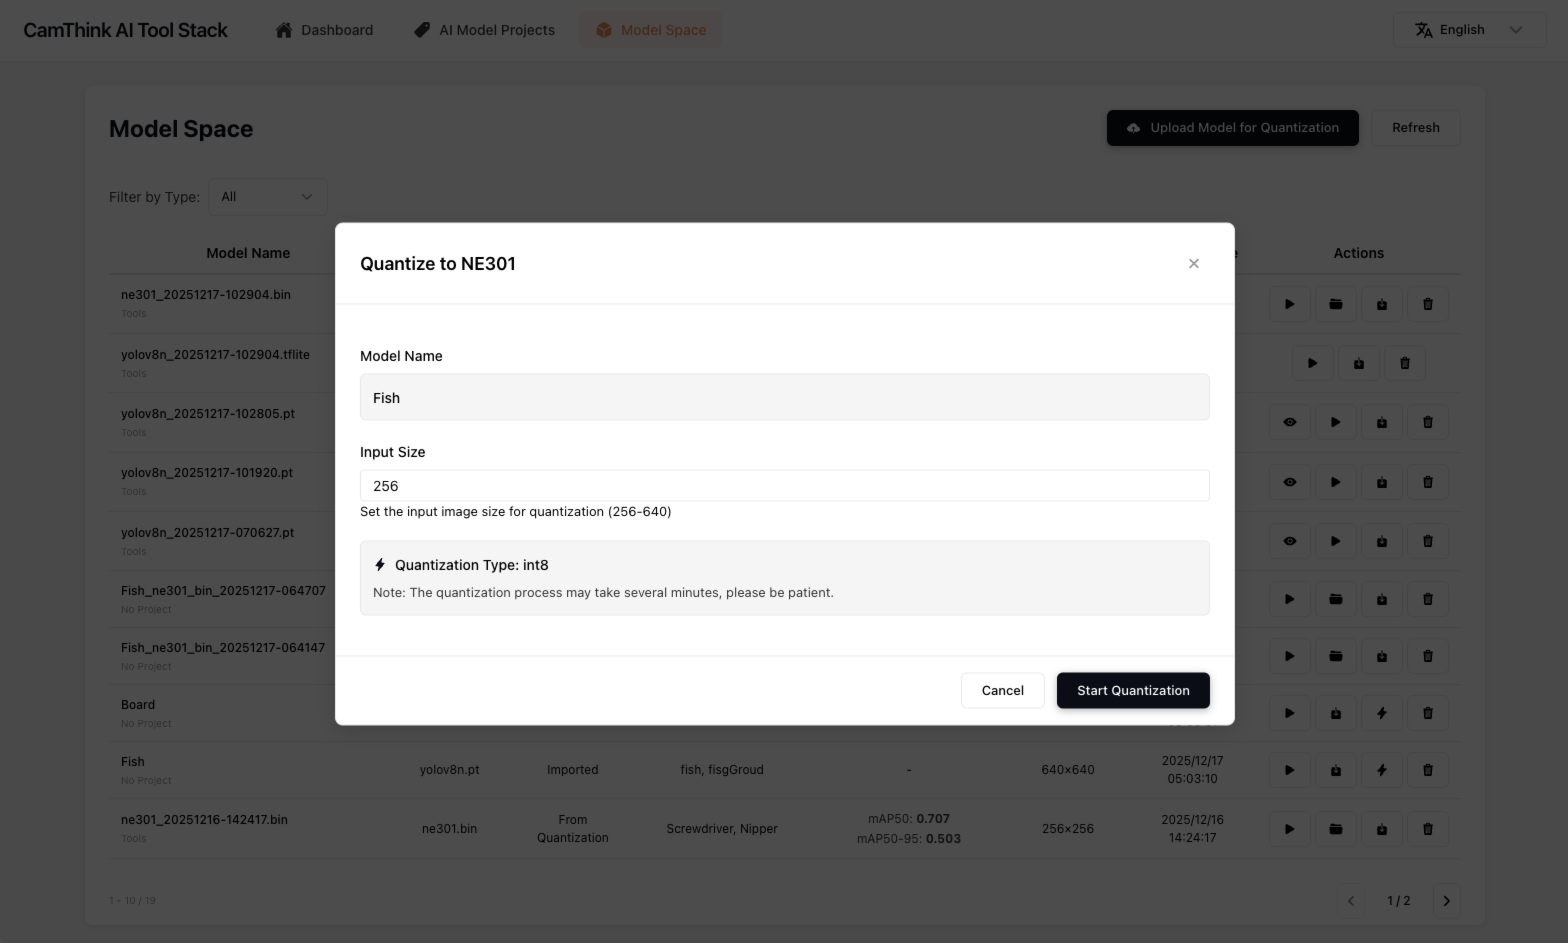
After model training is completed, you can click "Quantize (TFLite & CamThink NE301)" to build a model quantization task. In the task popup, you can set some quantization parameters. Except for the input size parameter, we don't recommend making any changes to the others. For the input size parameter setting, we recommend setting one of 256, 416, or 640. This parameter represents the image input size supported by the quantized model. If you don't want to adjust, use the default value. We recommend you set 256. If you want better accuracy performance, set 416. Inference performance is tight at 640, so set it carefully. Click "Start Quantization" and the model will start the quantization process. You only need to wait for quantization to complete. This process requires a long wait. Please do not close the task window. It will take approximately 5-10 minutes. After model quantization is completed, you can see the quantized NE301 model resource package. Click "Download Model Package" to download it (or find this resource in the Model Space menu after closing to download). The next step is to update the model to the NE301 device locally.
Model Deployment
Model Deployment
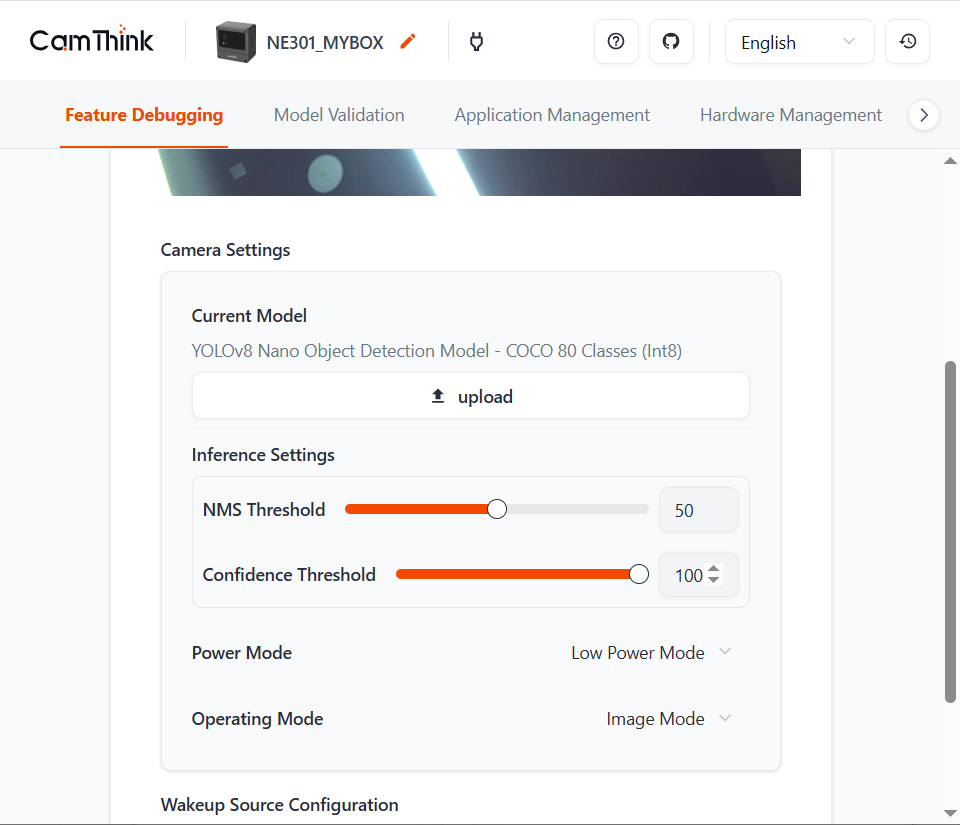
Now we have trained the model and exported the NE301 device-deployable model resource file. Now we can deploy the model in the NE301 device. Currently, model deployment still requires entering the NE301 device's WebUI to upload and update device model files. AI Tool Stack will support remote model updates in the future. Below will explain how to update the trained model file on NE301.
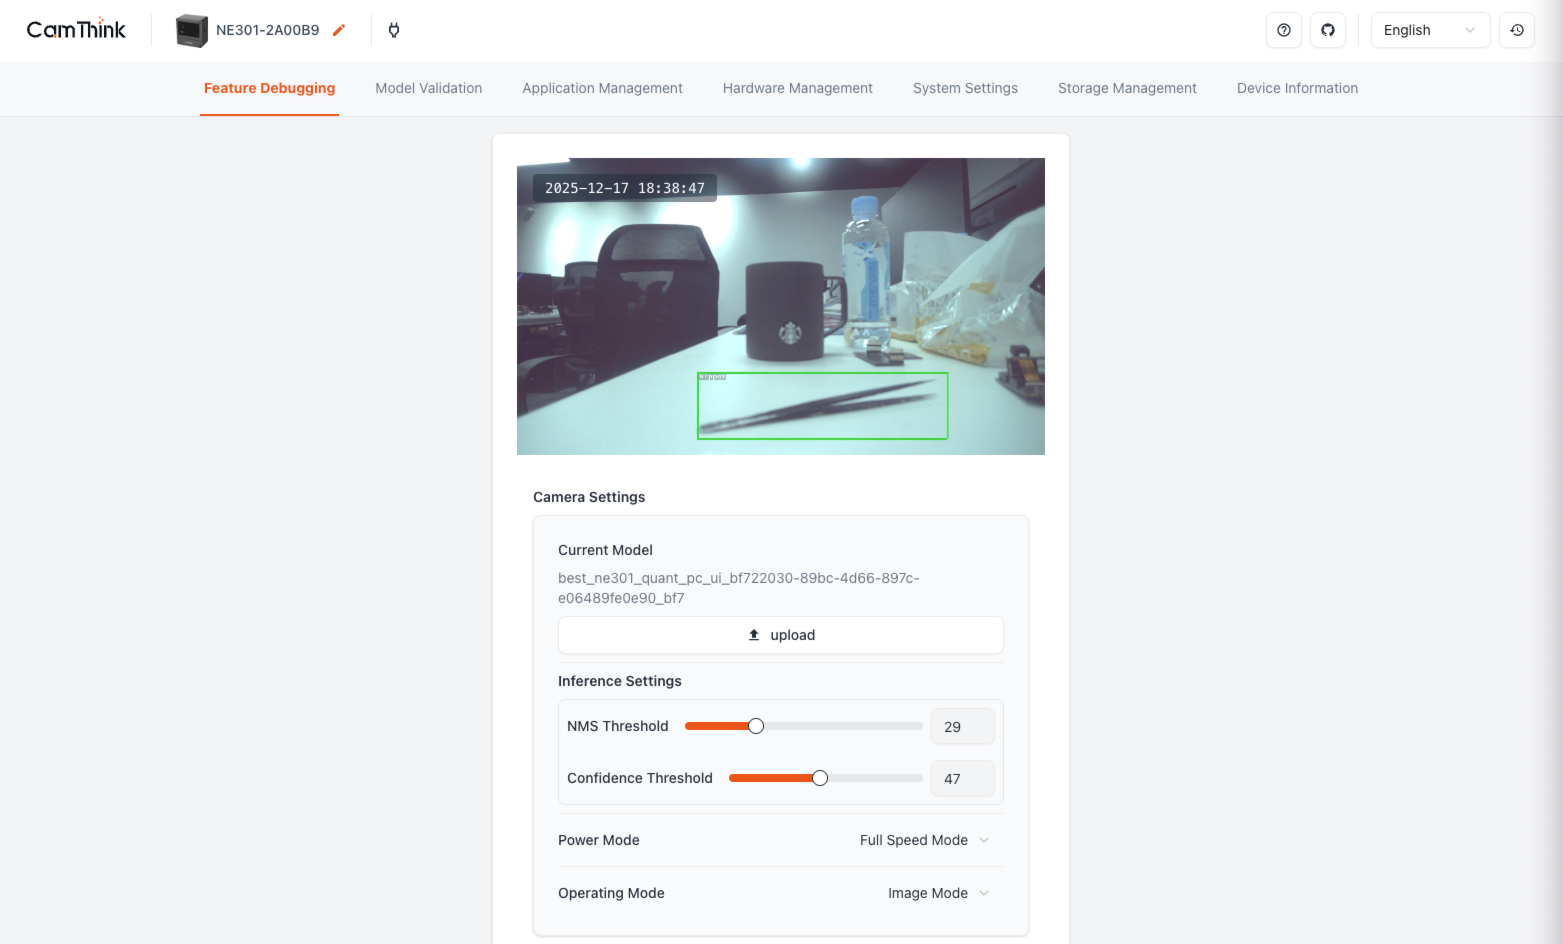
Use the mobile phone or computer that downloaded the model to connect to NE301's WiFi, enter the NE301 Web UI page, click "upload" in Current Model to select the downloaded NE301 model file for model update. After waiting for the model update, test the device model detection effect. You can test through the "Model Validation" function carried on the NE301 management page, or directly preview the target class detection effect in NE301. You can adjust Conf and NMS to verify the effect.
Deploying Existing Models
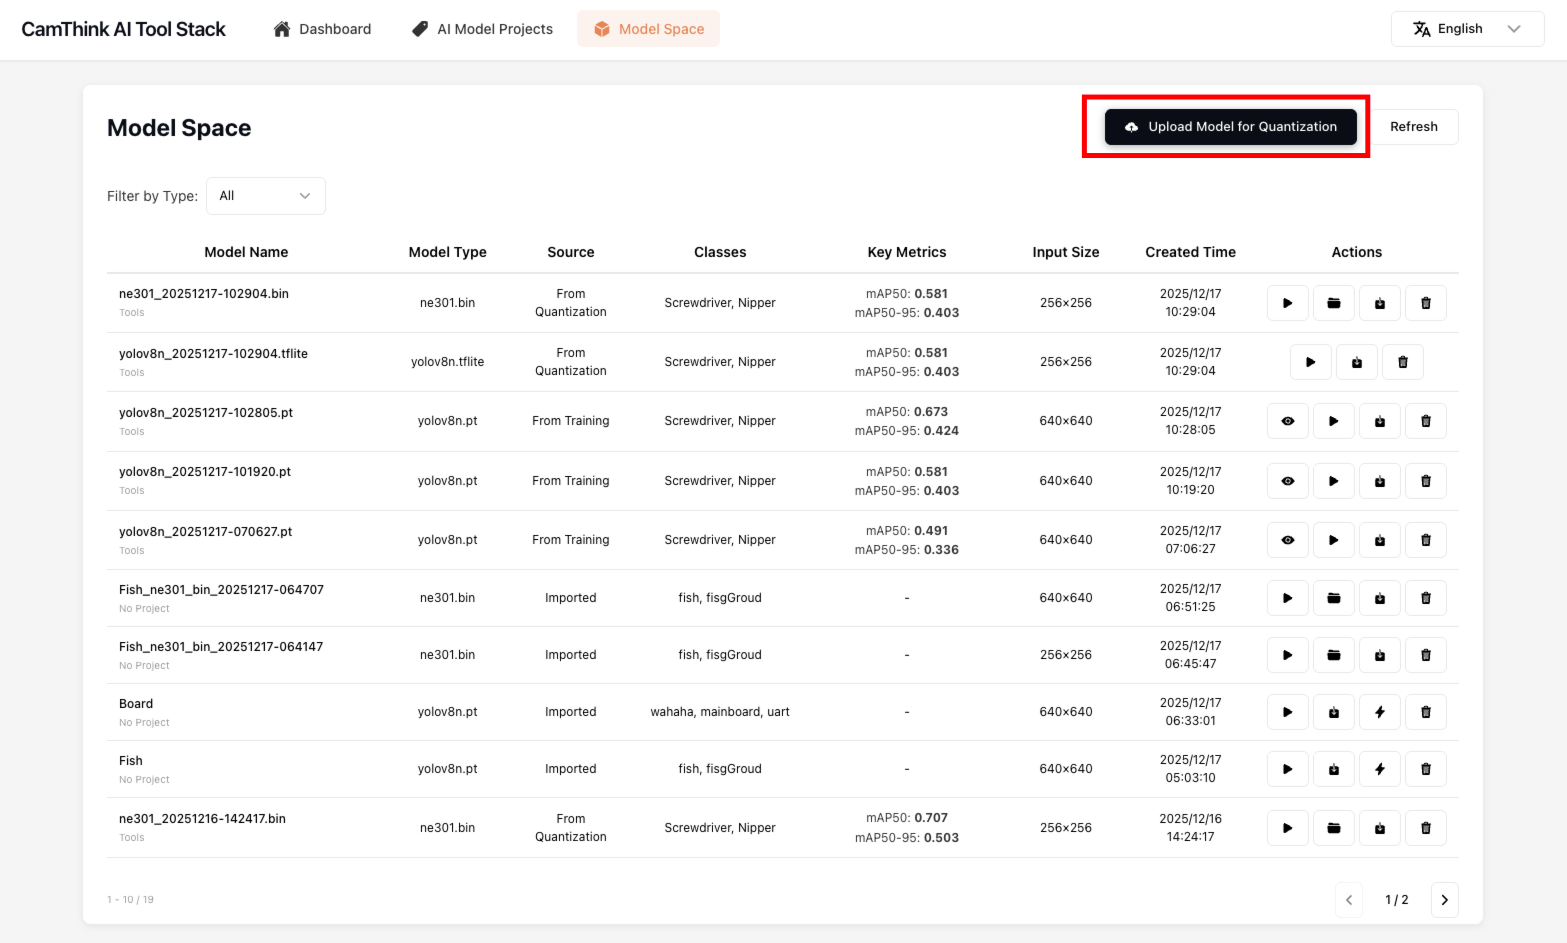
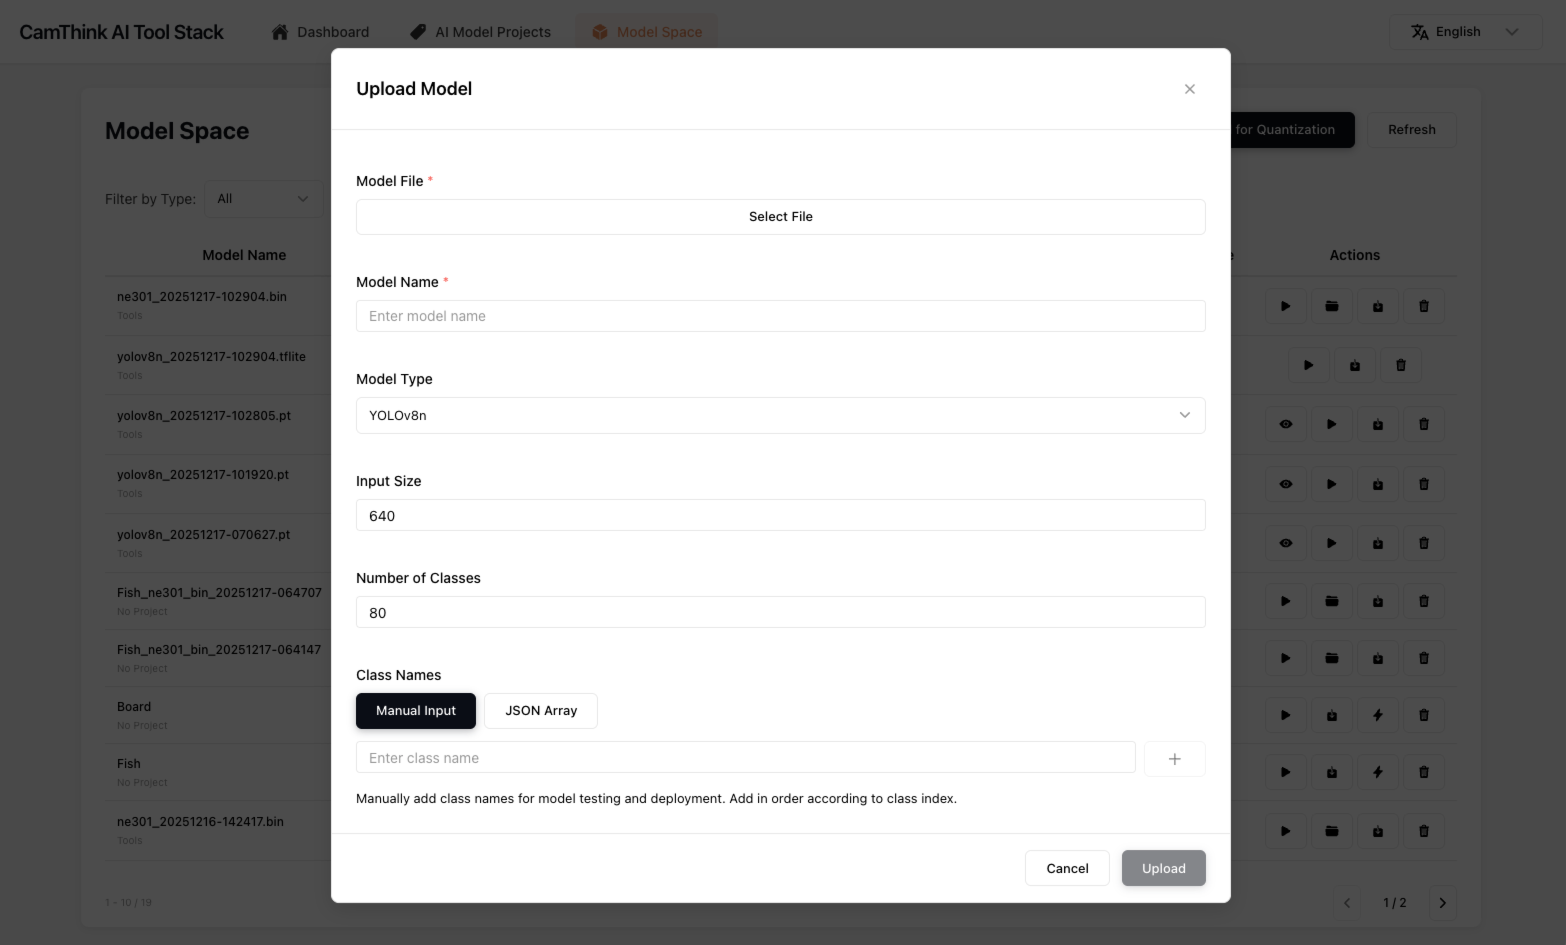
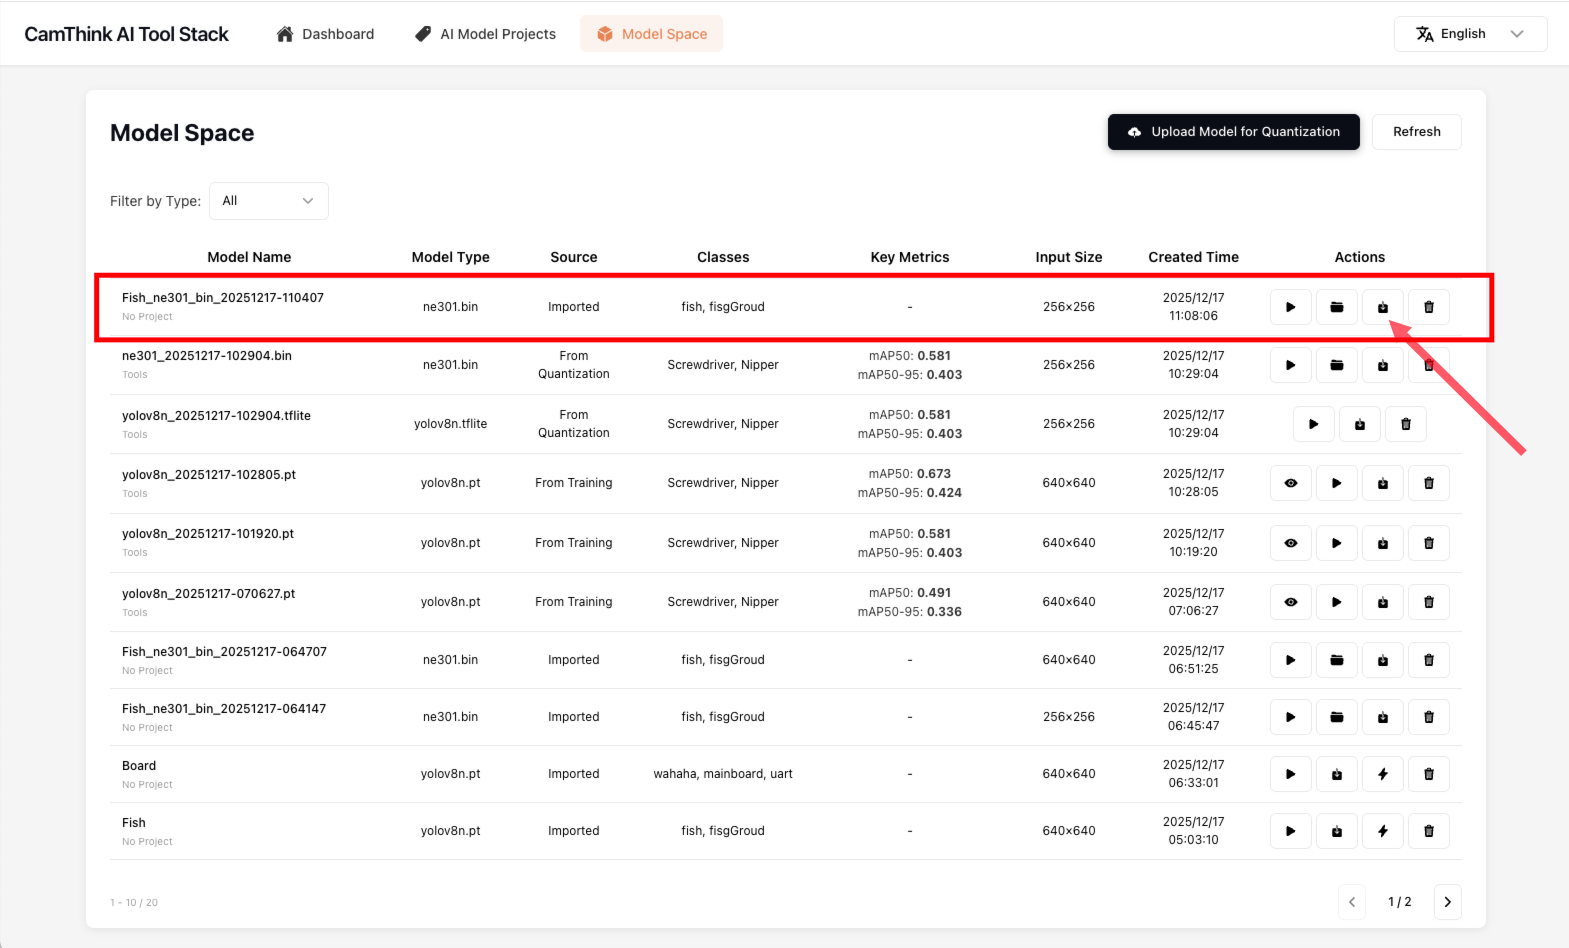
If you already have a trained Ultralytics YOLOv8 model, and it happens to be a Ultralytics YOLOv8n model—why Ultralytics YOLOv8n? Because in NE301 deployment, the model performance and performance under the n size are relatively appropriate. Ultralytics YOLO11 and Ultralytics YOLO26 will be supported in the future. If you need to deploy existing models in NE301, you can find the "Upload Model for Quantization" button in AI Tool Stack's "Model Space" menu. Click it and fill in the information in the form:
- Model Name: Define a name
- Model Type: Default Ultralytics YOLOv8n
- Input Size: Default 640, adjust according to your model's input image size
- Number of Classes: Adjust according to your model's detection class count
- Class Names: Fill in your model types
Click "Upload" to upload your model. Find the model you uploaded in the list. You can click test to test this model's performance.
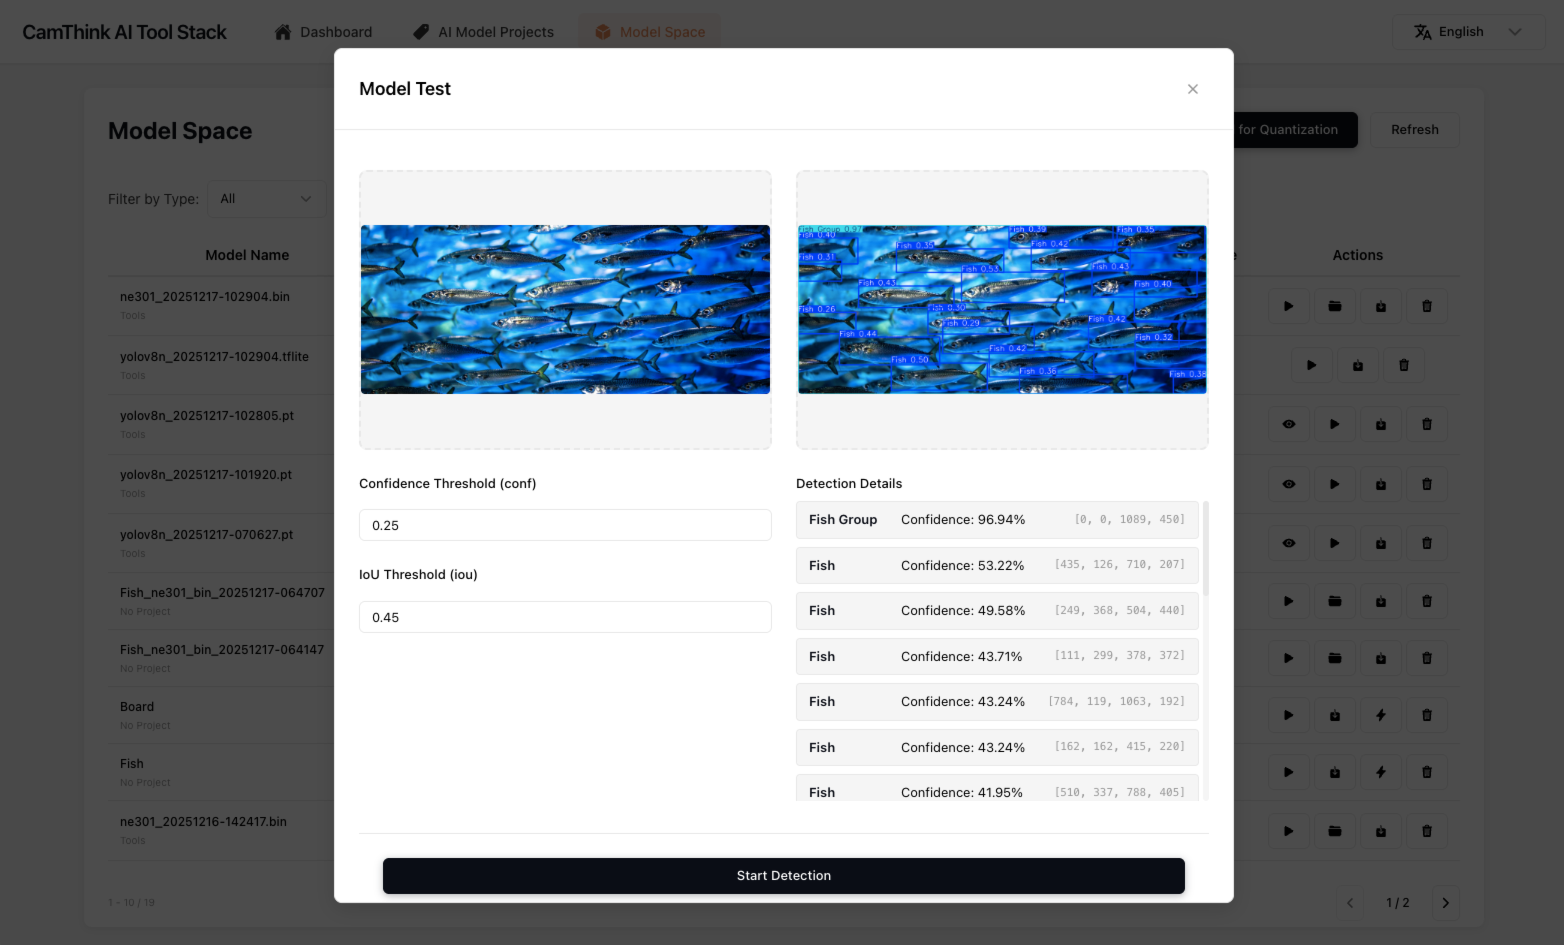
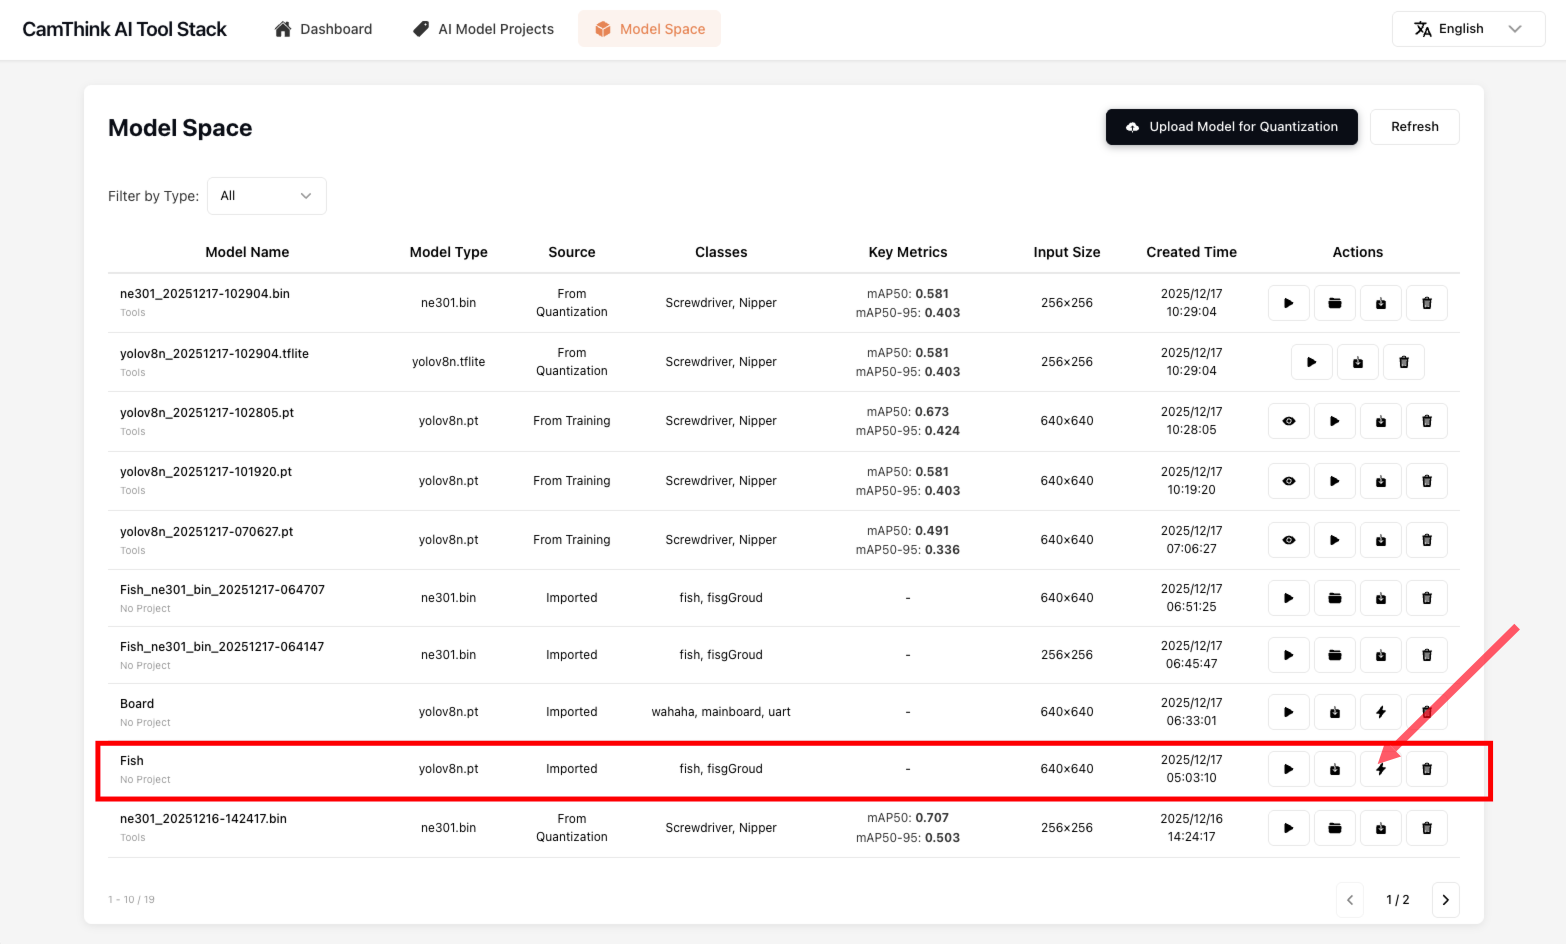
After model verification is completed, we begin to quantize the model to make the model quantized into NE301-deployable model resources. Click the quantization button in the list, fill in Input Size (256, 416, 640) in the popup, click the "Start Quantization" button, and wait for the quantization work to complete. This process takes a long time, please be patient. After model quantization is completed, NE301-usable model resources will appear in the list. You can download this file and deploy it on the NE301 device. For model deployment details, see Model Deployment
 ## Overview of Training to Model Quantization Deployment Results
Below is our process of collecting 31 images from NE301 devices using MQTT to push to the project, completing annotation. This model is a detection model for identifying tweezers and screwdrivers. Below are the detection effects after training and quantization deployed to NE301. This entire process took less than 2 hours.