Capture and Storage
Prepare the camera image and supplementary light in Hardware Management first. Then use Capture Settings → Capture Config to decide how triggered images are stored and sent, and use Records to inspect every capture.
1. Prepare the capture image
Image Management
Open Hardware Management → Image Management. Confirm that Connection Status is connected, then inspect the preview. Do not configure image flip, ISP mode or grayscale mode until the camera is connected.
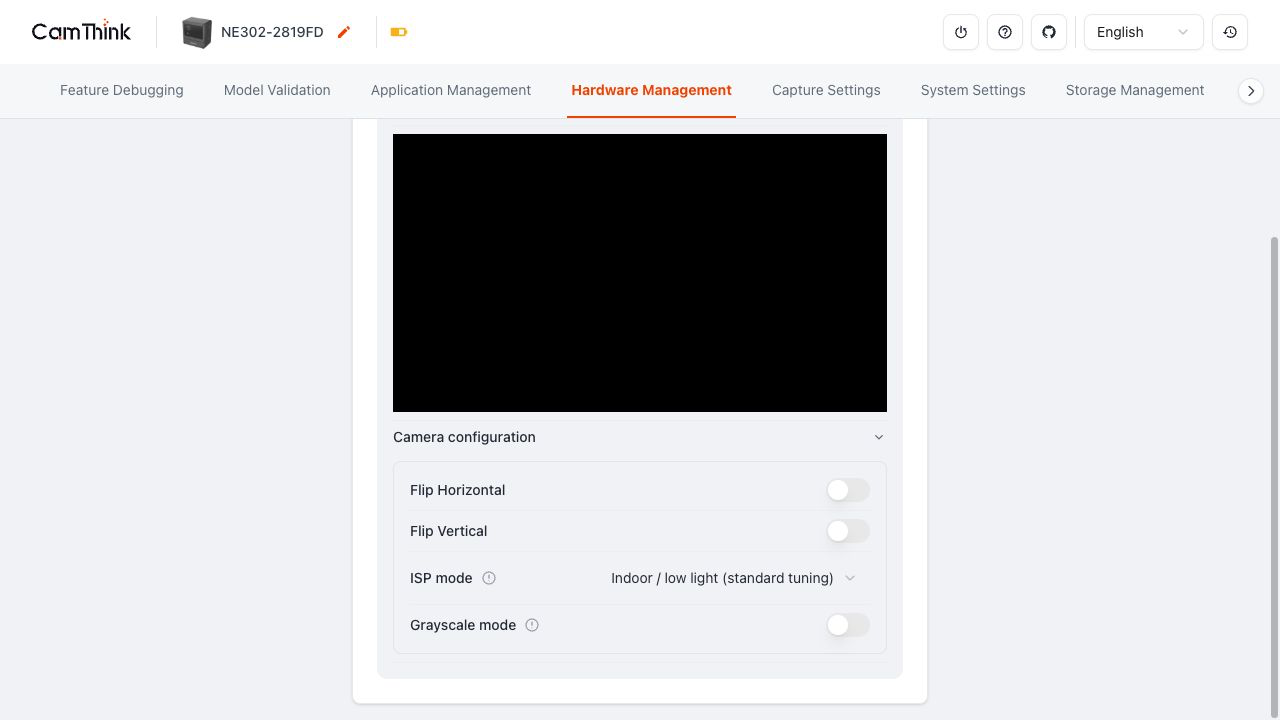
| Setting | When to adjust it | How to confirm |
|---|---|---|
| Flip Horizontal / Flip Vertical | The preview is mirrored or upside down. | Check the same scene in Feature Debugging, then inspect the next real image in Records. |
| ISP mode | Select the indoor/low-light or outdoor/bright-light tuning that matches the installation. | Restart or wait for the next wake-up, then compare the image and inference result with a fixed scene. |
| Grayscale mode | A downstream model or inspection flow explicitly requires grayscale images. | Restart or wait for the next wake-up, then confirm both the preview and saved image have the expected result. |
| Custom ISP profile | A validated ISP JSON configuration is already available. | Import only a validated profile, then recheck the image using the same scene. |
Changes to ISP mode and Grayscale mode apply after the next wake-up or reboot. During first installation, change one image setting at a time so that image changes remain attributable.
Lighting Management
Open Hardware Management → Lighting Management, confirm that the camera is still connected, then inspect Work Supplement Light. The page exposes the options available for the connected device and its current light mode. Always Off in the screenshot is the state captured from this device, not a universal recommendation.
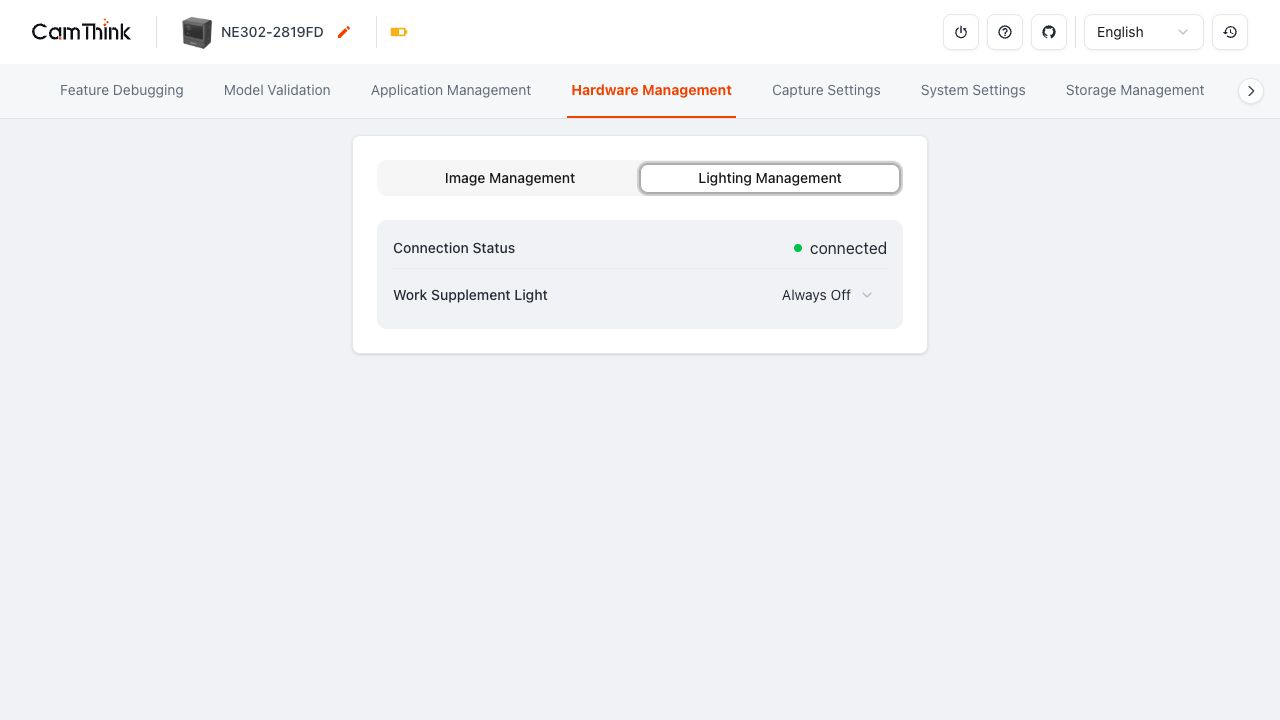
For a low-light installation, select an available mode appropriate to the scene, run one real trigger, and inspect the stored image under Records. Preview alone is not enough to judge whether supplementary light is suitable for capture and inference.
2. Choose capture, storage and delivery
Open Capture Settings → Capture Config. Select Capture Mode and Storage Location first, then configure upload and retention.
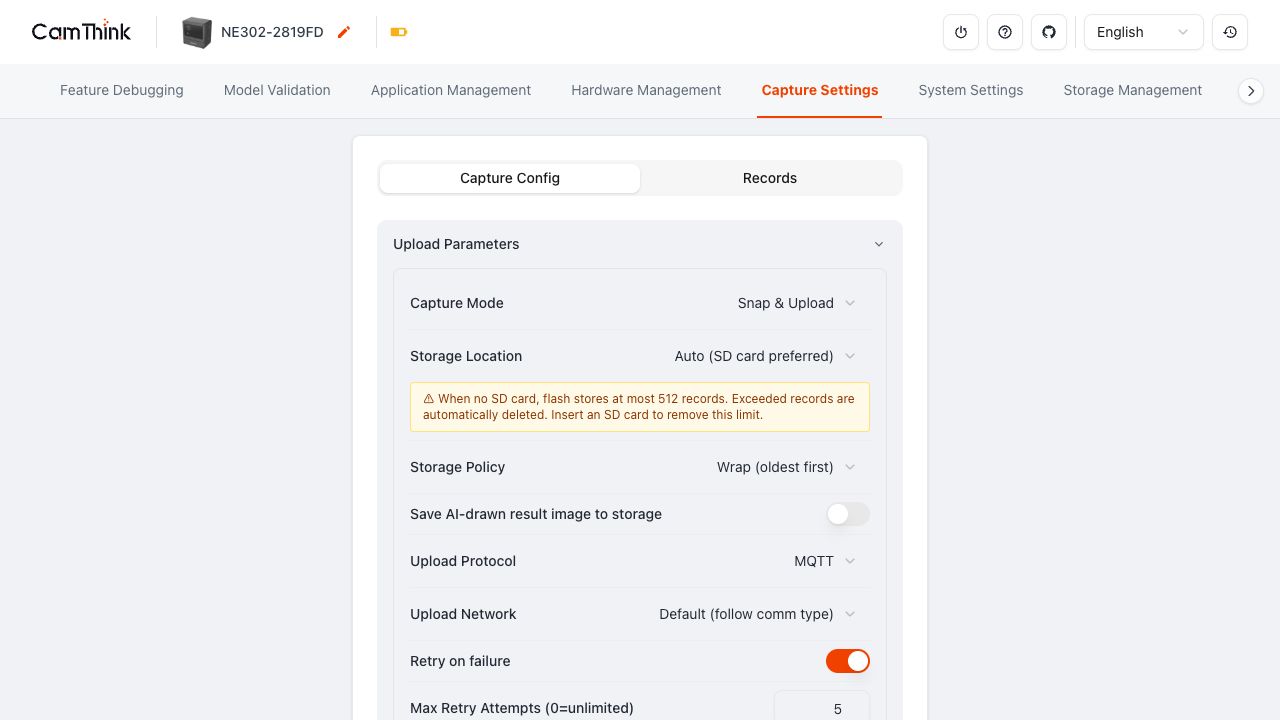
| Setting | When to use it | Configuration guidance |
|---|---|---|
| Capture Mode | Choose immediate delivery, accumulated batch delivery, scheduled delivery or local-only storage after a trigger. | For first integration, use Snap & Upload. Use Store Only when validating local capture only. Confirm the receiver and device time before batch or scheduled modes. |
| Storage Location | Select SD card, internal Flash, or device-managed SD-card preference for records. | Use a recognized SD card for long-term retention. No Storage (Instant only) leaves no local record. |
| Storage Policy | Choose whether writing continues or stops when storage fills. | Wrap (oldest first) overwrites the oldest records. For complete retention, use Stop When Full and export promptly. |
| Save AI-drawn result image to storage | Stores the image with AI detection overlays. | Enable it for visual review; disable it when only the original image is required or storage is limited. |
| Upload Protocol / Upload Network | Select the result-delivery protocol and network path. | Configure MQTT/MQTTS or Webhook address, authentication and certificates in Data Transmission. |
Without an SD card, the page shows the current Flash record limit. This is a limit of the current device configuration, not a universal NE302 capacity specification.
3. Set retry and image parameters
On the same page, configure retry, retention and camera parameters, then click save at the bottom.
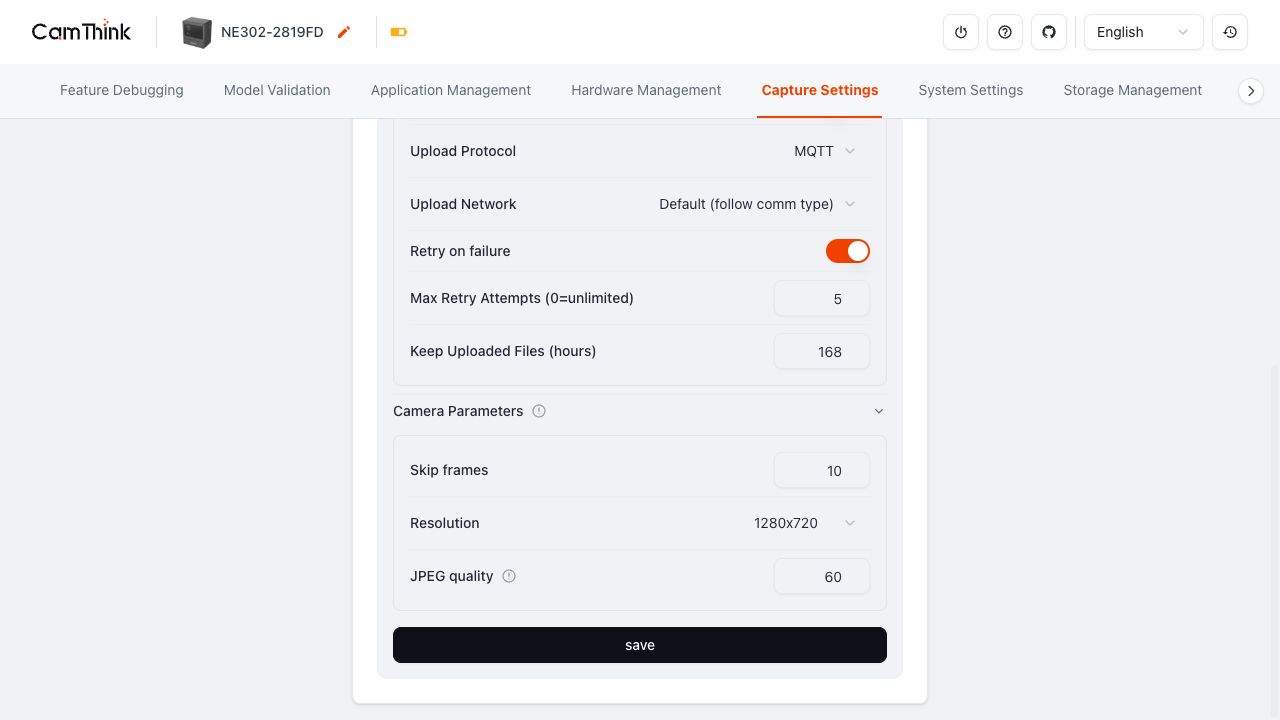
| Setting | What it affects | Selection guidance |
|---|---|---|
| Retry on failure | Whether a failed upload is retained and attempted again. | Enable it for temporary receiver outages. The receiver must tolerate duplicate results. |
| Max Retry Attempts (0=unlimited) | Maximum retries for a failed record. | Supports 0–20. 0 means unlimited; use it only when storage and receiver policies allow it. |
| Keep Uploaded Files (hours) | How long successfully uploaded files remain on the device. | Supports 0–720 hours. Longer evidence retention uses more storage. |
| Skip frames | Frames skipped after a trigger before the image is saved. | For moving subjects, compare incrementally with a fixed scene and identical trigger action. |
| Resolution / JPEG quality | Image detail, file size and upload time. | Change one setting at a time, then inspect the actual saved file and inference result. |
After saving, reopen the page to confirm that the values remain. Upload settings apply immediately; Camera Parameters changes apply on the next wake-up or reboot.
4. Verify a capture in Records
Run one real trigger, then open Capture Settings → Records and find the entry by trigger time.
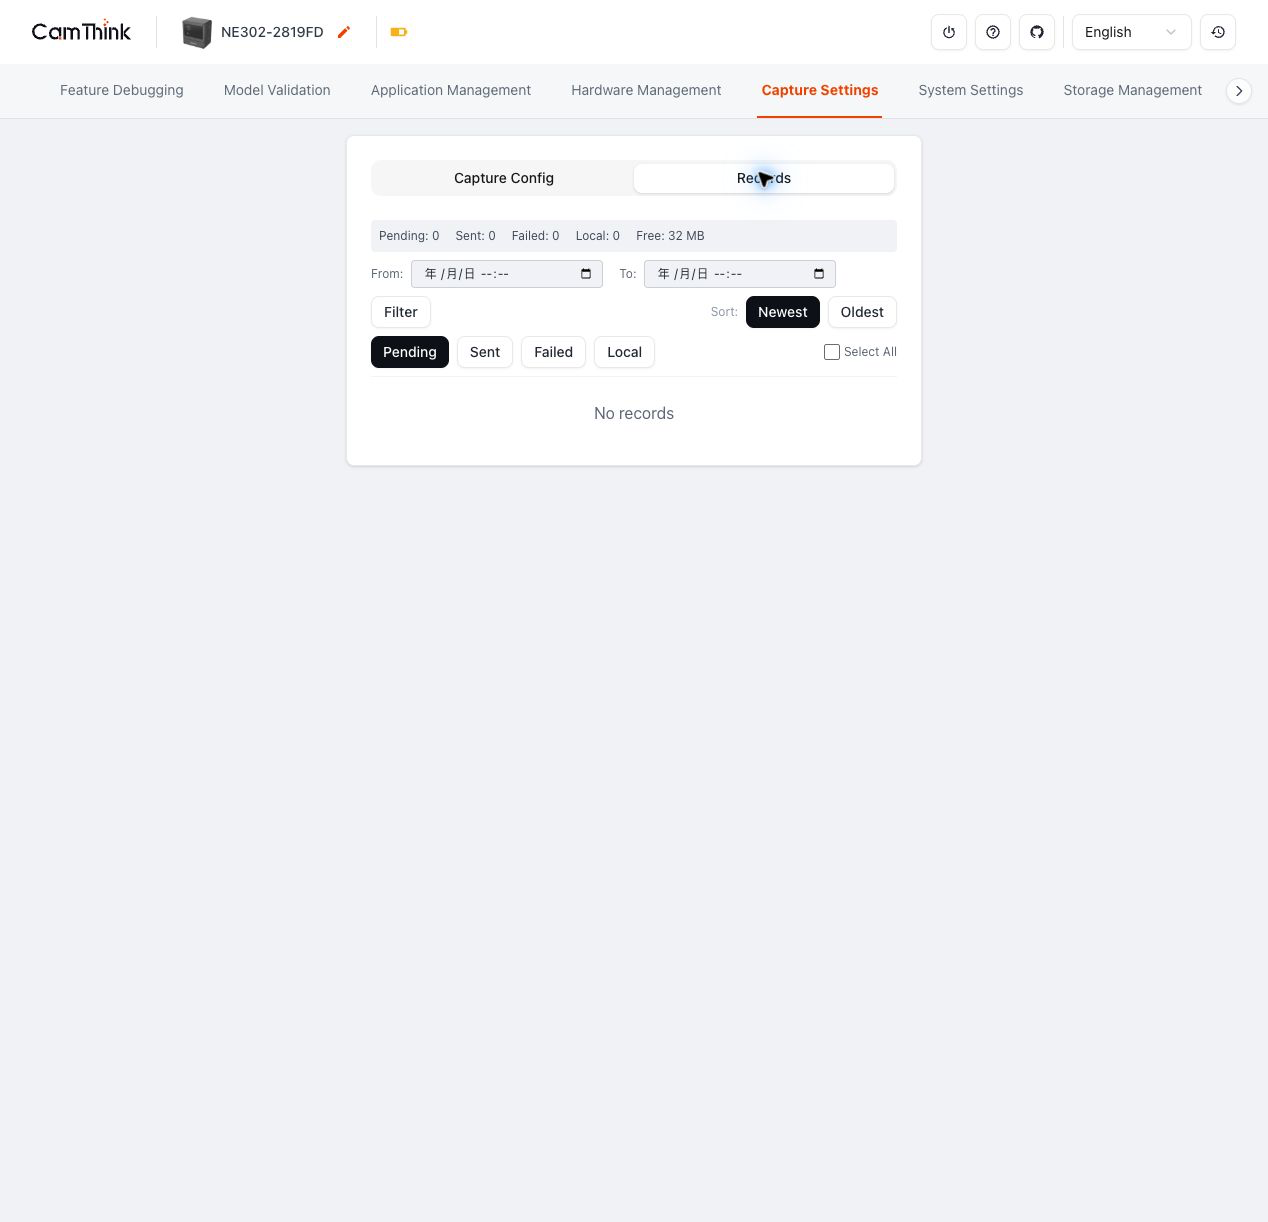
| Status | Meaning | Next action |
|---|---|---|
| Pending | The record is waiting for processing or delivery. | Check network, upload policy and retry settings. |
| Sent | The device sent the record using the current upload configuration. | Confirm the corresponding data on the receiver. |
| Failed | Delivery of the record failed. | Check Upload Protocol, network and receiver logs first. |
| Local | The record remains on the device. | Check Storage Location, free space and the file-retention policy. |
Use From / To to narrow the trigger-time range, then filter by Pending / Sent / Failed / Local. A capture passes when Records contains the matching time entry, local storage matches the selected policy and, when delivery is enabled, the receiver has the corresponding result. If no record appears, check the trigger source, Capture Mode, Storage Location and free space first.
5. Wakeup Source Configuration
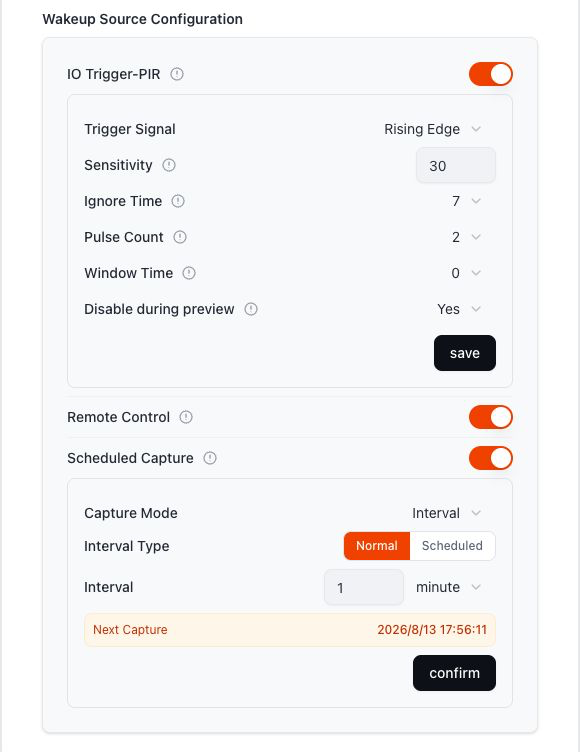
Open Feature Debugging → Wakeup Source Configuration. For first validation, enable one source only. Save it, then find the record at the matching time under Capture Settings → Records.
IO Trigger-PIR
Enable IO Trigger-PIR, configure these fields, then click save:
| Setting | Purpose and selection |
|---|---|
| Trigger Signal | Select Rising Edge or Falling Edge to match the PIR output signal at the installation. |
| Sensitivity | The effective range is 10–255. A smaller value is more sensitive to infrared change and is easier to trigger. |
| Ignore Time | Ignores new triggers after a trigger. The page value N represents N × 0.5 + 0.5 seconds. |
| Pulse Count | Sets the required number of pulses, from 1 to 4. A higher value improves interference resistance but slows the response. |
| Window Time | Sets the pulse-counting time window, from 0 to 3. The page value M represents M × 2 + 2 seconds. |
| Disable during preview | With Yes, PIR capture is suppressed while Web/RTSP preview is active. It resumes after preview closes; sleep wake-up is unaffected. |
Remote Control
Remote Control has only an enable switch. When enabled, the device can receive remote wake-up and capture through MQTT. Configure the MQTT/MQTTS connection in Data Transmission first, then use the configured remote-control path to verify Records.
Scheduled Capture
Enable Scheduled Capture, then select Capture Mode:
- Interval: set Interval Type. Normal runs at the chosen interval; Scheduled runs at that interval starting from Start Time. Set an interval from 1 to 999 minutes or hours. After confirm, the page shows Next Capture.
- Fixed Point: add the time and weekday for each capture. You can add up to 10 time points, then click confirm.
If no Record appears after a trigger, first confirm the trigger setting was saved, then check Capture Mode, available storage and Disable during preview for PIR.