Data Transmission
Use Application Management to send device results to an MQTT/MQTTS broker or Webhook service. Use Feature Debugging → Stream Settings to provide RTSP or push RTMP video. First confirm a local result with a fixed image in AI Model Validation, then configure the external channel.
1. MQTT/MQTTS
Open Application Management → MQTT/MQTTS. Enter the connection details, click save, then click connect. The device is connected to the broker only when Connection Status shows connected.
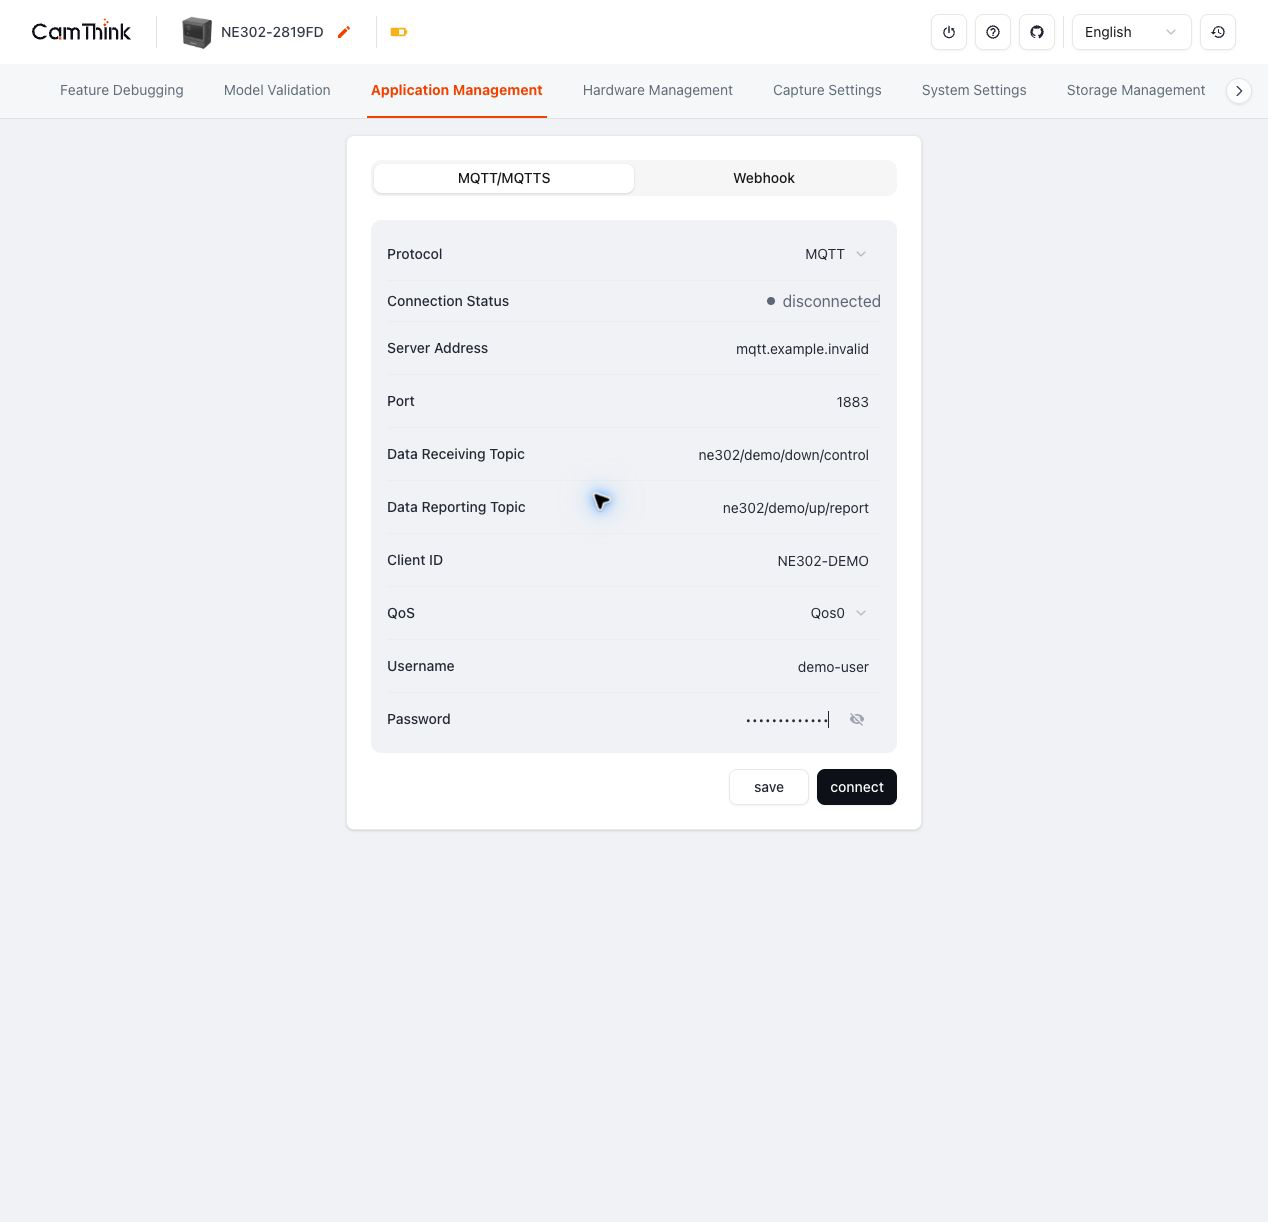
| Field | What to enter | When it matters |
|---|---|---|
| Protocol | Select MQTT or MQTTS. Changing it disconnects the current MQTT connection. | Switching to MQTT sets port 1883; MQTTS sets port 8883. Use the port actually listened to by the broker. |
| Server Address / Port | Enter the broker host name or IP reachable from the device, and its listener port. | If connection fails, check these values and device network reachability first. |
| Data Receiving Topic / Data Reporting Topic | Enter the topics used for data received by and reported from the device. | Subscribe to Data Reporting Topic at the receiver to see device reports. Topics are limited to 128 characters. |
| Client ID | Use a unique ID for each device. | A duplicate Client ID can disconnect an existing broker client. Limit: 23 characters. |
| QoS | Choose the option required by the receiver subscription. | If the receiver cannot handle duplicates, validate first with a test topic. |
| Username / Password | Enter the broker credentials. | Each field is limited to 32 characters; the page does not reveal the password. |
For MQTTS, complete the certificate fields shown by the page: upload a CA Certificate required by the broker; add Client Certificate and Private Key only when mutual authentication is required; then enter SNI. Save and connect, then subscribe to the Data Reporting Topic while triggering one fixed-image result. If the page says connected but no message arrives, check the subscribed topic, Client ID and broker ACL first.
2. Webhook
Open Application Management → Webhook, enable Enable Push, enter the receiver's HTTP(S) Push URL, then click save. The URL must start with http:// or https:// and be no longer than 256 characters.
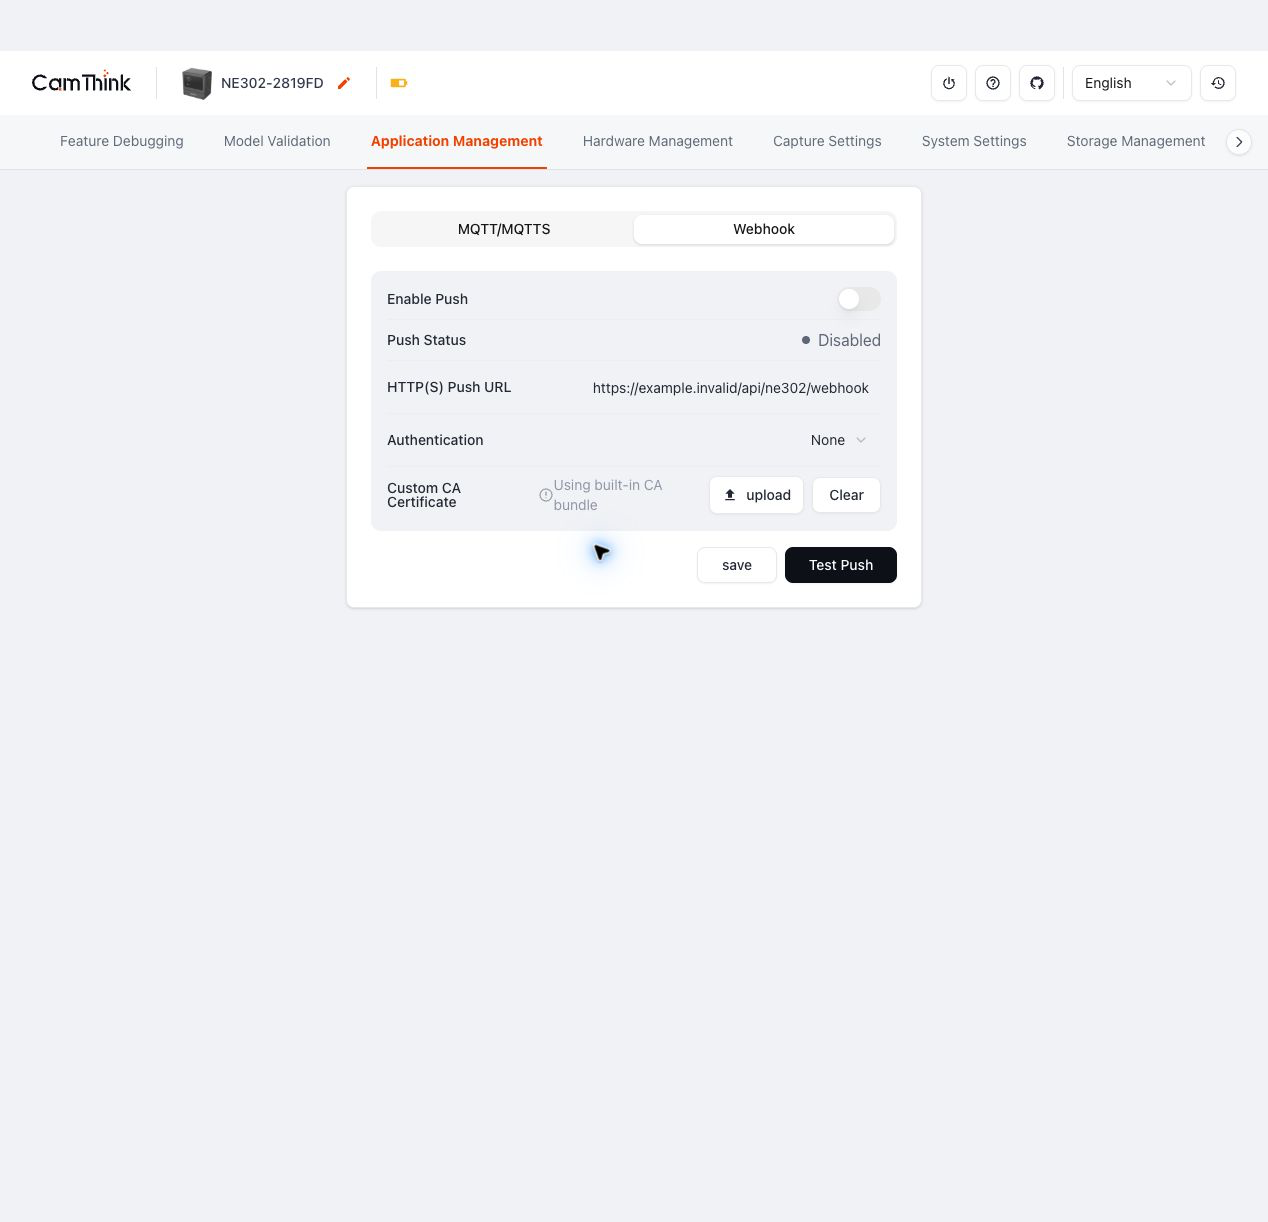
| Setting | Purpose | Action |
|---|---|---|
| Enable Push | Controls whether Webhook requests are sent. | Save, then check Push Status. It must show Enabled before delivery can occur. |
| Authentication | Select the method required by the receiver. | Any option other than None requires Auth Secret / Token. |
| Custom CA Certificate | Lets the device verify an HTTPS server certificate issued by a private CA. | Keep the built-in CA bundle for a public CA. To replace a custom certificate, click Clear before uploading the new one. |
| Test Push | Sends a test request to the current URL. | Save first, then click it. A success message proves the test was sent; use a fixed image to validate actual result delivery. |
For validation, inspect the request generated by Test Push on the receiver, then run one fixed-image inference. The channel passes basic verification when the receiver sees both the test request and the result request while Push Status remains enabled.
3. Video stream
Open Feature Debugging → Stream Settings, choose the required protocol and save the configuration.
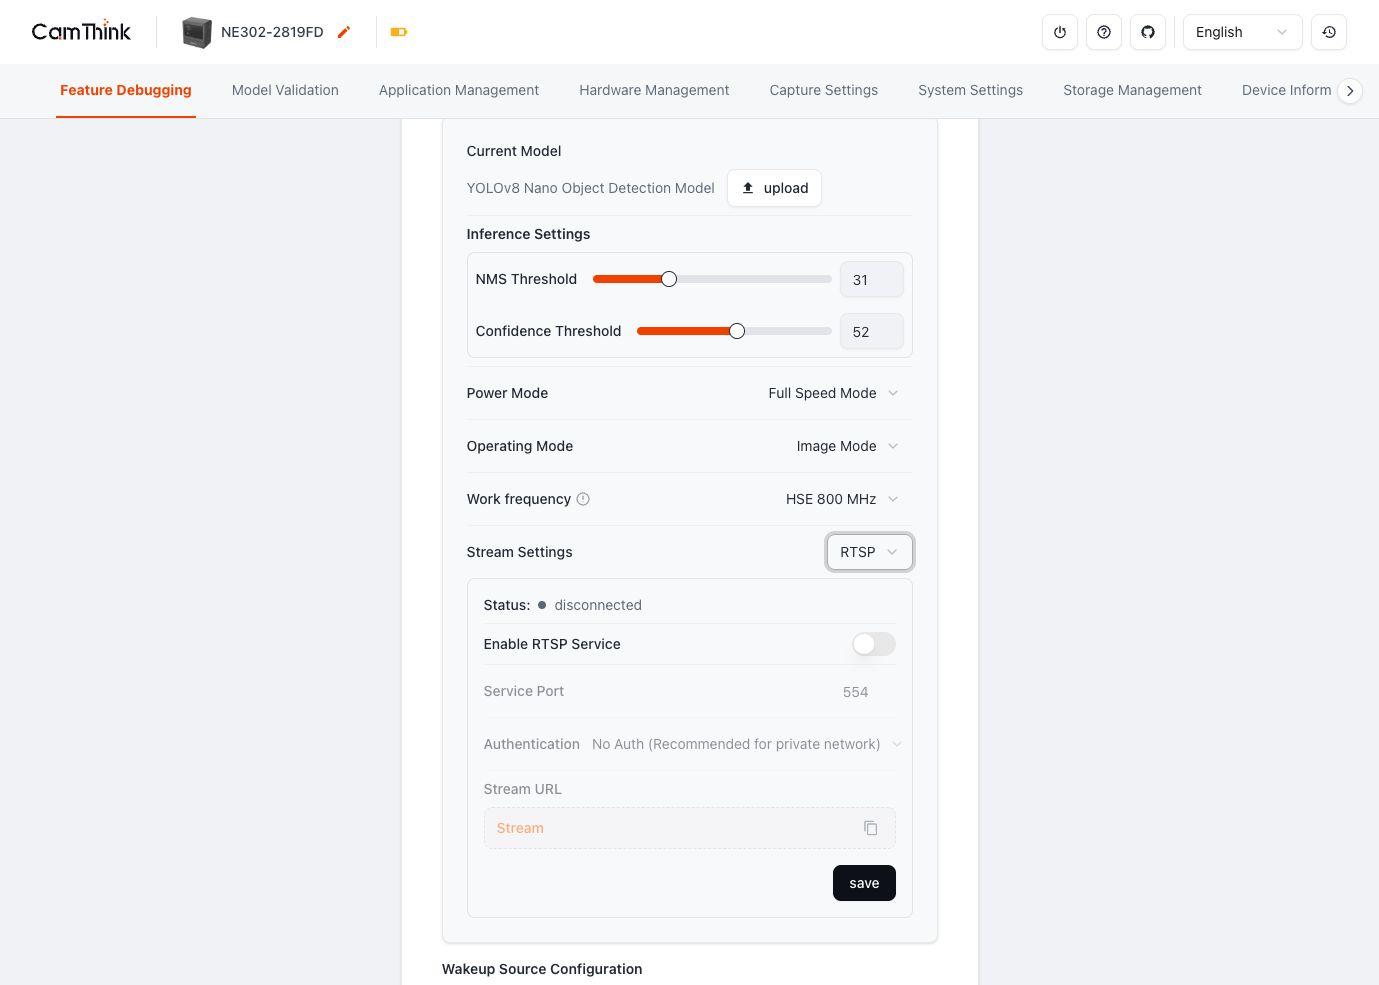
| Protocol | Device action | Pass criterion |
|---|---|---|
| RTSP | Enable Enable RTSP Service, set the port and, when required, select Digest and enter a username and password. The page generates the Stream URL. | A player on the same network opens that URL and continuously shows video. |
| RTMP | Enter the server URL and Stream Key, enable the service and start the push. | The streaming server reports an active input and the video can be played. |
The RTSP port must be from 1 to 65535. The RTMP Stream Key is limited to 128 characters. If the page looks normal but no external video appears, check the protocol, address/port or Stream Key before checking player or server logs.