Hello World
在 NE503 上构建、部署并验证 Hello World 容器应用。
1. 准备
使用源码时:
git clone https://github.com/camthink-ai/neoruntime-apps.git
示例目录为 neoruntime-apps/examples/hello-world/,包含:
app.py          # 应用代码
Dockerfile      # 镜像构建文件
app.yaml        # 应用清单
entrypoint.sh   # 调试入口
预编译包解压后得到 app.yaml 和 image.tar,可直接执行第 3 节。
2. 构建镜像
在应用目录执行:
cd neoruntime-apps/examples/hello-world
docker buildx build --platform linux/arm64 --load -t aipc/hello-world:1.0.0 .
docker save aipc/hello-world:1.0.0 -o image.tar
构建完成后检查镜像架构和导出文件:
docker image inspect aipc/hello-world:1.0.0 --format '{{.Os}}/{{.Architecture}}'
test -s image.tar
预期输出包含 linux/arm64,且当前目录存在非空的 image.tar。部署时同时使用当前目录的 app.yaml;其 spec.image 必须与镜像标签 aipc/hello-world:1.0.0 一致。
3. 部署到设备
3.1 Web 控制台
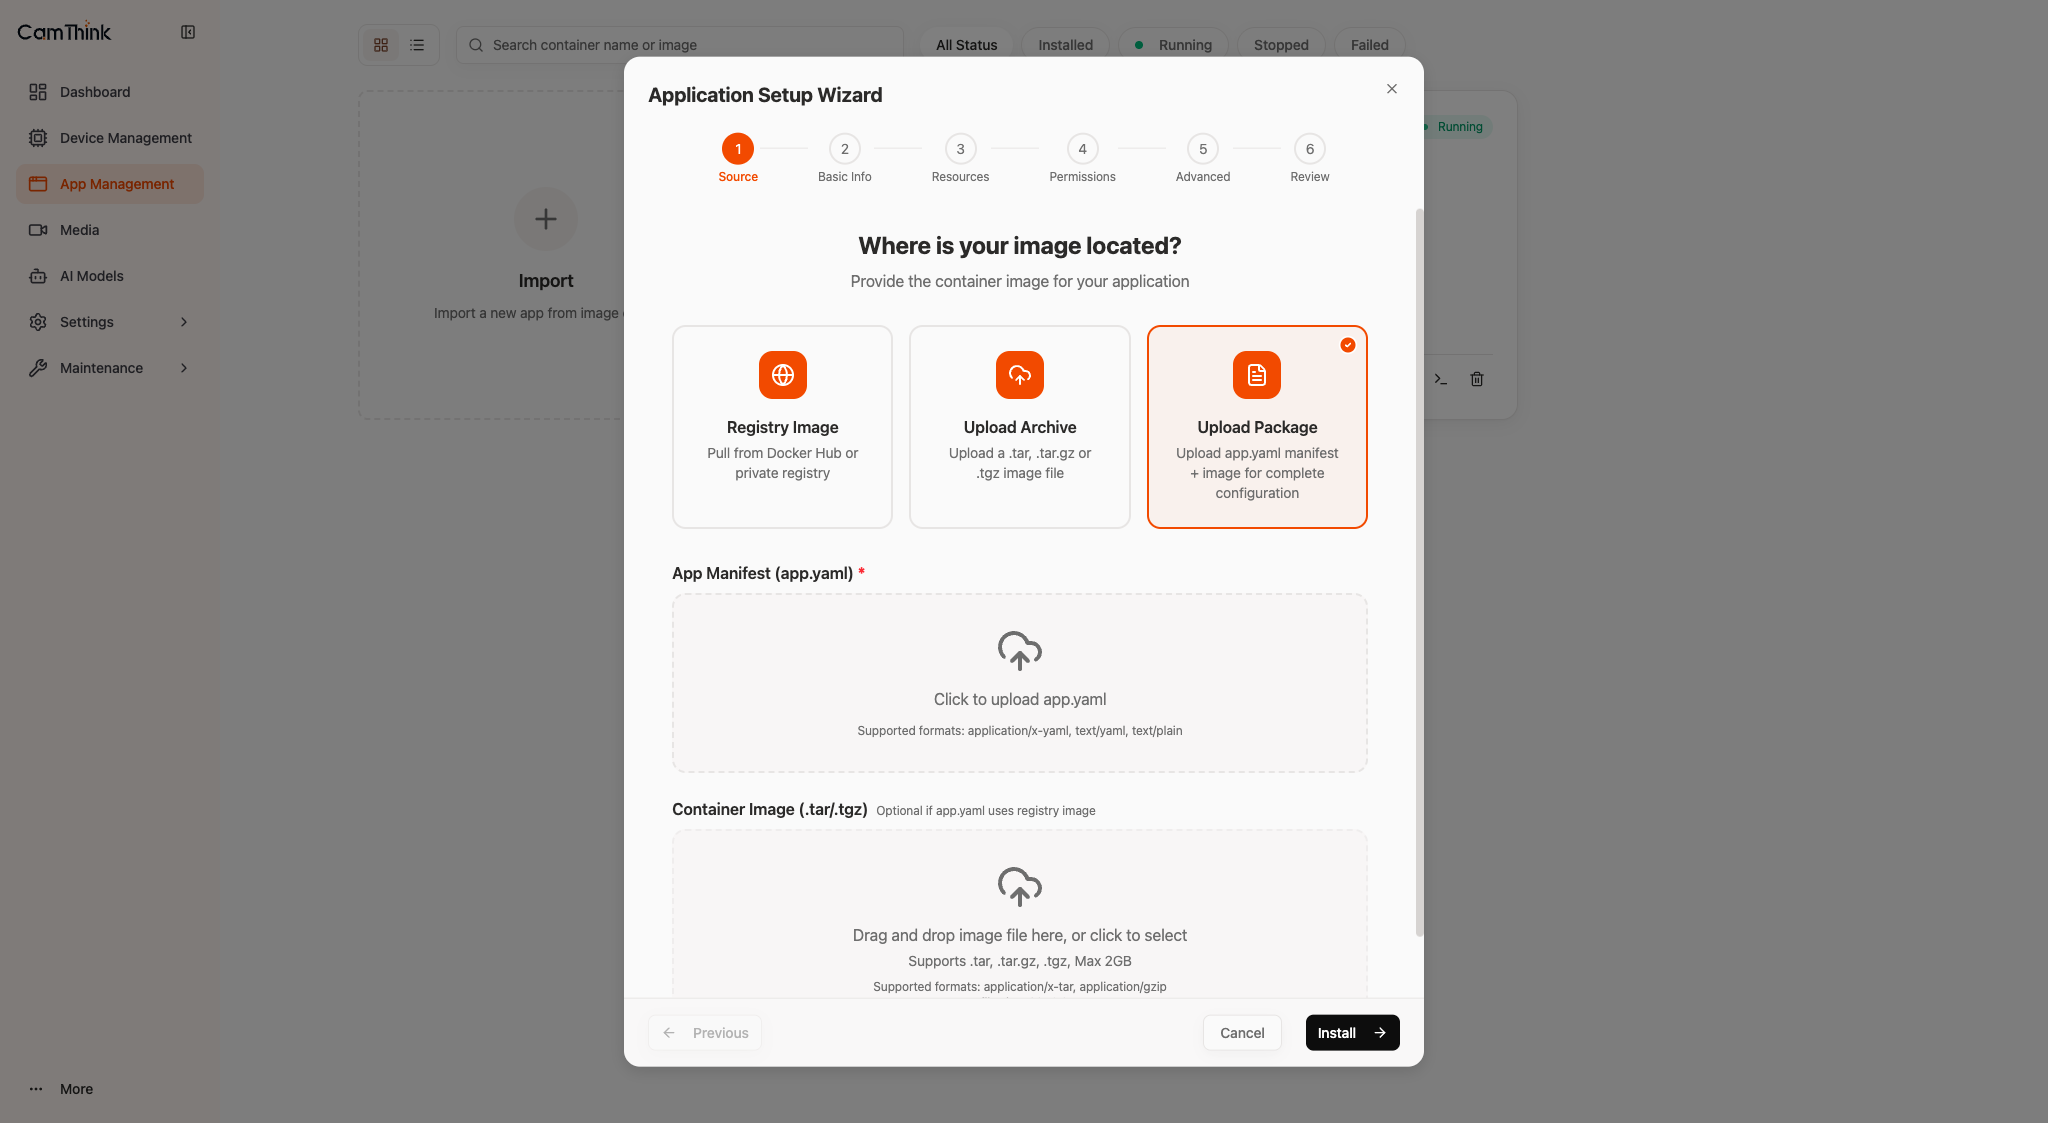
- 登录
https://<device-ip>。 - 进入 App Management → Import → Upload Package。
- 选择
app.yaml和image.tar,点击 Install。
3.2 SSH
DEVICE_IP="<device-ip>"
scp app.yaml image.tar root@"$DEVICE_IP":/tmp/
ssh root@"$DEVICE_IP" 'cd /tmp && aipc-cli app install app.yaml image.tar'
两种方式安装完成后,应用状态均为 Stopped,继续第 4 节启动。
4. 启动与验证
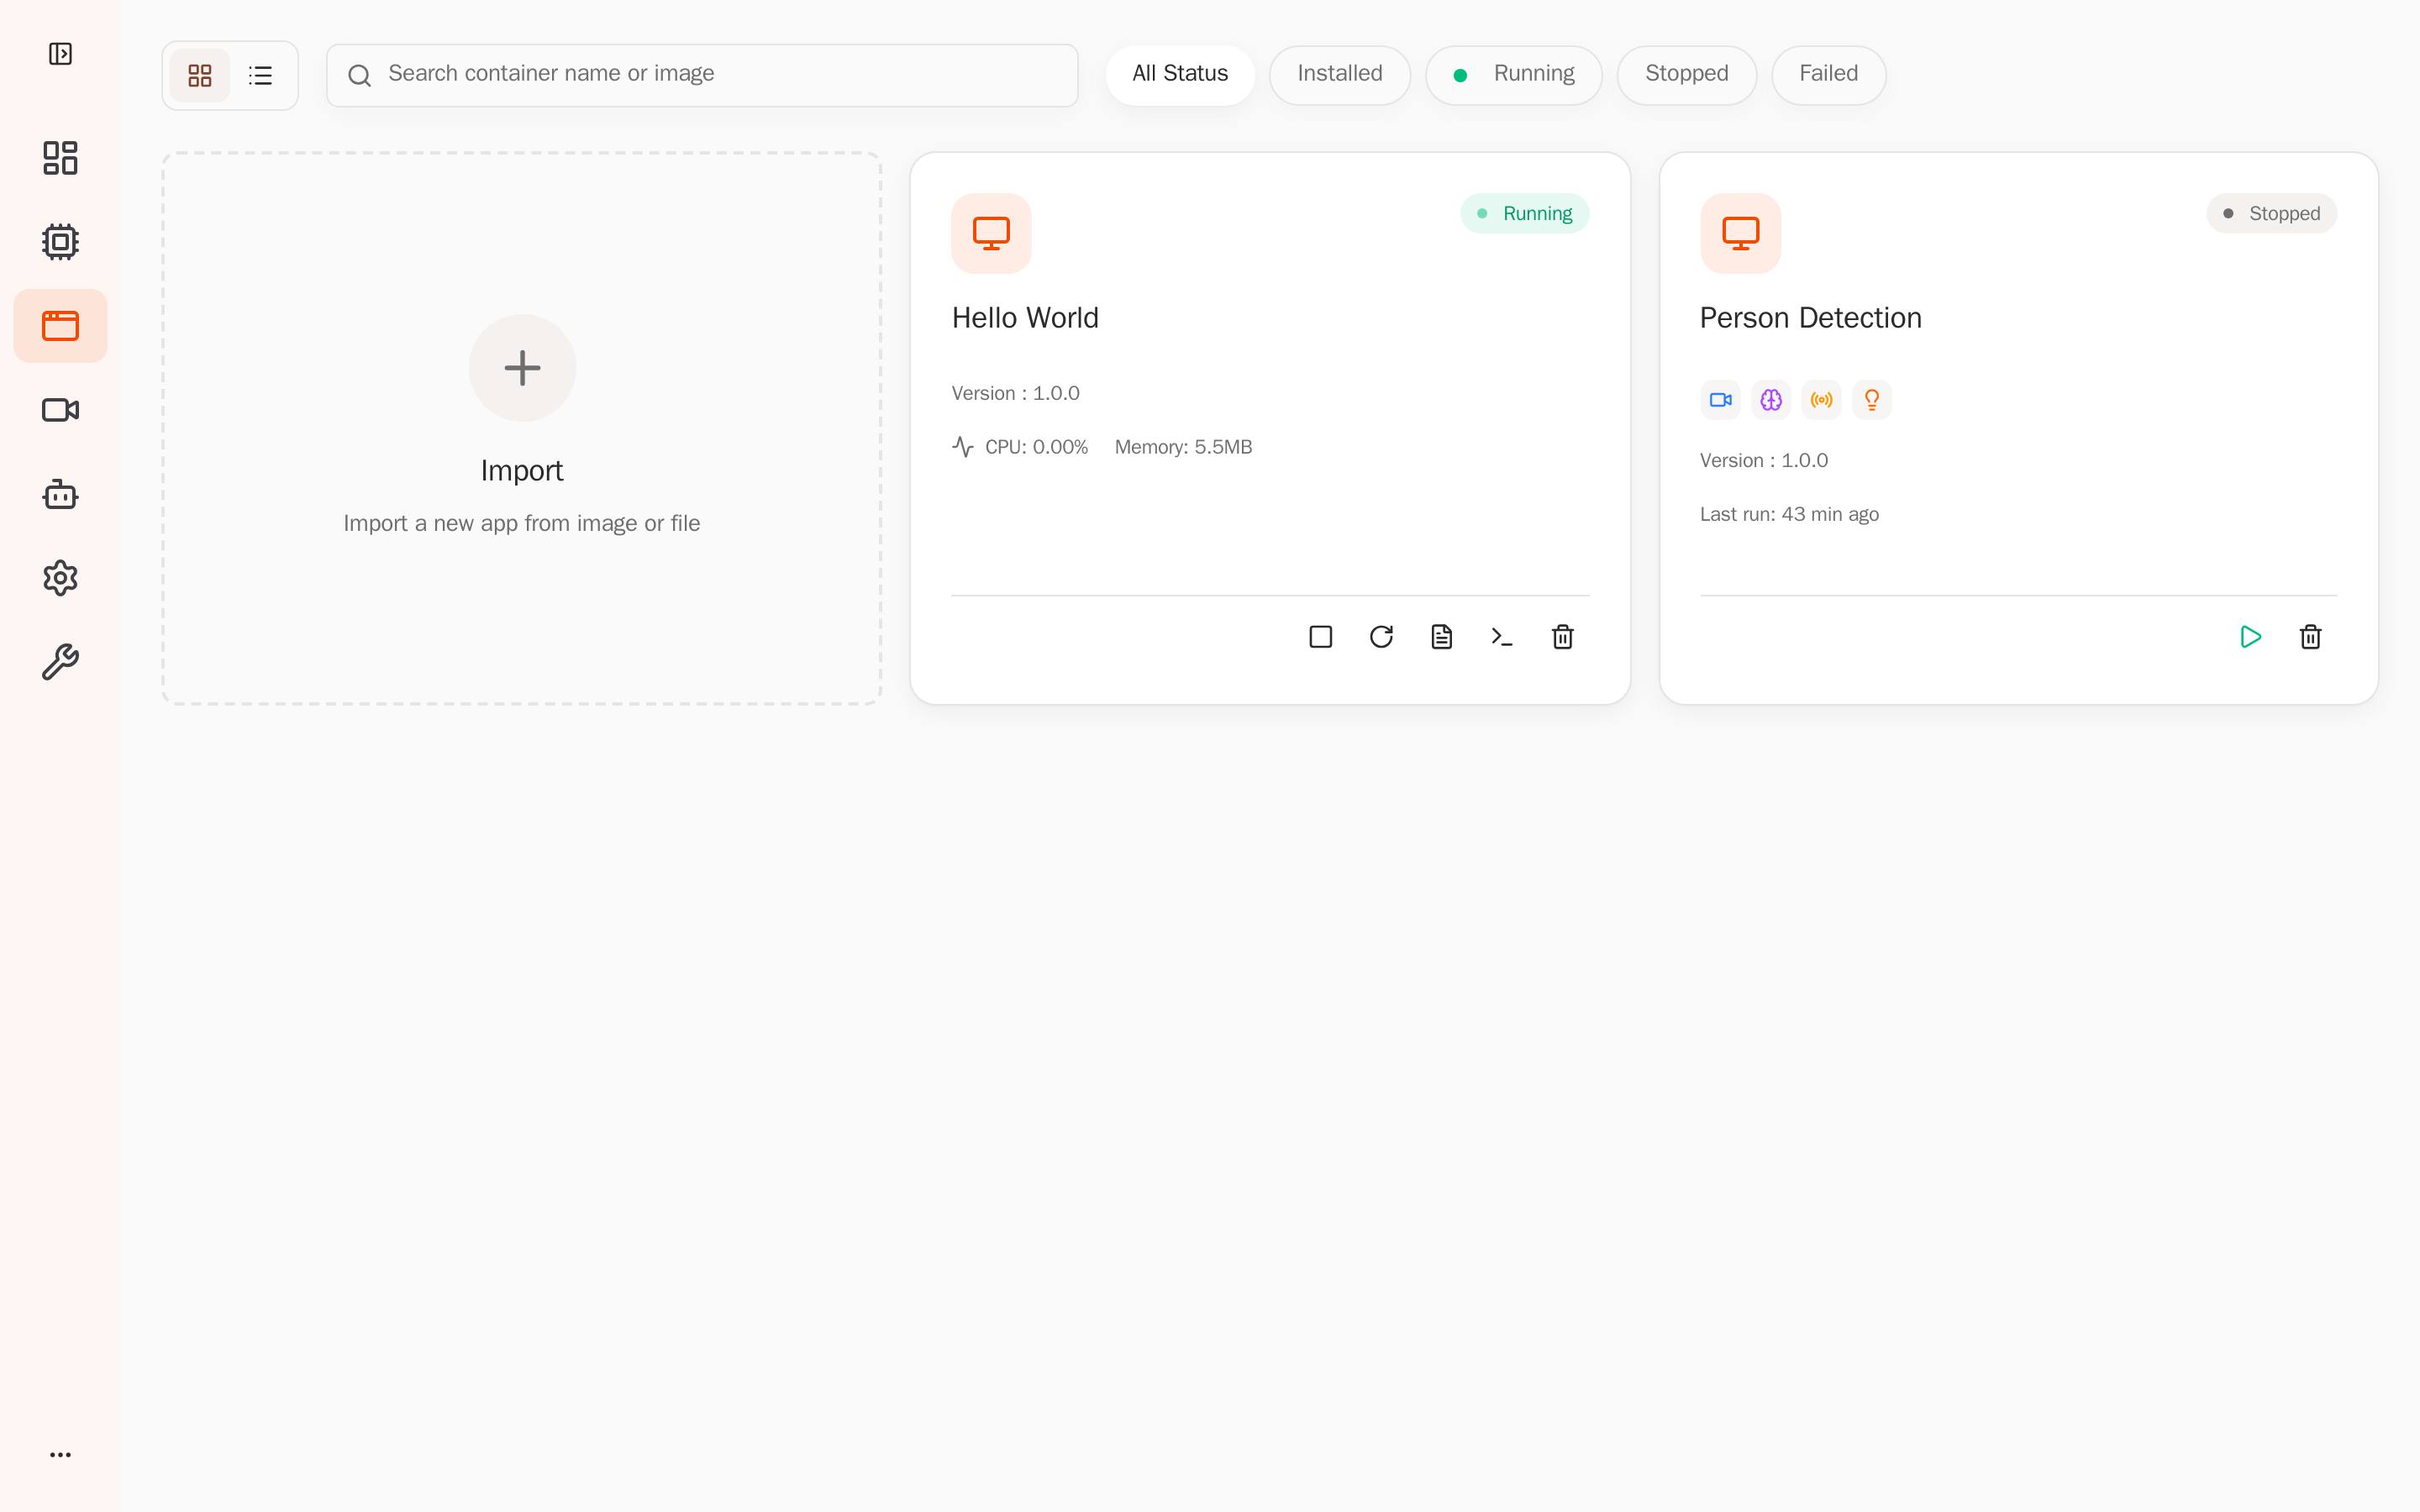
在应用卡片点击 Start,确认状态变为 Running。
通过 SSH 查看状态和日志:
DEVICE_IP="<device-ip>"
ssh root@"$DEVICE_IP" 'aipc-cli app list'
ssh root@"$DEVICE_IP" 'aipc-cli app logs hello-world -f'
按 Ctrl+C 退出日志跟随。**成功:**应用状态为 Running,日志每秒输出新的计数。
5. 清理
验证完成后,在应用卡片点击 Stop,再点击 Uninstall。