Extension Management
Extensions are NeoMind's pluggable capability modules — vision AI, OCR, weather forecasts, custom data sources, and more are all integrated as extensions. Extensions run in separate processes and communicate via FFI, so a crash in any single extension does not affect the main service, achieving true fault isolation.
Jump straight to Installing Extensions — one click from the marketplace. The full catalog table follows below.
What Are Extensions?
Extensions provide three types of capabilities to NeoMind:
| Capability | Description | Data form | Example |
|---|---|---|---|
| Metric | Time-series data produced by the extension, stored in telemetry.redb, viewable on dashboards | Stored as time series | temperature metric from a weather extension |
| Command | Callable operations invoked by AI Agent / API / rules, supporting parameters and return values | Input params → execute → return JSON | detect command from a YOLO extension |
| Component | Custom dashboard visualization components (provided by a frontend bundle shipped with the extension) | Dragged into the dashboard editor | Real-time annotated video frame from a video-stream extension |
A single extension can declare multiple capabilities. For example, yolo-video simultaneously provides metrics (detection counts), commands (single-frame detection), and components (live annotated video).
Official Extensions
The NeoMind-Extensions repository provides official extensions, installable in one click from the built-in extension marketplace (marketplace currently at version 2.7.8, September 2026, updated with each extension repo release; the list below evolves with the marketplace):
| Extension ID | Category | Description |
|---|---|---|
yolo-video | Vision AI | YOLOv11 real-time object detection on video streams (RTSP/camera), with ROI statistics and line-crossing counting |
yolo-device-inference | Vision AI | Automatic YOLOv8 detection bound to NE101/NE301 device image streams (ROI monitoring, line-crossing detection) |
image-analyzer | Vision AI | Image understanding and analysis (ML models lazy-loaded) |
face-recognition | Vision AI | Face detection and recognition |
locate-anything | Vision AI | LocateAnything visual grounding: object detection, phrase grounding, and visual grounding |
vision-hub | Vision AI | Unified vision pipeline: hardware-accelerated detection / OCR / face / grounding / VLM |
video-vlm | Vision AI | Real-time VLM semantic understanding of video streams (RTSP/file, on-device LFM2.5-VL) |
ocr-device-inference | OCR | Automatic OCR bound to device image streams (SVTR model, boxed results) |
paddle-ocr-v6 | OCR | PP-OCRv6 native ONNX inference (tiny/small/medium model tiers) |
paddle-ocr-vl | OCR | PaddleOCR-VL high-accuracy multilingual OCR, table recognition, and key information extraction |
voice-assistant | Voice | Real-time voice assistant orchestration: microphone → VAD → ASR → LLM → TTS → speaker |
sensevoice-asr | Voice | SenseVoice-Small speech recognition (Chinese/English/Japanese/Korean/Cantonese) |
cosyvoice-3 | Voice | CosyVoice 3 streaming TTS (local playback + wav synthesis) |
moss-tts-nano | Voice | MOSS-TTS-Nano voice-cloning TTS |
voice-edge-tts | Voice | Edge TTS (sherpa-onnx ZipVoice, CPU streaming synthesis) |
stream-player | Streaming | General-purpose video playback: RTSP / RTMP / HLS / local files (FFmpeg transcoding) |
deepstream | Streaming | NVIDIA DeepStream bridge: remote video pipelines and event routing (NG4500) |
homeassistant-bridge | Bridge | Home Assistant bridge: entity sync and control |
lorawan-bridge | Bridge | LoRaWAN bridge: connect ChirpStack/TTN sensors with automatic device discovery |
modbus-bridge | Bridge | Modbus TCP/RTU: PLCs, power meters, industrial sensors |
opcua-bridge | Bridge | OPC-UA: connect industrial servers, browse nodes, subscribe to data |
bacnet-bridge | Bridge | BACnet/IP: building automation device discovery and control |
onvif-bridge | Bridge | ONVIF cameras: discover IP cameras, pull RTSP streams, control PTZ |
uink-rms-bridge | Bridge | Uink-RMS e-ink displays: device registration, telemetry collection, display content delivery |
weather-forecast | Data Source | Real-time weather forecasts (multi-city, OpenWeatherMap) |
gym-tracker | Industry | Gym operations suite: exercise trajectories/heatmaps/member analytics (extension + dashboard components) |
wasm-demo | Demo | WASM sandbox demo extension showcasing the extension SDK capabilities |
The marketplace index refreshes with each extension repo release. If your marketplace shows fewer extensions than the table above, or some entries still carry old names (
weather-forecast-v2/yolo-video-v2), your platform is loading the previously published index — these will be renamed/added in the next release. Mapping:weather-forecast-v2→weather-forecast,image-analyzer-v2→image-analyzer,locate-anything-v2→locate-anything,yolo-video-v2→yolo-video. For end-to-end examples, see Use Cases.
Interface Overview
Navigate to the Extensions tab in the left sidebar to see all installed extensions:
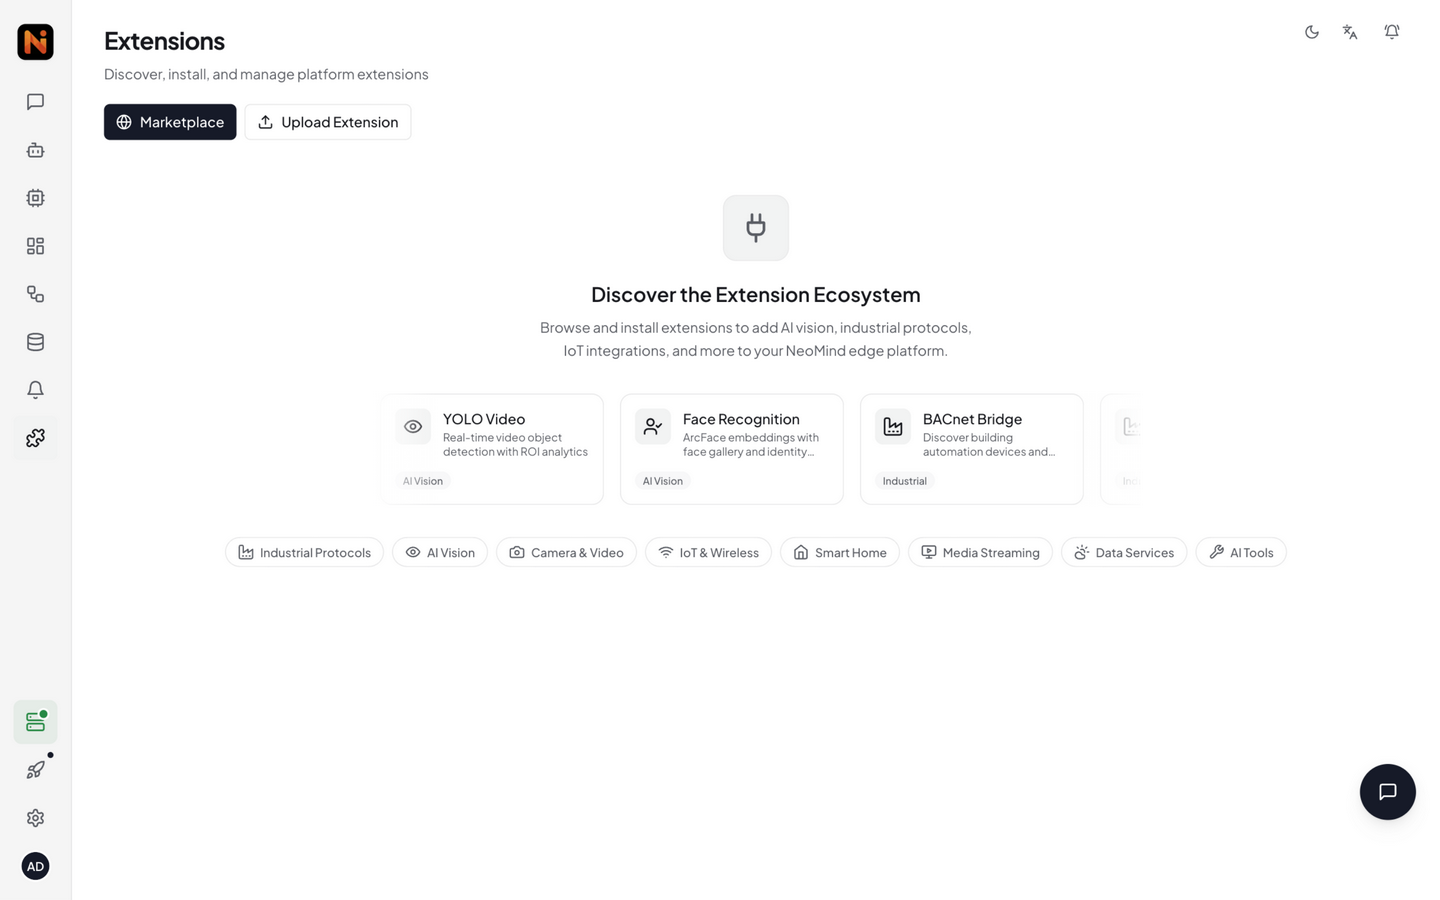
The toolbar at the top provides three actions:
| Button | Icon | Purpose |
|---|---|---|
| Refresh | RefreshCw (circular arrows) | Re-fetch the extension list to see the latest status |
| Upload | Upload | Open a local .nep package installation dialog |
| Marketplace | Globe | Open the official extension marketplace for one-click install |
Each extension card displays: extension name, version, current status (Running / Stopped / Error / Crashed), and capability icons (metric / command / component). Click anywhere on a card to open the extension details dialog.
Installing Extensions
NeoMind supports four installation methods, ordered by recommendation:
Method 1: Marketplace (Recommended)
Click the Globe icon in the toolbar to open the marketplace dialog. NeoMind fetches the list of available extensions from the official repository:
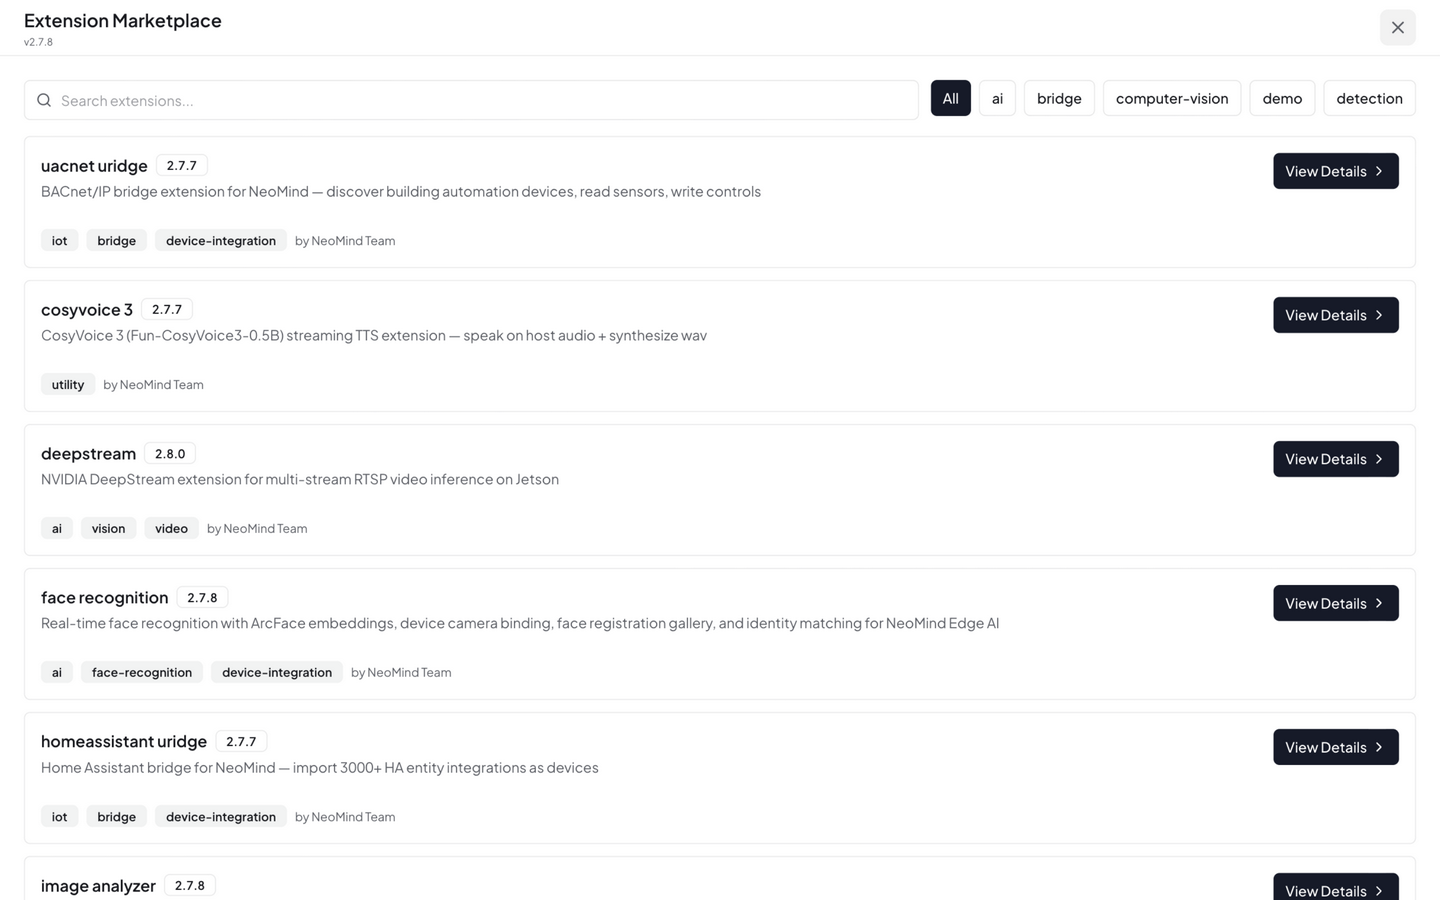
In the marketplace dialog:
- Browse available official extensions (name, version, description, size)
- Click Install to download and install in one click
- After installation, the extension automatically appears in the list and starts
Marketplace installation automatically selects the extension package matching the current main service's ABI version — no manual platform selection needed. The marketplace source can be switched in Settings → Preferences.
Method 2: Web UI Upload
If you already have a .nep package (self-developed or downloaded from Releases), use upload installation:
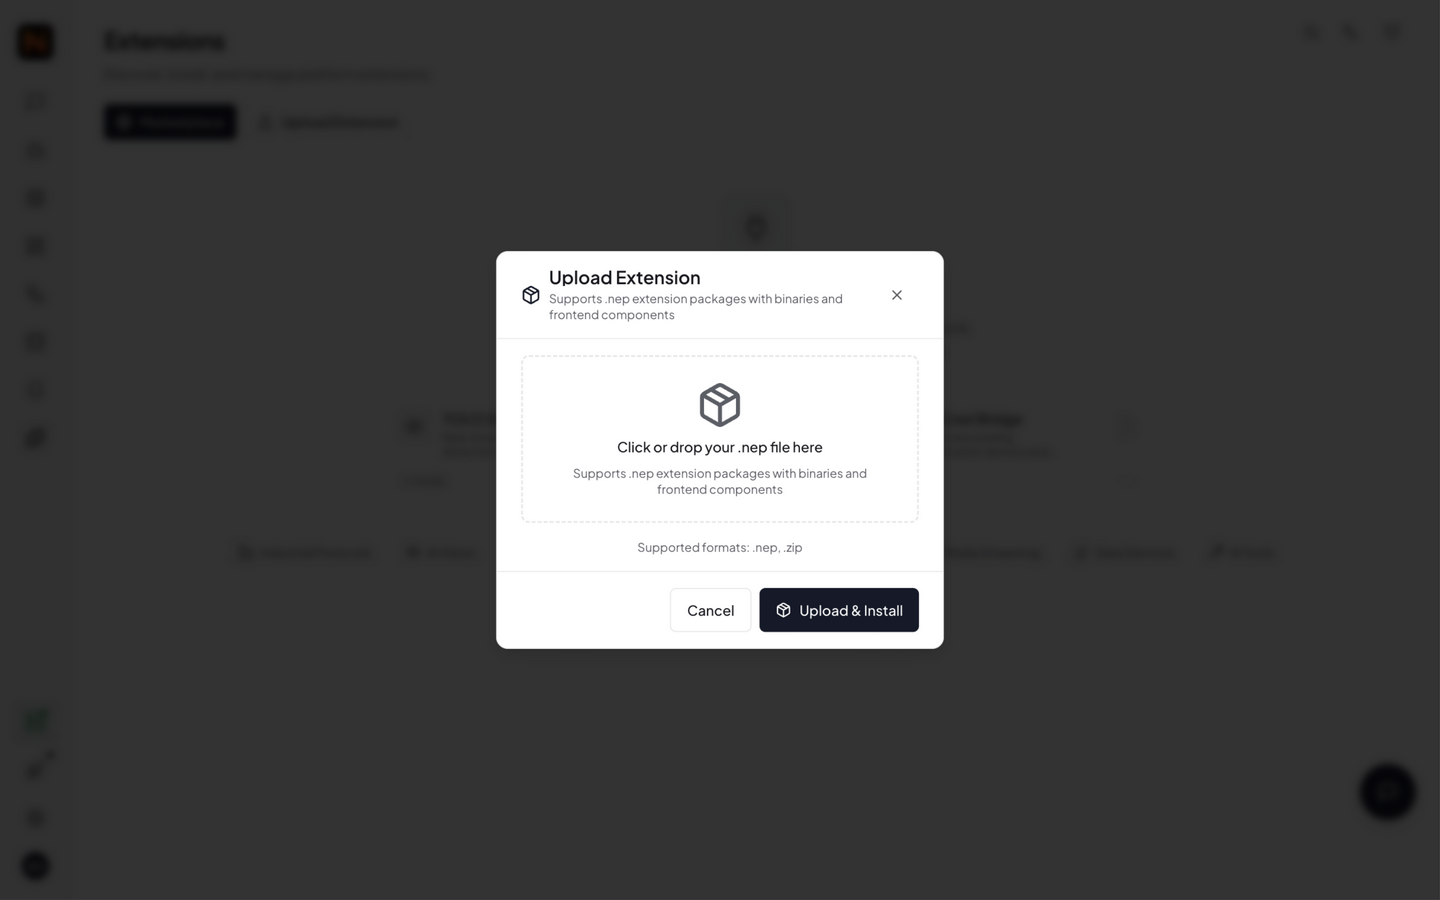
- Click the Upload button in the toolbar
- In the dialog, drag in or select a
.nepfile - NeoMind automatically validates package integrity (manifest / format / platform binaries) and the ABI version
- After validation, it unpacks, loads, and starts the extension
Official .nep packages are distributed per-platform (e.g. weather-forecast-2.7.7-linux_amd64.nep). Marketplace installation automatically selects the package matching your platform and the main service's ABI version — no manual picking required. When downloading manually from Releases, choose the package under your platform's directory.
Method 3: CLI
# Install a local .nep package
neomind extension install /path/to/weather-forecast.nep

# Install from URL (suitable for automated deployment; pick the package for your platform)
neomind extension install https://github.com/camthink-ai/NeoMind-Extensions/releases/download/v2.7.8/weather-forecast-2.7.7-linux_amd64.nep

# List installed extensions
neomind extension list
For the full list of subcommands (install / info / uninstall, etc.), see the CLI Reference below.
Method 4: AI Chat
Tell AI Chat directly:
"Help me install the weather extension"
The LLM guides you to upload a .nep package or provide a download URL, and automatically invokes extension install to complete the installation.
Extension Details and Configuration
Click any extension card to open the details dialog. The dialog uses a left-right layout: the left side has navigation for five sections, and the right side shows the corresponding content. Each section is described below.
1. Overview
The Overview section displays basic information about the extension:
- Extension ID: Unique identifier (e.g.,
yolo-device-inference), used for API calls and data source binding - Name and version: Human-readable name + SemVer version
- Status: Current runtime status (Running / Stopped / Error / Warning / Crashed)
- Capability declaration: Types of capabilities provided (metric count / command count / component count)
- Description: Functional description of the extension
- ABI version: ABI version the extension was compiled against (must match the main service)
2. Configuration
Some extensions require configuration parameters to run (e.g., a weather extension needs an API key). Switch to the Configuration tab to configure:
Configuration parameters are automatically rendered as appropriate input controls based on their type:
| Parameter type | Control | Validation rules |
|---|---|---|
string | Text input | Required check, max length |
string (name contains password) | Password input (masked) | Required check |
string + enum | Dropdown select | Must choose from predefined values |
integer / number | Number input | Min / max range |
boolean | Toggle switch | true / false |
After filling in the fields, click Save. The configuration is first validated against the schema (out-of-range numbers, missing required fields cause an error on save and are not persisted), then hot-reloaded into the running extension process — most parameters take effect without a restart.
On save, NeoMind attempts to push the new configuration to the running extension (hot-reload). If hot-reload fails (or the extension only reads config at startup), the configuration is still saved — run neomind extension reload <id> or restart from the details-page action menu for it to take effect.
3. Commands
Commands are callable operations exposed by the extension. Switch to the Commands tab to see all commands:
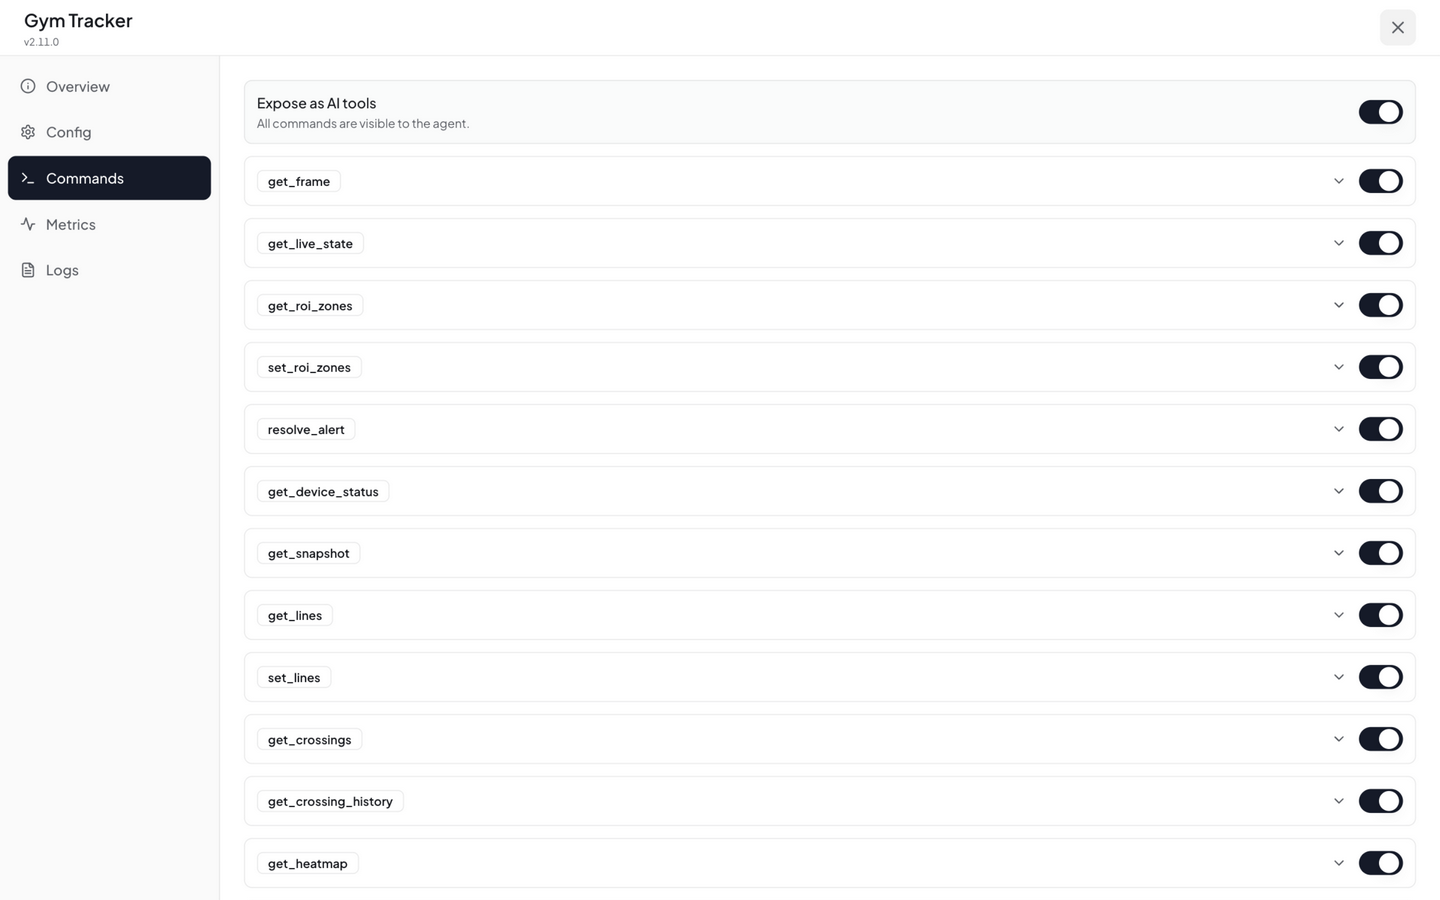
Each command card displays:
- Command name: e.g.,
detect,ocr_recognize - Description: What the command does
- Parameter form: Click the expand button to reveal the command's parameter input form
- Execute button: Fill in parameters and click to run; the result is returned as JSON and shown below
Commands can be executed manually for testing, and also invoked by AI Agents / REST API / automation rules. Manual testing is the fastest way to verify an extension is working correctly.
4. Metrics
Metrics are the time-series data produced by the extension. Switch to the Metrics tab to view historical data:
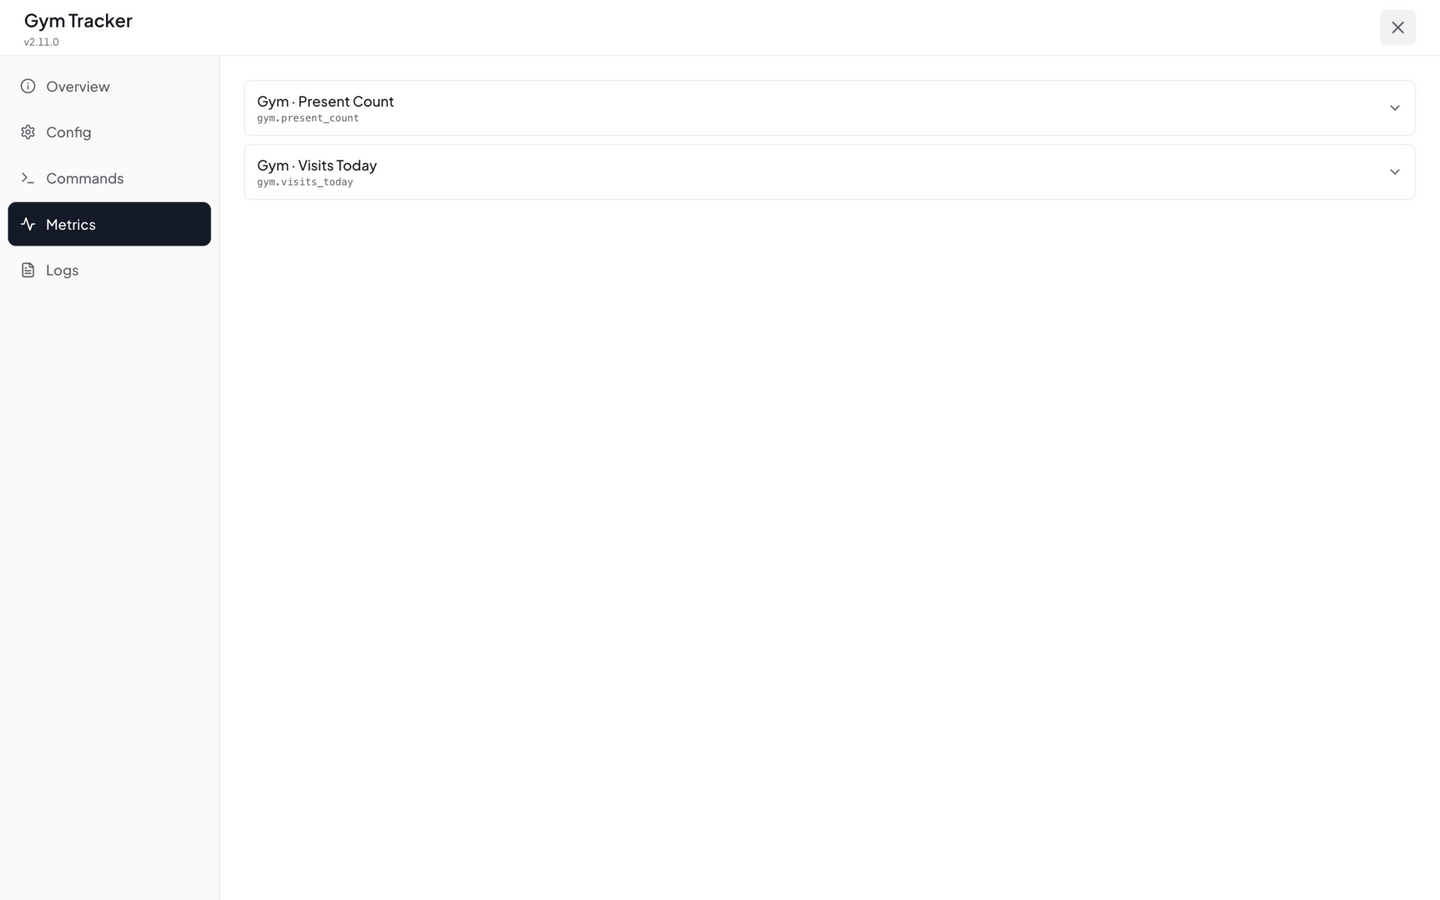
The Metrics section provides:
- Time range selector: 1 hour / 24 hours / 7 days / 30 days
- Metric list: All metrics produced by the extension (e.g.,
detection_count,avg_confidence) - Trend chart: Select a metric to display its historical curve
- Latest value: Current real-time value of the metric
Metric data source format: extension:<extension_id>:<metric_name>. This can be used as a component data source in dashboards.
5. Logs
The Logs section shows the extension process's standard output and error output in real time:
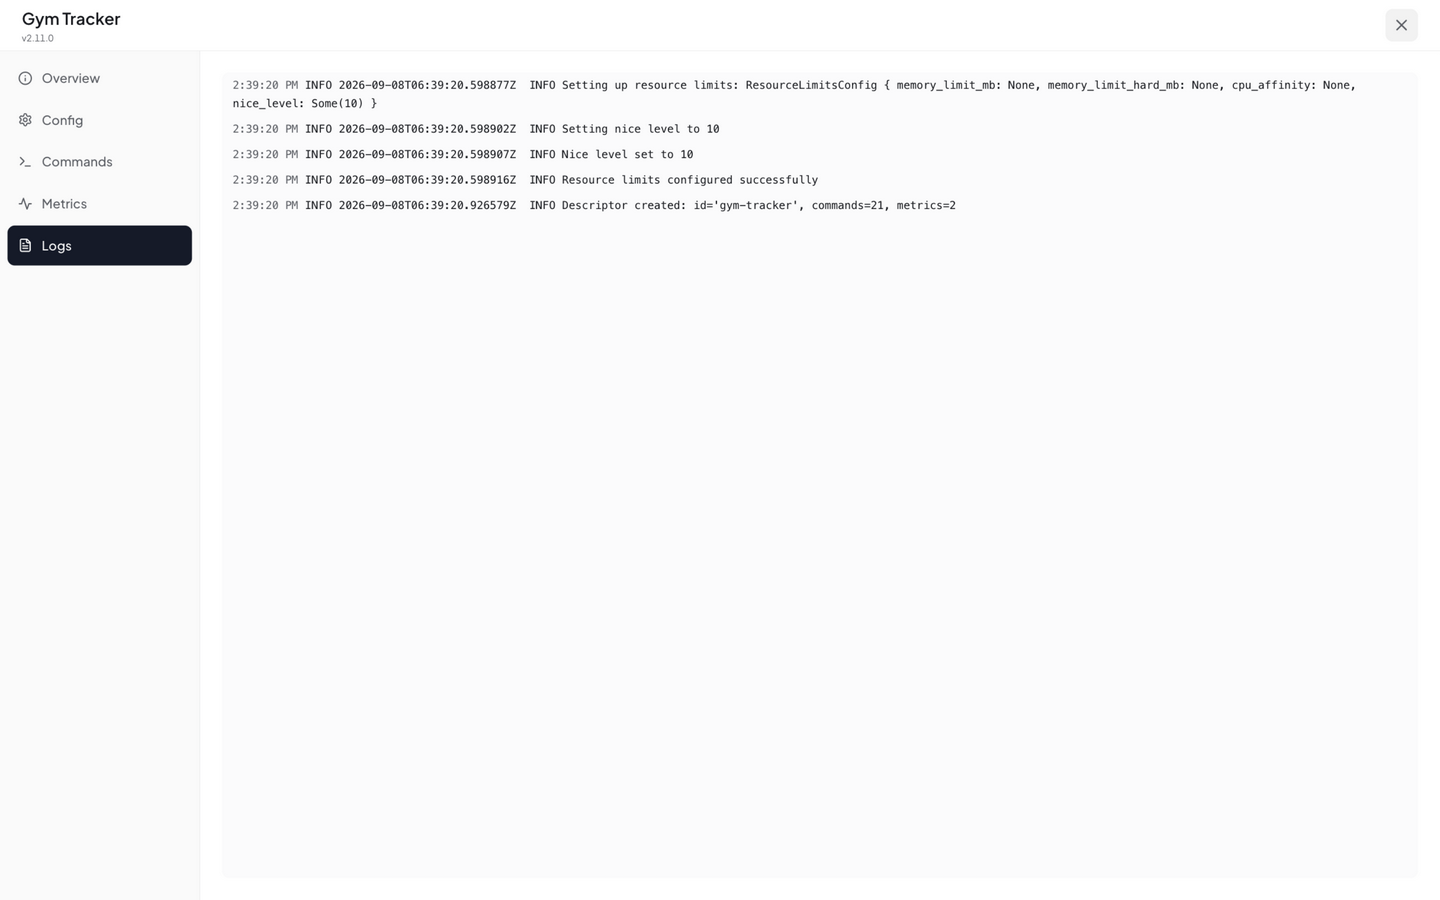
Features:
- Auto-refresh: Fetches new log lines every 3 seconds
- Auto-scroll to bottom: New logs automatically scroll into view
- Error highlighting:
ERROR/WARNlevel logs are highlighted in red / yellow - Retention: Keeps the most recent 2,000 lines by default
When troubleshooting extension issues, the Logs section is your first stop. If an extension is in Error or Crashed state, the logs usually show the panic stack trace or initialization failure reason directly.
Extension Status and Lifecycle
| Status | Icon | Description | Trigger |
|---|---|---|---|
| Running | Green dot | Extension is running normally | Install complete / manual start / auto-recovery |
| Stopped | Gray dot | Extension has been stopped | Manual stop / restarting after config change |
| Error | Red dot | Extension crashed or failed to load | Process exited abnormally / initialization failed |
| Warning | Yellow dot | Health check reports a warning | Running abnormally but not crashed |
| Crashed | Red badge | A stopped extension whose auto-restart was suspended by crash-loop protection (hover shows the crash reason and consecutive crash count) | Entered when consecutive crashes trigger crash-loop protection |
Restart / Reload Extensions
# Reload (restart) the extension process
neomind extension reload <extension_id>

# Check extension status
neomind extension status <extension_id>
Start / stop are currently provided via the REST API (
POST /api/extensions/:id/start/stop, see below); on the CLI side,extension reloadis enough to restart.
You can also start / stop / restart / uninstall from the action menu on the extension details page.
Crash Protection
Extensions run in separate processes. NeoMind safeguards main service stability through multiple layers:
- Process isolation — An extension crash does not affect the API, MQTT, dashboards, or other extensions
- Auto-restart — An extension process that exits abnormally is automatically restarted, up to 3 attempts with a 5-second interval
- Hang detection — Each extension process has a liveness probe (Ping); an unresponsive hung process is treated as crashed and enters the restart flow
- Crash loop detection — If ≥ 3 consecutive crashes occur and the last crash happened within the 50-second cooldown window, a crash loop is declared and auto-restart is suspended (the extension shows as Crashed), preventing resource exhaustion
- In-app notifications — When an extension stops auto-restarting, the system sends an in-app message so operations staff receive an alert
A crash-loop-stopped extension requires manual intervention:
# View the extension's crash reason and status (recommended)
neomind extension info <extension_id>

# Or check the panic stack trace directly in the Logs tab of the extension details page
# After fixing the root cause, manually restart
neomind extension reload <extension_id>
Common crash causes: missing model files, invalid API keys, port conflicts, ABI version mismatches.
Hung extensions (process alive but unresponsive) are covered too: the host sends a liveness probe every 30 seconds and, after repeated failures, kills and restarts the process through the same recovery machinery as crashes. An extension shown as Crashed in the list stopped because it crashed (not manually stopped); hover for the reason and consecutive-crash count.
Using Extension Data
In Dashboards
Extension metrics are used exactly like device metrics. In the dashboard editor, when adding a component, select an extension metric as the data source:
- DataSourceId format:
extension:<extension_id>:<metric_name> - Example:
extension:weather-forecast:temperature - Extensions that ship components appear under the Extension Components category in the component library — just drag them in
In AI Chat
Tell AI Chat directly:
"Call the weather extension and check whether it will rain in Shanghai tomorrow."
The LLM automatically identifies the extension command, fills in parameters, invokes it, and interprets the returned result.
In AI Agents
Agents in Focused mode can bind:
- Extension metrics as data sources (for periodic analysis)
- Extension commands as tools (for LLM tool calling)
During execution, the Agent automatically invokes extension commands to close the reason-execute loop.
In Automation Rules
Automation rules can use extension metrics as conditions, or invoke extension commands as actions:
{
  "name": "High-temperature alert",
  "trigger": { "trigger_type": "schedule", "cron": "0 0 18 * * *" },
  "condition": {
    "condition_type": "comparison",
    "source": "extension:weather-forecast:tomorrow_temp",
    "operator": "greater_than",
    "threshold": 35
  },
  "actions": [
    { "type": "notify", "message": "High-temperature alert tomorrow — prepare for heat" }
  ]
}
Install Integrity
Marketplace installs verify each package's SHA256 (from the checksums.txt shipped with the release assets); a mismatch refuses the install. Deployments that want stronger guarantees can set NEOMIND_STRICT_PACKAGE_SHA256=1 — packages without integrity data are rejected outright. Locally installed .nep files go through path-traversal and zip-bomb defenses, and symlink entries are always rejected.
Extension Package Format (.nep)
.nep is the standard packaging format for NeoMind extensions — essentially a ZIP archive:
weather-forecast.nep
├── manifest.json          # Extension metadata (format/abi_version/id/version/capability declarations + binaries platform mapping)
├── binaries/
│   └── linux_amd64/       # Platform directory (.nep packages are distributed per-platform; usually only the current platform is included)
│       └── extension.so
├── frontend/              # Optional: dashboard component bundle + frontend.json
└── models/                # Optional: ML model files
Extensions must match the main service's ABI version (currently v3). Mismatched extensions are rejected at load time with an "Incompatible version" (ABI mismatch) error.
For detailed .nep structure and the development workflow, see Developer Guide - Extension Development.
CLI Reference
# Listing
neomind extension list                              # List all installed extensions
neomind extension list -v                           # Detailed output (metrics / commands info)

# Install / uninstall
neomind extension install <path-or-url>             # Install (local path or URL)
neomind extension uninstall <extension_id>          # Uninstall

# Details and status
neomind extension info <extension_id>               # View metadata, metrics, commands, config params
neomind extension status <extension_id>             # View runtime status (process, uptime, last error, resources)

# Lifecycle control
neomind extension reload <extension_id>             # Reload (restart process; start/stop go through the REST API)

# Configuration
neomind extension config <extension_id>             # View current configuration
neomind extension config <extension_id> --set '{"city":"Beijing"}'  # Modify a config field (JSON object)
For extension development you will also use extension validate (pre-install .nep validation), extension create (scaffold), extension build (compile & package), extension logs (process logs), and extension market-list / market-install (marketplace install). The CLI authenticates via the NEOMIND_API_KEY environment variable or --api-key flag.
REST API
Extension management also provides a REST API, for easy integration with external systems:
# List all extensions
curl -H "X-API-Key: $NEOMIND_API_KEY" http://localhost:9375/api/extensions

# Query a single extension's details
curl -H "X-API-Key: $NEOMIND_API_KEY" http://localhost:9375/api/extensions/<extension_id>

# Start / stop / reload
curl -X POST -H "X-API-Key: $NEOMIND_API_KEY" \
     http://localhost:9375/api/extensions/<extension_id>/start

curl -X POST -H "X-API-Key: $NEOMIND_API_KEY" \
     http://localhost:9375/api/extensions/<extension_id>/stop

curl -X POST -H "X-API-Key: $NEOMIND_API_KEY" \
     http://localhost:9375/api/extensions/<extension_id>/reload

# Invoke an extension command
curl -X POST -H "X-API-Key: $NEOMIND_API_KEY" \
     -H "Content-Type: application/json" \
     -d '{"command":"detect","args":{"image_url":"https://example.com/test.jpg"}}' \
     http://localhost:9375/api/extensions/<extension_id>/command
The authoritative list of extension endpoints lives in the Developer Guide — REST API Reference.
Troubleshooting
Quick Diagnosis
When you encounter extension issues, run these commands first to gather information:
# View all extension statuses
neomind extension list

# View a specific extension's metadata and recent errors
neomind extension info <extension_id>

# View extension process log files
neomind extension info <extension_id>   # includes recent errors; use the Logs tab on the details page for live logs

# Check extension-related entries in the main service log
journalctl -u neomind.service | grep -i extension
You can also open the Logs tab on the extension details page to view process output in real time.
Common Issues
| Problem | Possible cause | Solution |
|---|---|---|
| Extension shows Error after install | ABI version mismatch / binary load failure | Upgrade the extension or main service to a matching ABI version (currently v3); check Logs on the details page for the specific error |
Install fails with Unsupported platform | The .nep package lacks a binary for the current platform | Verify the package contains the right platform directory (e.g., macOS arm64 needs binaries/darwin_aarch64/); re-download the full package from the official source |
Install fails with Extension already registered | An extension with the same ID already exists | Run neomind extension uninstall <id> first, then install the new version |
| Extension startup times out (Error after 120s) | Large model files / blocking initialization | Check Logs to see which step is stuck; if model loading is slow, wait longer or use a smaller model |
| Extension stops auto-restarting due to crash loop (shows Crashed) | Initialization failure / missing model / port conflict | Triggered after 3 consecutive crashes. Check Logs for the root cause, fix it, then run neomind extension reload <id> |
| Extension metrics don't show on dashboard | Extension not configured / DataSourceId typo | Confirm the format is extension:<id>:<metric>; open details → Metrics to see actual metric names |
| AI cannot invoke extension commands | Extension is stopped | Start the extension from the Extensions tab; confirm status is Running |
| Command execution times out | Inference takes too long / input too large | Default timeout is 300 seconds; compress input images, reduce batch size, or check the network |
| No visualization components after install | The extension does not provide Component capability | Only extensions that declare a frontend bundle have dashboard components; check the capability declaration on the Overview tab |
| Config not taking effect after save | Extension lacks hot-reload / reads config only at startup | Run neomind extension reload <id> after saving, then verify |
Marketplace install fails / Checksum failed | Network interruption / corrupted package | Click Install again; check proxy settings; or use the CLI to download from GitHub Releases instead |
For more general troubleshooting tips, see Troubleshooting.
Developing Your Own Extension?
The complete extension development tutorial is in Developer Guide - Extension Development, covering:
- Creating a Rust extension project from scratch
ExtensionMetadata::new()builder usage- Exporting FFI entry points with the
neomind_export!()macro - Implementation patterns for the three capabilities (metrics / commands / components)
- Cross-platform packaging (5 platform targets)
- ML model lifecycle management (lazy loading, keep-alive across sessions)
Next Steps
- Use Cases — See how extensions are used in real scenarios (object detection / OCR / face recognition)
- Dashboard — How to display extension-provided visualization components on dashboards
- AI Agent — Have Agents invoke extension commands for automated inspection
- Automation Rules — Use extension metrics as conditions to trigger alerts and actions
Last updated: 2026-09-08